All Activity
- Past hour
-
@Origin7 happy to, but what measurements would you suggest?
-
Can you get some rough measurements and calculate the capacity (roughly)? Then you know if you can only put 5 gallons in a 10 gallon tank, you have a problem. I am not exactly sure what that problem would be, but it's a starting point.
-
Thanks for the complement - like the car, the blog is a work in progress! Hopefully it's a resource for others as I've really leaned on blogs for help. And a record for me as my memory fades! FWIW, tightly bundled in heat shrink - and crucially, without pins - the 5 wires from the headlight were no problem to push through the bracket. I did slide the grommets off and spray silicone lube but I wouldn't worry about doing it again. For me the PITA and most time spend would be the need to replace the pins. OTOH if you didn't want to replace the pins, then the wires would be trickier to to be fed back and I'm guessing could only go through the bracket one at a time? That would also limit heat shrink to just the headlight end, not the full length? Regarding the look ... I don't think I'll really know if it looks weird until I put the nosecone, hood and front wings on. I'll try and remember to report back when I get to that point.
-
I wasn't aware that you've got a new blog going. You're doing a very nice job with it! The option of leaving off the indicator pods entirely hadn't occurred to me. It's definitely something to consider.
-
@chrisp993 your blog is very thorough and clean. Well done! I took a video time-lapse blog but the downside there is that there are no up-close video of what I did. To complement that, I just took hand-written notes in a notebook that I'm holding onto forever lol. I'd love to convert that to a blog one day, but as time passes, my recollection of what my notes mean are fading more and more. At the time, given I only had 2 or 3 hours to work every night after the kids went to bed... I just wanted to get the build done and documented JUST enough. Anyways, looking at your pic, I'm realizing that if I wanted to get off the pods, I'd likely have to pull the entire length of wires out of the chassis to remove the pods... re-threading those through the tubing and the chassis will be quite a pain. Not sure if I want to do that. Yeah, I found the spec on the pins but couldn't find anywhere to purchase them without buying 6000 of them. Thank you for the offer to send over some, but your link to Corsa is great. I'll just order a batch myself. Thanks again for being so generous. As far as blacking out those nuts... you could use a Sharpie for now... but given your thoroughness with the blog and build so far... maybe get the same spec nuts, and get them powdercoated, even cerakoted lol... and replace. I think overall I like the look without the pods from afar.... but looking close-up...the headlights look weirdly stood up and strangely tall. I'm un-sure if I'll commit to removing the pods, probably will be an in-the-moment decision when I re-pin the headlight.
-
Gotcha. Sounds like you need to repin the end of the wire with a new pin? What parts did you buy? Check my blog post for the exact pin (which did match OEM) that I bought. Message me, I'd be happy to send you a couple of those pins in the mail if you think that would help? Car is still in build, but hopefully these give you some idea? I just need to black out that large nut!

-
@chrisp993 it's the crimp on the pin. i bought an Econoseal tool and pin pack off Amazon. It wasn't the exact right part. It still fits but poorly. It's loose and after about 300 miles of driving and vibration it appears to have fallen out. I was curious how the headlight and the front of the car looks without the indicator and pods
- Today
-
Howard, is it the crimp on the pin/connector in the engine bay that is bad? Can you tell if it's the chassis side or the headlight side of that connection? It is straightforward to remove the pin from the connector using a very small thin (like jeweler's) screwdriver, you just need to pull out the yellow guide and then release a small tab: video example. If the pin crimp is bad, you may be able to improve it by putting it in a crimp tool and trying to crush the crimp a bit more. Alternatively, the tool and some pins is maybe $40. When you ask how does it look, which part did you want a picture of?
-
@chrisp993 I need to rewire one of my headlights due to poor crimping on the connector and was considering doing the same. How does it look?
-
I also just completed the headlight wiring for my build - long blog post here - but the short version is that I ditched the indicator pods and went with aftermarket LEDs (integrated turn signals) and just took all the wiring through to the engine bay where I crimped on pins to match the factory wiring.
-
Hi, I'm going to contact you via private messaging.
-
1) can this seat be mounted at various angles? Realize it won't move once mounted. Trying to get lower in car than my stock seat, but I like long arm/short leg mounting. 2) tried to look on line for price to offer you to little avail. Any thoughts? This is fiberglass, not carbon fiber correct?
-
SOLD
-
Yeah I'm gonna do that. I just wanna see exactly how many miles and how many gallons (from full) each 1/4 tick of the gauge is. Was gonna do half a tank first, then I can see where 3/4 tank and 1/4 tank is... and then finally just drive til basically empty and see what that is. I think by that point, I might have enough data points to be able to guess relatively close where empty actually is.
-
I do too. I haven't ruled out just me being a really dumb fellow quite yet, but so far, with me only filling up ~5 gallons, it's always displayed full on the gauge and will go steadily down towards empty. I always filled it when it hit then 1/4 mark, and it'll take about 4 gallons (until the nozzle shuts itself off). I just have a lot of experimenting and note taking to do for the next few fill ups just to see where I'm going off the rails.
- Yesterday
-
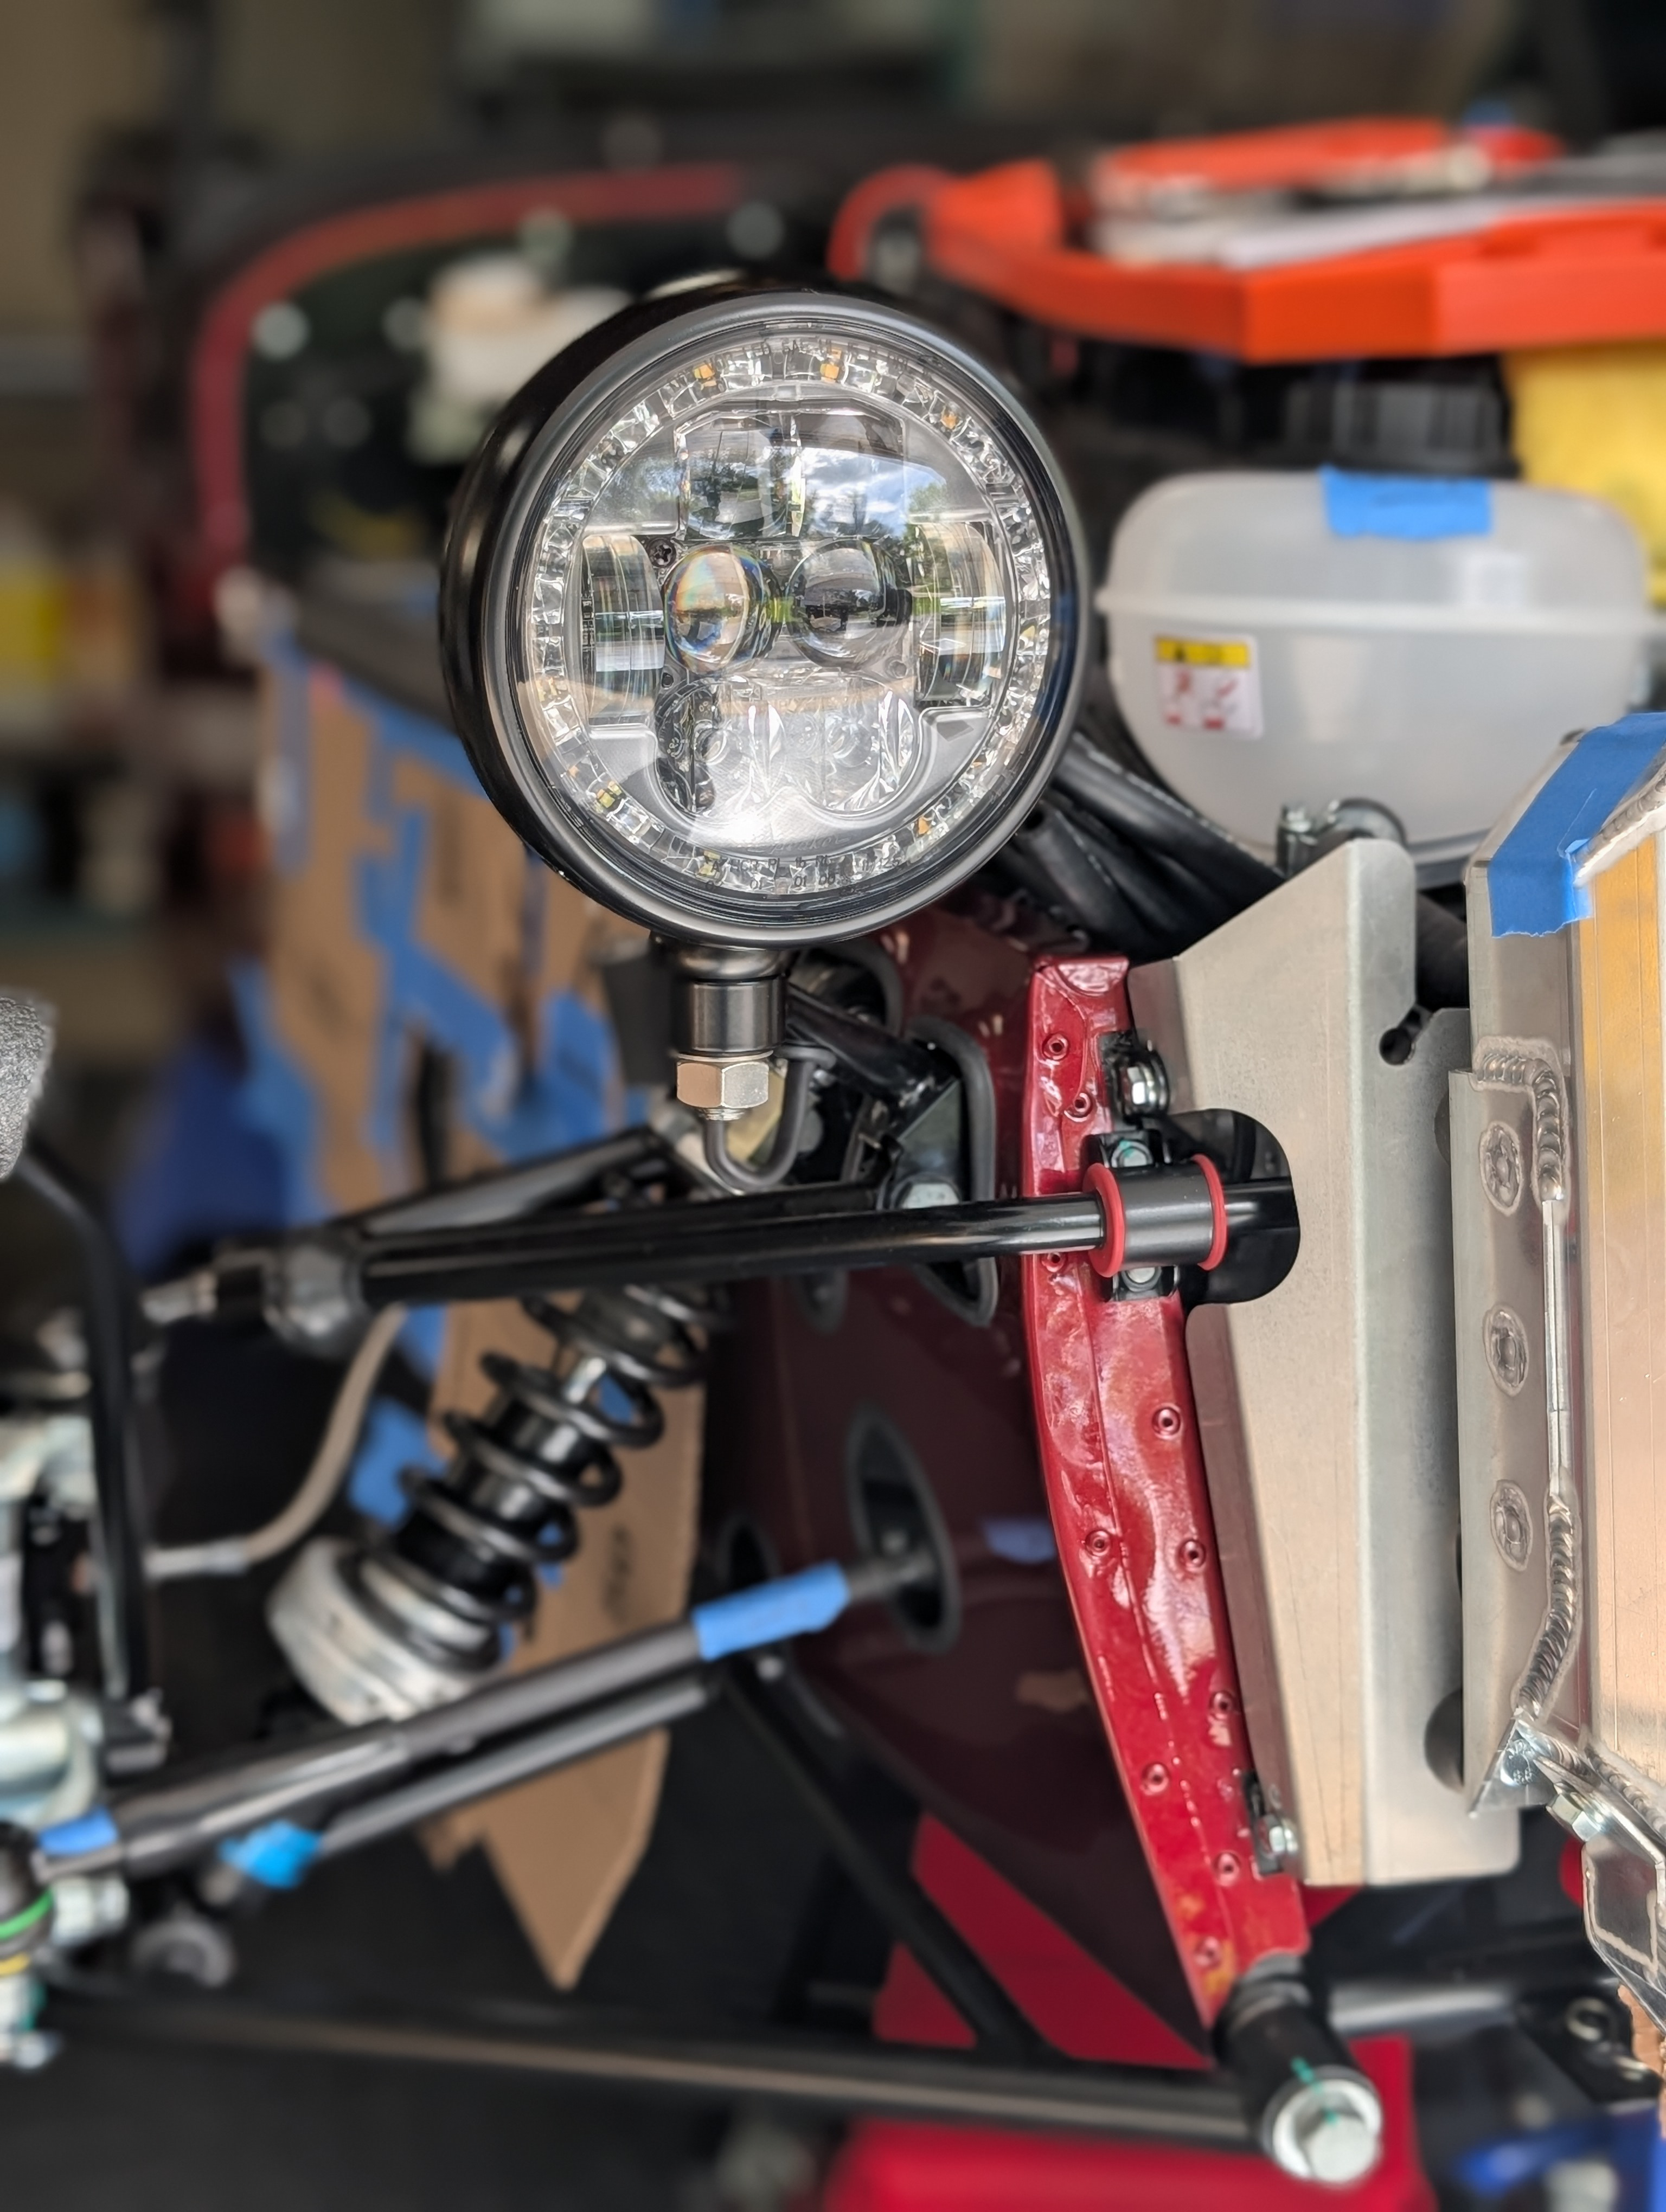
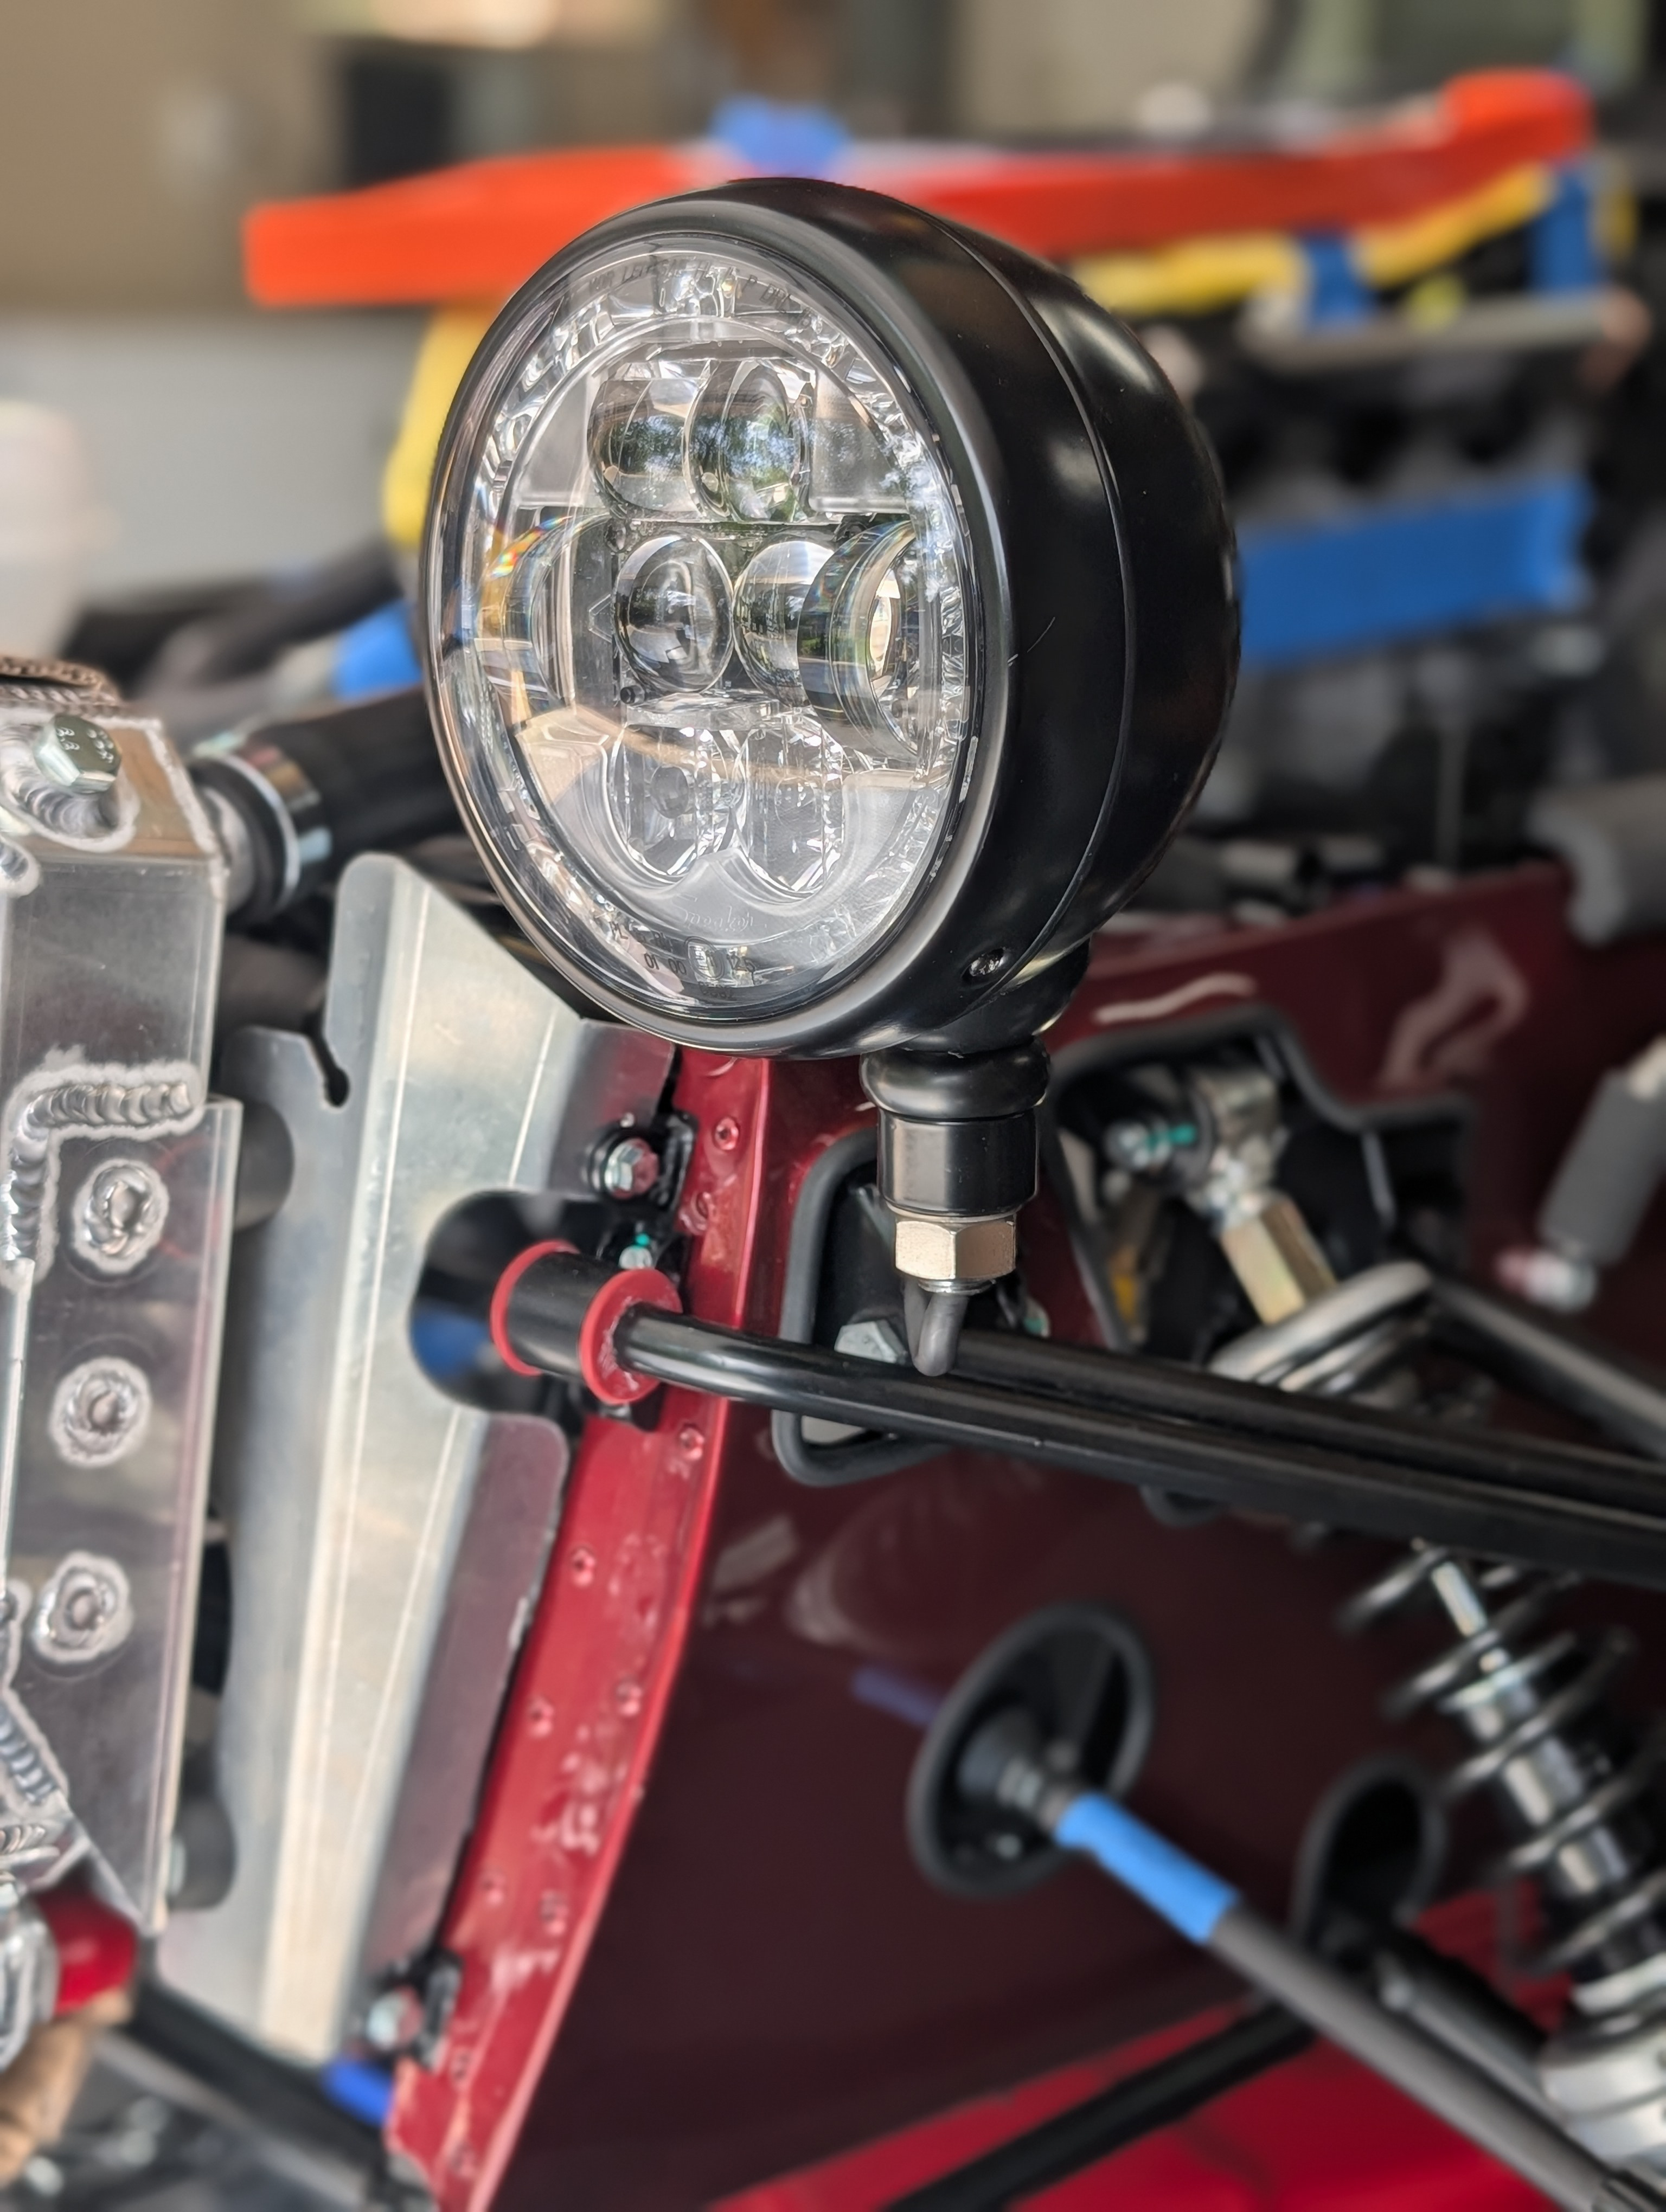
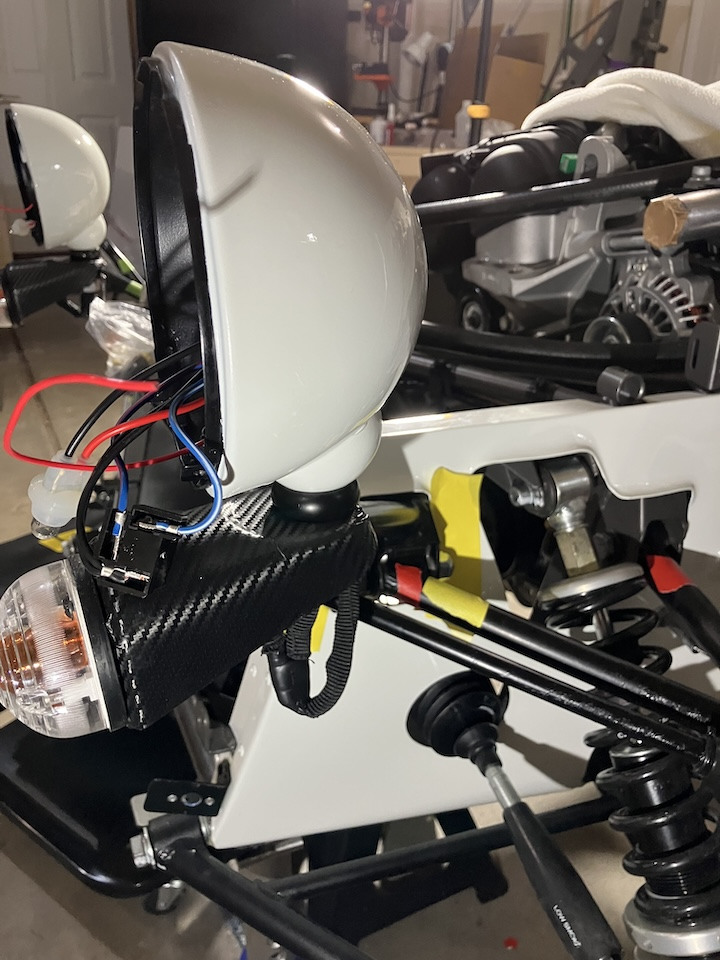
The wire bundle is routed into the headlight mount through the mount's opening+grommet, then down through the mount and into and through the bracket on the forward upper wishbone mounting point (also with a grommet in that opening), and then into the chassis.
-
Hard to tell but did you not run the wiring through the headlight mount cavity and ran it underneath the mount?
-
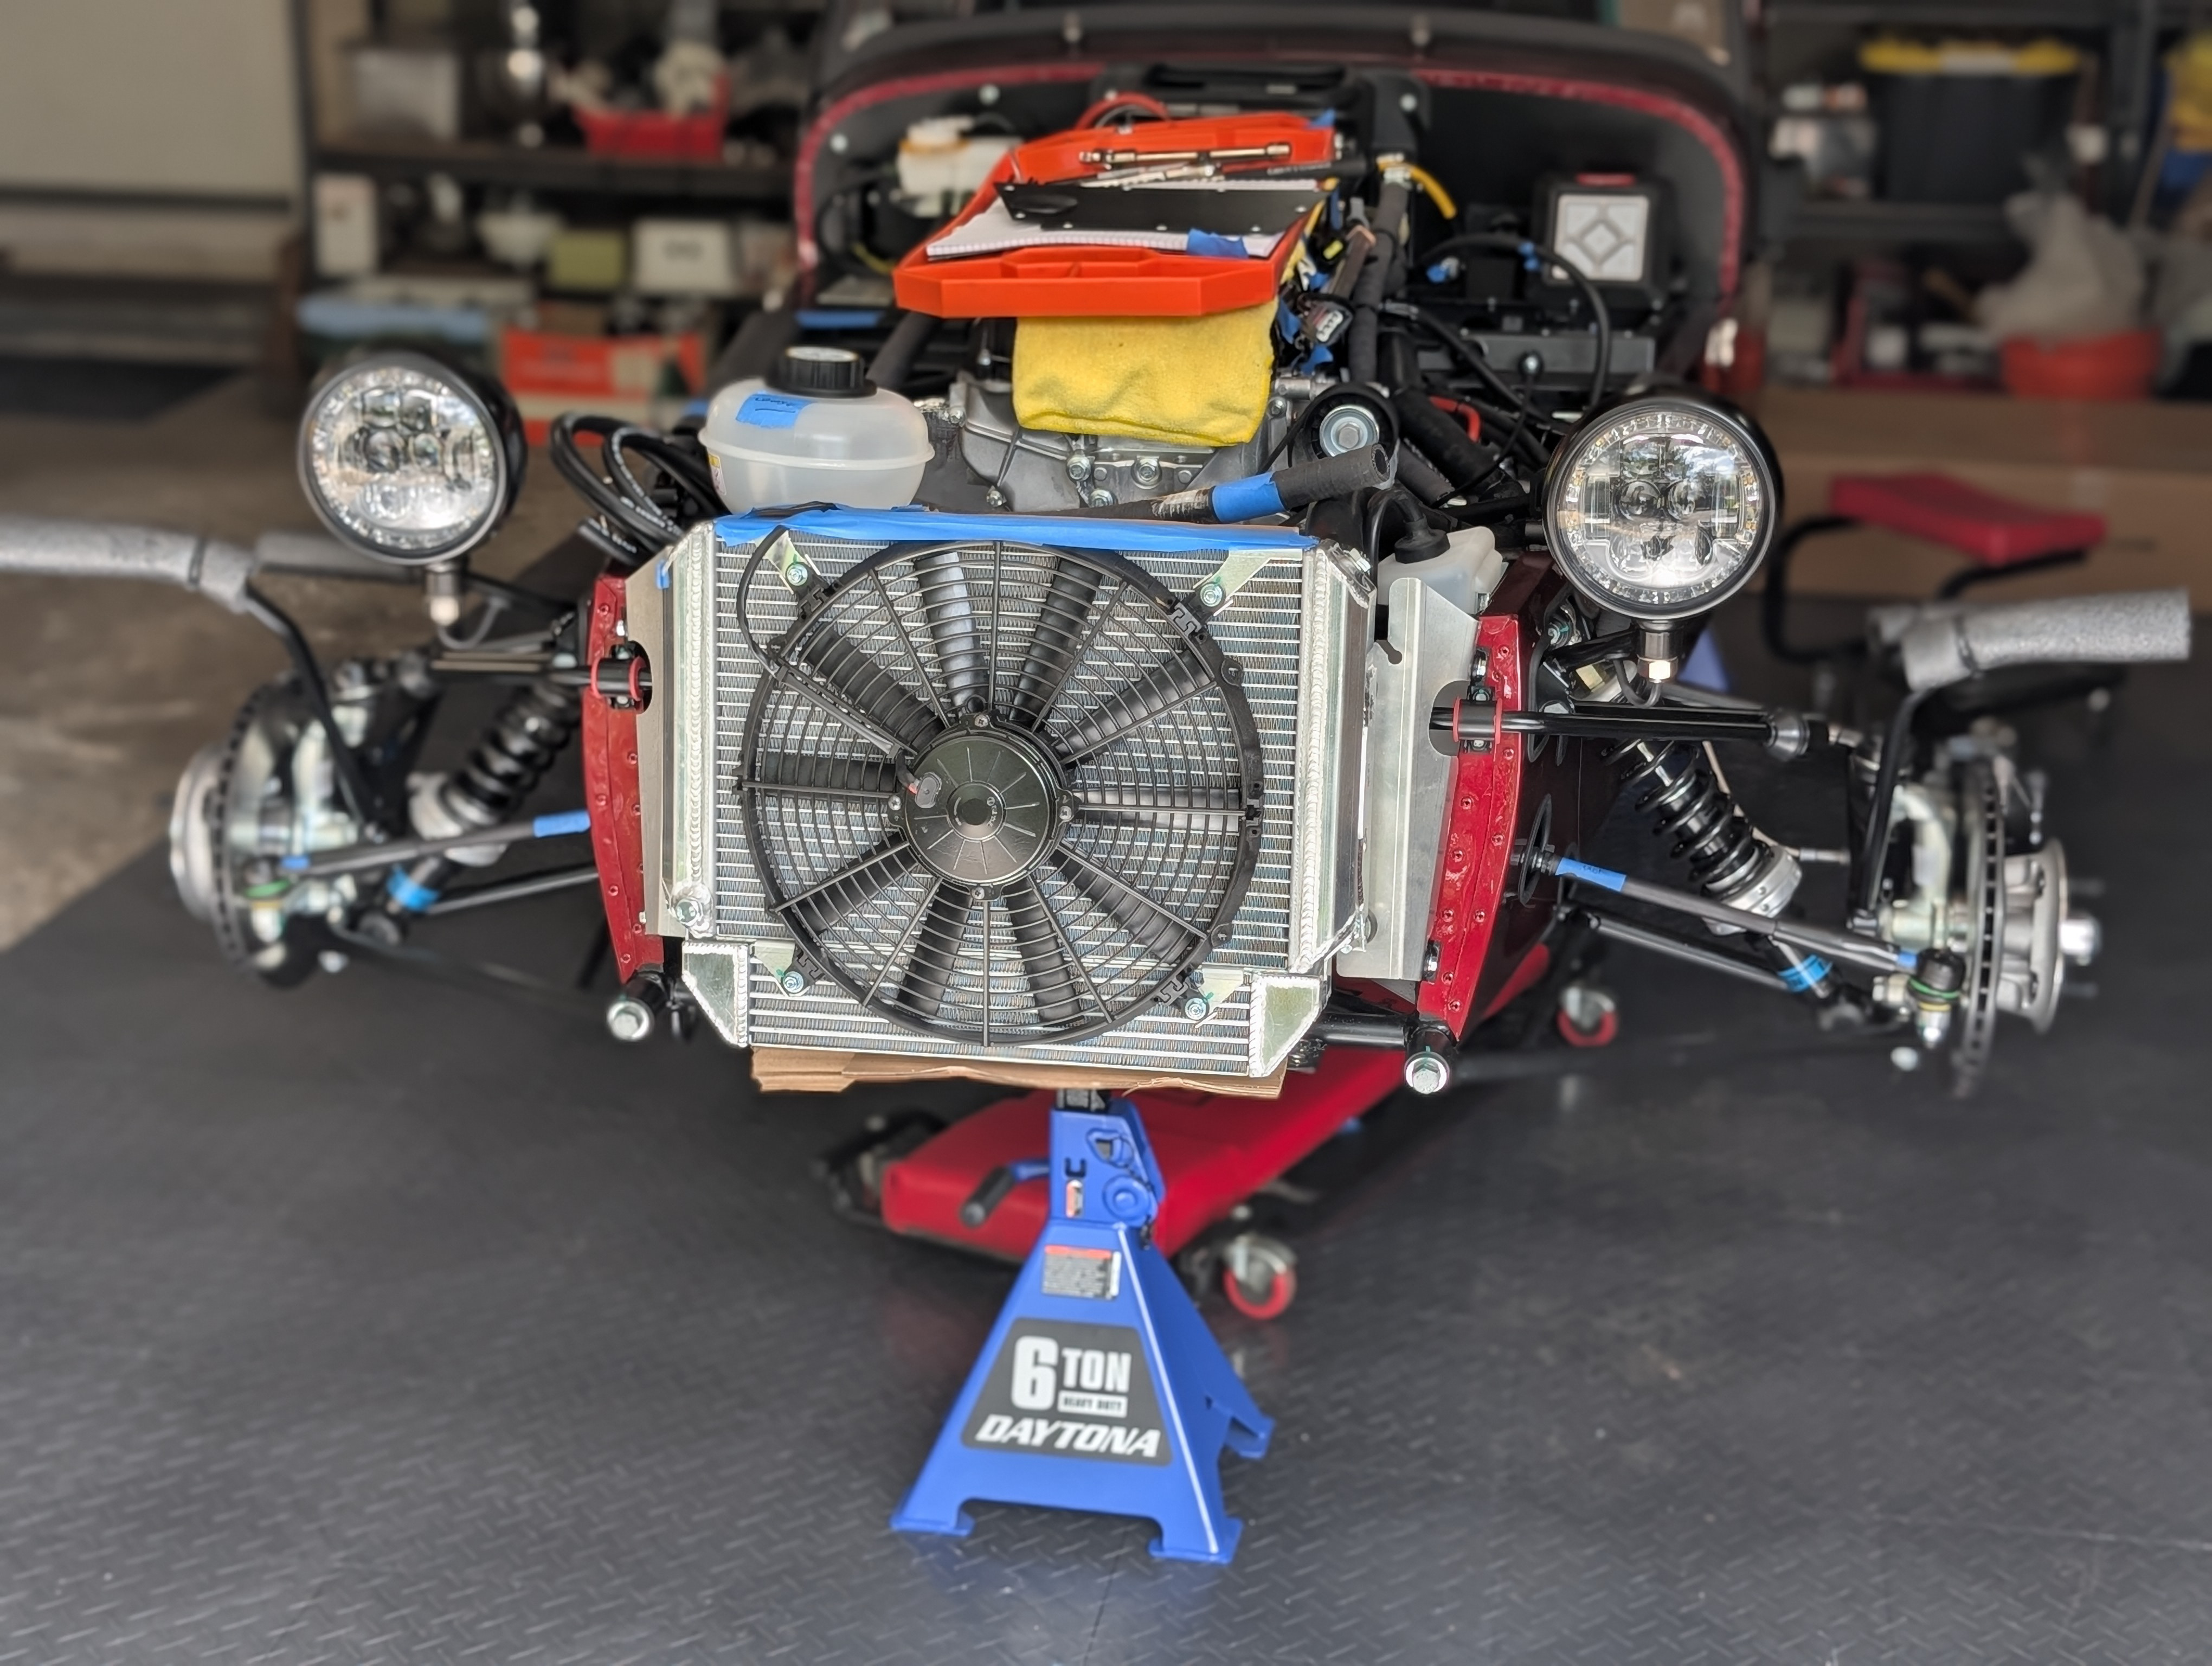
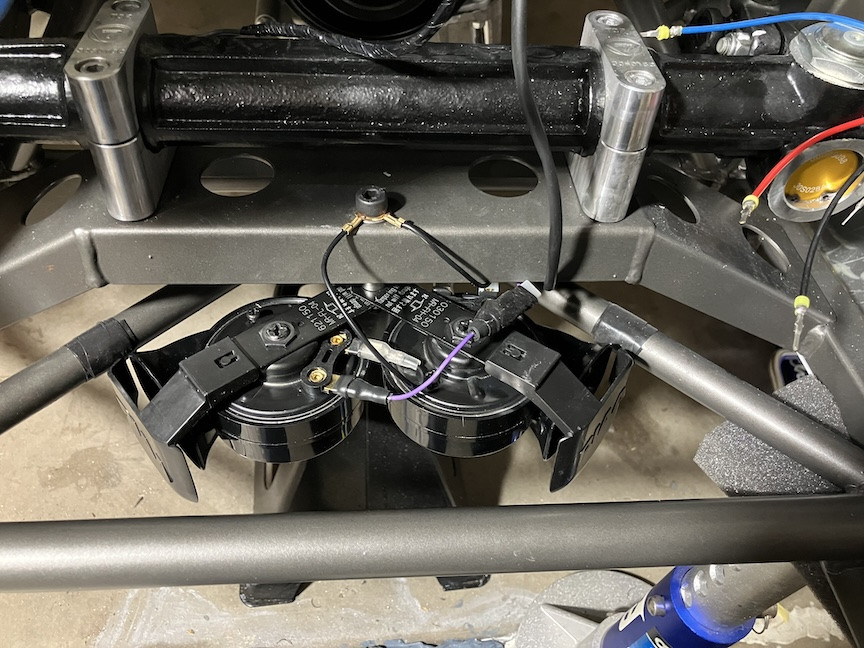
Horns I installed PIAA Sport horns, based on online recommendations. They're noticeably louder than the stock horns. They wouldn't fit in the standard mounting location for the 310, so I used the mounting arrangement for the 420. The Encore uses a 420 radiator with the fan mounted in front, so I figure the horns won't get in the way of anything. I initially thought there might be other good candidate locations on frame rails but nothing looked ideal. The PIAA horns require using separate ground wires (provided). The existing purple power wire set was just slightly too short so I had to add a short extension
-
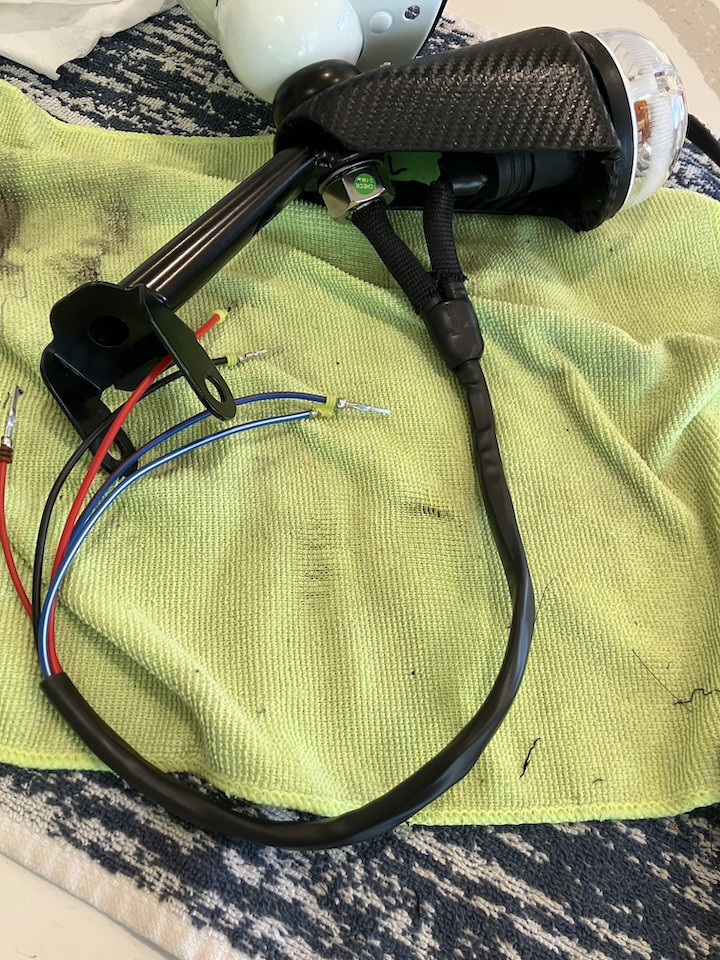
Headlight wiring Finally managed to finish the headlight wiring. I'm not sure I'm happy with the results - the wiring looks pretty bulky. I decided to go with using a "Y" heat shrink piece when routing the indicator/turn-signal wire up into the headlight bowl. I'd also spliced in another wire to the indicator's power wire, and routed that into the headlight bowl as well. My thought is that when I install LED headlights, I hopefully can use that wire to operate the headlight's "switchback" capability to operate the headlight's daytime running light as a turn signal. Unlike the wiring diagrams and in other blogs I've seen, my indicator pods have red power wires rather than green. That now gives me two red wires at the end of the headlight wiring bundle - the sidelight/parking light wire and the indicator wire. The indicator's wire is a darker red, but I'll need to double check which is which when connecting to the econoseal connector. I tried to arrange the wires so that they'd be close to the same length once inside the chassis, but they're off quite a bit. I might decide to trim the lengths and crimp on new pins. One thing I'm wondering about is whether it would be better to send the indicator's ground wire out through the headlight mount and into the chassis along with the other headlight wires and the indicator power wire. That might neaten up the headlight wiring underneath the indicator pod. It would add extra difficulty in pushing the wire bundle through the headlight mount, but that went pretty easily for me. I've found that with heat shrink, the flexibility of the wrap can vary some between different brands. I ordered "flexible" HS from Digikey, along with the Y HS piece. I also used heat shrink fabric from Digikey. I tried some cheaper non shrink fabric from Amazon but I couldn't keep it from getting ragged looking.
-
 Bingo 😊
 -
I wouldn't trust linearity of the gauge. Also, given that your gauge would read full with your prior filling technique, it suggests that you were probably getting the tank mostly full, unless your gauge is way off. I say drive it till you run out of gas (if practical), then you will actually know how much gas you've used to get to that point.
-
I have the Bruce fuel mod which works well 420R. The first half of the tank lasts longer than the second half. I usually run it down to fairly solid on E and it will take 7.5-8 gallons (SV so 10.8 gals minus the roughly 1.5 unreachable). One time at the track i got distracted and buried the needle on E. It took almost 10 gals so maybe the 1.5 is overly safe but I dont try for that. Here is NY they have taken the auto locks off the pumps so you have to hold it anyway. With some practice you can judge it but 1/4 of the time i still have spill over.
-
I remember trying this with my very first fill-up, but I can't remember what the results were. But again, I think that was with only 5 gallons... as my habit was to stop filling when the pump nozzle stops. I'm gonna carry around a small jerry can, and test the range. I'm at 777 having pumped "fully" and then drove 2 miles home. I'll check the mileage at 1/2 tank and then attempt to fill back to "full" and see what that volume is.
-
I've never been able to use the auto-stop at the fuel pump in my r500. The speed at which I can fill the tank varies from location to location, but its rarely full go. Once I get to about 6gal I'll usually slow it down and listen for when its getting full (I'm usually only putting in around 7gal). I've also noticed the fuel gauge isn't overly accurate. It takes significantly more time to go from 30L to 20L than it does from 10L to 0L. Once I get to 10L I'm starting to look for a place to stop. I don't think I've ever put more than 7.5 gal in. While I also have a 36L tank, I'm not sure if its 1-2 gal of unusable space or if 0L on the gauge actually means another gal or so of fuel left (I don't plan on finding out).
-
I'll just add that I hold the gas pump nozzle upside down when I'm filling my 1990 Caterham to get a better angle... I kinda lean into it with my body weight to keep the vapor-recovery belows thing compressed to prevent auto shut-off (might just be a California thing). It holds about 10 gallons, but most of the time I misjudge and get overflow. The filler neck on my older car might be a differnt shape from the more modern Cats, however. Cheers, -David
.thumb.jpg.9ffdd2cf708d472aae35e80097bfc46d.jpg)