JohnCh
-
Posts
3,406 -
Joined
-
Last visited
Content Type
Profiles
Forums
Store
Articles
Gallery
Events
Library
Everything posted by JohnCh
-
I installed the Zoom Compact mirror today. I had previously lowered the factory mirror to the base of the windscreen to reduce some of the annoying vibration, but the Zoom takes things a noticeable step further. While shake isn’t completely eliminated, it’s no longer objectionable. The mirror is slightly convex and, despite its small size, provides a good field of view between the seats. There’s no day/night function, but the surface is coated with a blue tint to help reduce headlight glare. I was concerned the coating might be too dark during daytime use, but it seems fine. My only complaint is that adjustment requires loosening and tightening a set screw. This isn't a big deal unless you regularly share driving duties, but with a wider channel machined into the socket housing, and a Belleville washer to apply constant tension to the ball, it could operate like a conventional mirror.

-

The Regular Summary of Classified Ads of Se7ens Found For Sale
JohnCh replied to Croc's topic in Cars For Sale
420R SV on BaT: https://bringatrailer.com/listing/2023-caterham-seven-420r/ -
Piling onto this comment, another place where people go wrong -- including Caterham -- is the sensor mounting orientation. Sensor manufacturers recommend positioning it at least 10 degrees above horizontal to minimize the condensation pooling on the tip.
-
I may be using TPU for a tricky airbox to air hose connection in another car. I'll be interested to hear how things go for you.
-
Very nice! For under bonnet items, check out PET-CF. Prints just as nicely as PETG-CF, but can handle very high heat.
-
He has a problematic Zetec that is getting horrid mileage. Someone with a 420 should be able to chime in with their typical street mpg. As proxies, my Westfield, with a taller (3.62 vs. 3.92) final drive returned ~25 mpg when it had 420 cams with ITBs, and about 1-2mpg worse after changing to more aggressive cams. Highway consumption when touring was much better. The 2.4L Duratec in my Caterham is pretty thirsty, barely breaking 20 mpg in normal (back roads/around town) street use. Something would need to be wrong for you to go through 5 gallons in just 40 miles of street use in a stock 420.
-
BTW all the suggestions above are assuming your car is running well and you aren't getting @Vovchandr-like fuel consumption.
-
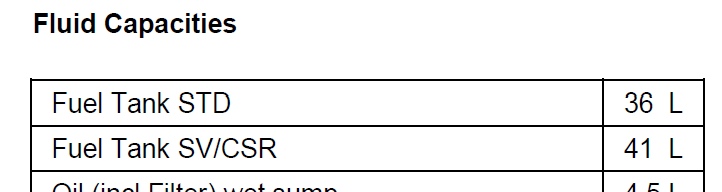
Caterham doesn't offer smaller fuel tanks, so even if they somehow managed to install the slightly smaller S3 tank in your SV, you would still have 9.5 gallons less ~1.5 gallons the fuel pump can't reach. That doesn't mean the tank wasn't crushed, but you that would be pretty obvious from beneath the car. From the owner's manual: It seems there are only two possibilities: The way you checked earlier that the tank was full was done incorrectly, or you have an issue with the tank. Although it's a little tricky to do because of the flap and the curvature of the filler neck, you could make a curved dipstick out of thick single strand wire or thin rod to confirm the fuel level. I have done this before when troubleshooting, but it took several attempts to get an accurate reading. I found putting painter's tape on the rod was helpful to see the actual level. Another possibility is repeatedly tapping the front of the tank going from bottom to top to see if you note a change in the thud that delineates the transition from fuel to air. I've never tried this myself, so the difference may be too subtle to hear. If you do attempt it, avoid the middle of the tank where the baffle is located. If you think the tank should be nearly full and the dipstick or thump test shows about half, then you know the issue is with filling it. If not, then there could be a blockage, or possibly an issue with the baffle, which divides the fill side and pump side of the tank. The foolproof method to confirm the fuel level is to remove the floor and pull the fuel pump/sensor assembly and do a visual check. However, that isn't easy as an uncut floor can be very frustrating to remove, and you need a special tool to remove the fuel assembly's locking ring. Fortunately, that tool is readily available and isn't expensive. My boot floor is currently removed, so let me know if you need pictures of anything.
-
I'm not sure how @Croc will feel about losing top billing
-
Yep! The MAP sensor is really just there for barometric compensation. A TPS controls the tables. I can share my map that was done on a dyno for my 2.4L. I'll shoot you a PM.
-
@redursidae welcome to the world of se7ens where Alpha-N is the norm. Even the MBE in new Caterhams employs this older strategy with time-based injector control. It's certainly not as good as a VE-based PID control, but it's certainly possible to achieve good behavior with these less sophisticated ECUs. Over the last 22 years, I've run Emerald and MBE on Duratecs with ITBs and have never had running issues related to the mapping strategy. Your advice is spot on when it's time to replace the Pectel, but I suspect @Vovchandr's issues run far beyond his map or mapping strategy. Fuel milage doesn't plummet by 40% unless there is some kind of failure. He needs to address that first. I suppose it's possible that the Pectel has a driver failure that is intermittently holding open an injector, but other than that, I'd start by looking at all sensors that can trim the injection map, run a compression and leak down, then check injector flow to see if one or more is bad. If the AFR numbers provided above are accurate, I'd be very concerned about bore wash. Given all the issues with this particular engine over the years, I suspect there are multiple things going on. Occam's razor won't apply.
-
If your totals and fill procedure above are accurate, and assuming your car wasn't used to smuggle anything into the country via a hidden compartment in the fuel tank, I wonder if you experienced a fuel delivery issue, that is discrete from your gauge accuracy? Either some kind of blockage in the tank or the fuel pump cutting out? Has this only happened once?
-
I'm having trouble correlating your last two posts. Nearly 6 years ago, you wrote: Now you say: Did you make map changes in those intervening years, or does the Pectel have a self-mapping function that would have altered it without your intervention? If not, and if the supplied data is accurate, then something else has occurred to account for the significant drop in mpg; leaking injectors, fuel pressure has increased, TPS is out of adjustment, O2 sensor feeding the closed-loop mode has failed, compromised cylinder(s), etc. Changing the map to compensate for an unknown issue is just kicking the problem down the road. You need to identify the root cause(s).
-
The latest issue of Avants magazine has a nice article on Caterham that was pulled together with the help of some Seattle-area owners and features some very nice photography. https://www.avants.com/magazine/the-benchmark-for-lightness?
-
Per Caterham, S3 fuel tank capacity is 9.5 gallons (36 liters), and the SV is 10.8 gallons (41 liters). In both cases, the last 1.5-2 gallons isn't accessible due to the shape of the tank and the relation to the fuel pump pickup. It might be worth starting a separate thread on this if you need troubleshooting advice.
-
@Vovchandr is wrong. Now add that to your signature!
-
I don't know how the loom was set up in those days. I wouldn't expect it to matter, but it's always possible that the grounds were daisy chained and the connection at one of those missing points failed (e.g. they crimped those grounds together to complete the circuit and the crimp weakened over time). My understanding is that because LEDs draw far less voltage, they tend to expose weak grounds earlier than an incandescent bulb. I'd start by replacing the incandescent lights one at a time to see if the issue persists or goes away as a means of potentially narrowing down the location of the issue. You may get lucky. If not, then start methodically checking and cleaning all the ground connections in the circuit until you find the culprit. Don't forget to hit the grounds at the switch and relay.
-
I had something very similar happen with the Westfield many years ago. It turned out the ground on a rear taillight was bad.
-
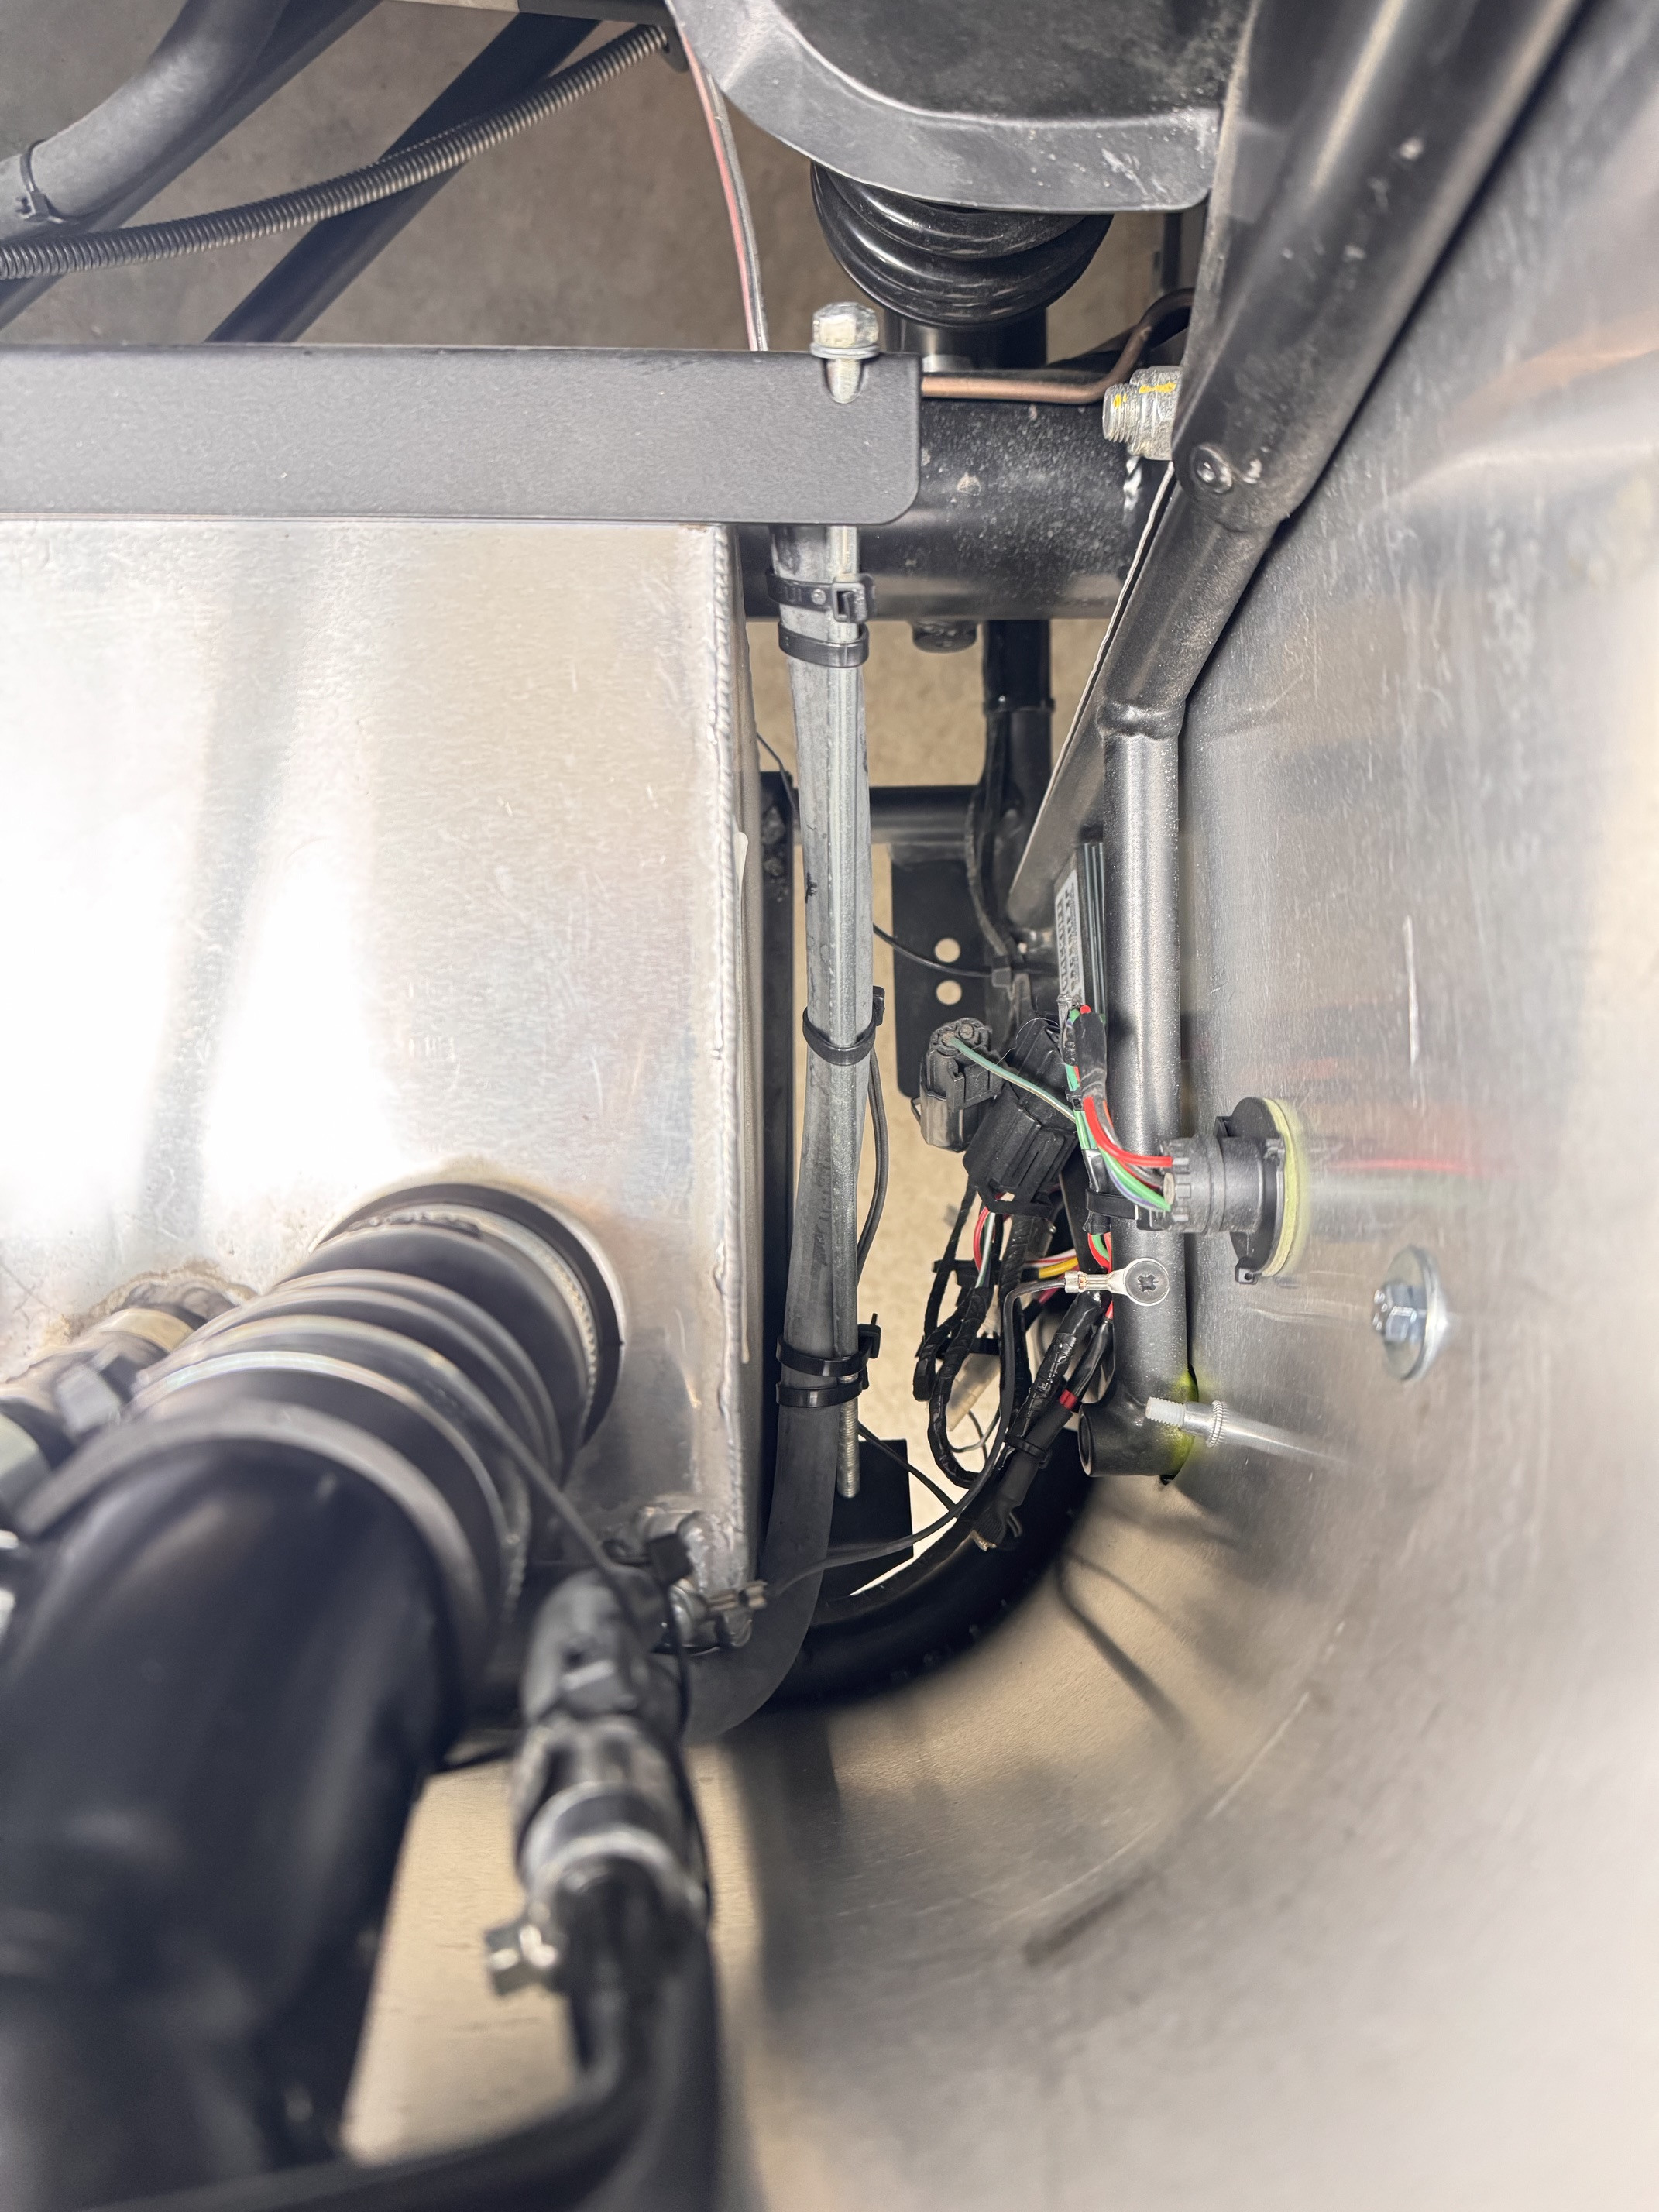
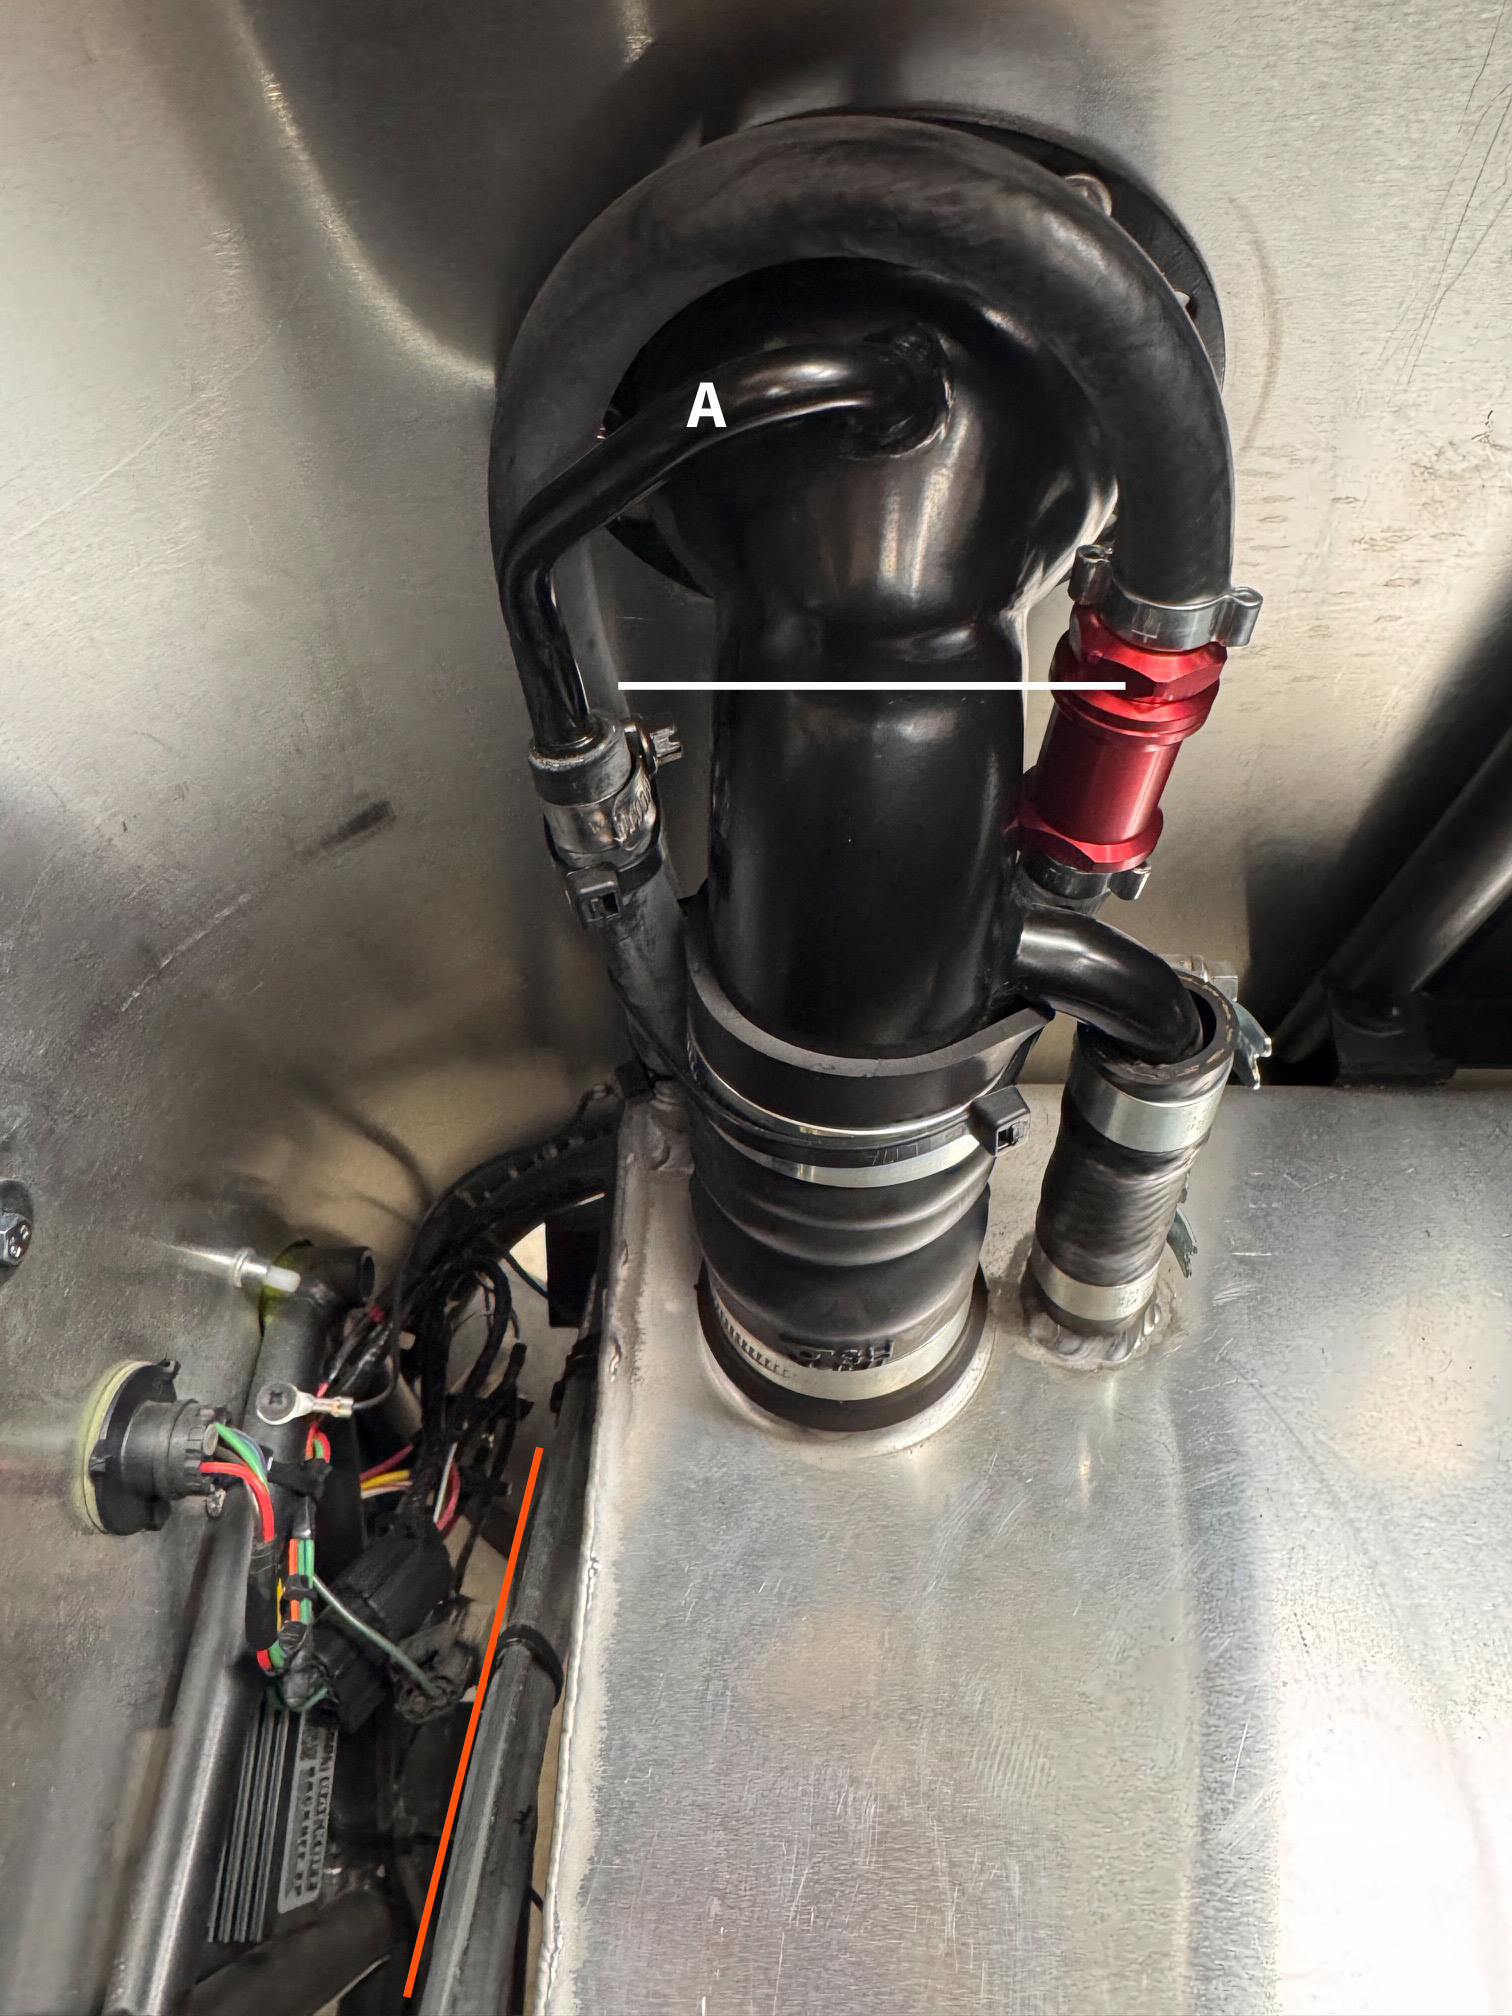
Just to add onto my earlier post, that hose next to the filler might act like a secondary vent. Although it enters the filler neck below the flap valve, if that's not particularly airtight, then air could escape through it and join the main vent system on the other side. @CBuff, I hit it with compressed air before taking photos
-
I was curious, so popped out my floor to take a look how my recent build is plumbed. The only vent is the one in the filler neck above the internal flap valve (shown roughly by the white line). The hard tube at point A connects to a rubber hose that loops around to the red rollover valve, then continues down to the bottom of the tank where it’s zip‑tied to the clamp rod (red line). From there, it follows the rod back up to the top of the tank and vents to atmosphere.
-
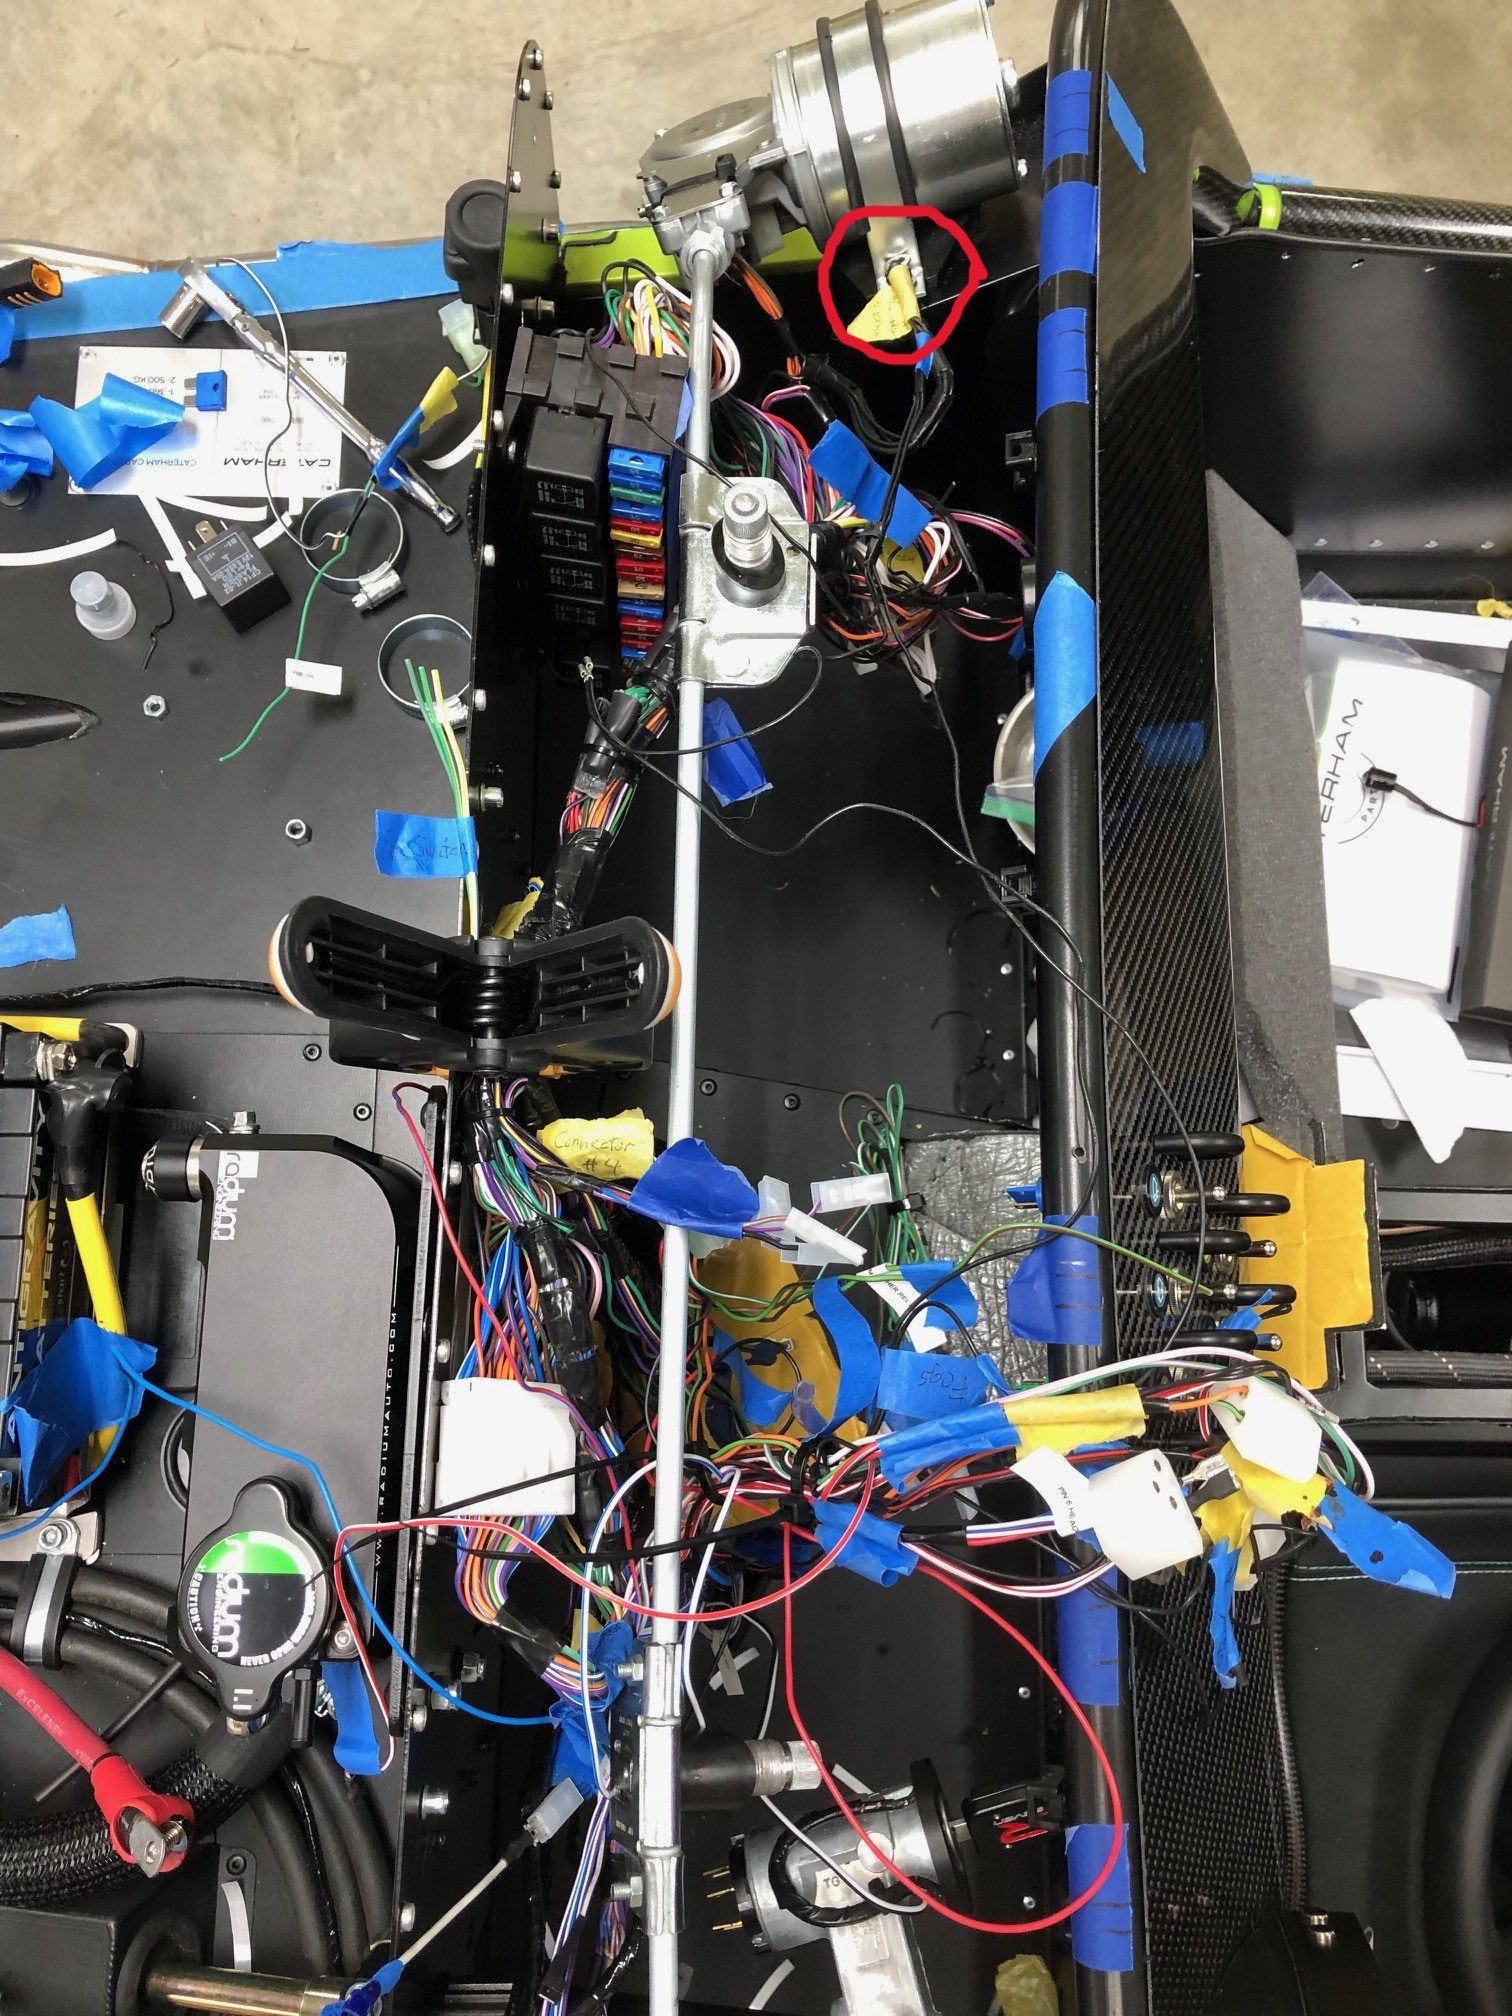
My first guess is the same as @wdb. One of the grounding points isn't tightened or the powder coating wasn't properly removed. There are three places where I'd run the jumper cable: The ground location at the back of the engine/bellhousing, the main grounding point on the shelf next to the battery, and the grounding point for the switches & gauges at the wiper motor attachment point behind the dash. The first two are easy to find. For the third, see this photo with the scuttle removed. The dash grounding point is at the top of the photo, circled in red. One caveat is that it's been a few years since I redid my under-dash wiring, so there may be a fourth point for a portion of that harness that I've forgotten about.
-
if you have a twin cam then your car is likely from the era when the dash was held in by rivets. if that's the case, and provided they also didn't glue it down, then @7Westfield's suggestion should be much easier.
-
Went for a blat with a friend today.
-
I agree this sounds like something done by a PO. Is there any evidence that the scuttle has previously been removed? I'd recommend using fishing like rather than wire. You're less likely to have an oops moment and damage the paint. Unless cars from that era used bolts to attach the scuttle, you will have a couple of studs sticking up that will block the line from reaching the middle section. However, depending on the material used, breaking the seal at both ends with the line may weaken it enough that you can safely slide in a plastic putty knife or trim removal tool into that area. You could also use a thinner, metal putty knife, but slide that in from the cabin side to minimize the risk of paint damage. Just be aware that the scuttle aluminum is thin. Try to avoid prying as that will likely result in some creasing or deformation. Any pictures?
-
Caterham Configurator & Spec Limitations
JohnCh replied to Exarkun1178's topic in General Sevens Discussion
Caerbont Automotive Instruments makes both the standard and Smiths gauges for Caterham. From a manufacturing perspective, I'd suspect the plugs and wiring are the same. If Caterham is unresponsive or gives a suspect answer, I'd go straight to the source. https://www.smiths-instruments.co.uk/projects/caterham-cars/