JohnCh
-
Posts
3,406 -
Joined
-
Last visited
Content Type
Profiles
Forums
Store
Articles
Gallery
Events
Library
Everything posted by JohnCh
-
I thought your car looked familiar. Was a former owner's name Morgan? If so, I can point you to some history on the car that you may not know about.
-
Do you know if you have a Pipercross or ITG? I've had to source my Pipercross sausage filters directly from them in the UK, but Pegasus in the US can supply the ITG filters.
-
MK also offer the Miata donor version set up to take the Honda K20 or K24 engines for those who want high horsepower without forced induction.
-
Someone needs to update their signature
-
They can trip from curb hopping. It's common enough that Caterham even sells a bypass plug. I have read of people relocating them to a more accessible location in the cockpit rather than disable them, which seems a more prudent choice. https://caterhamparts.co.uk/switches/7564-inertia-switch-bypass-plug.html
-
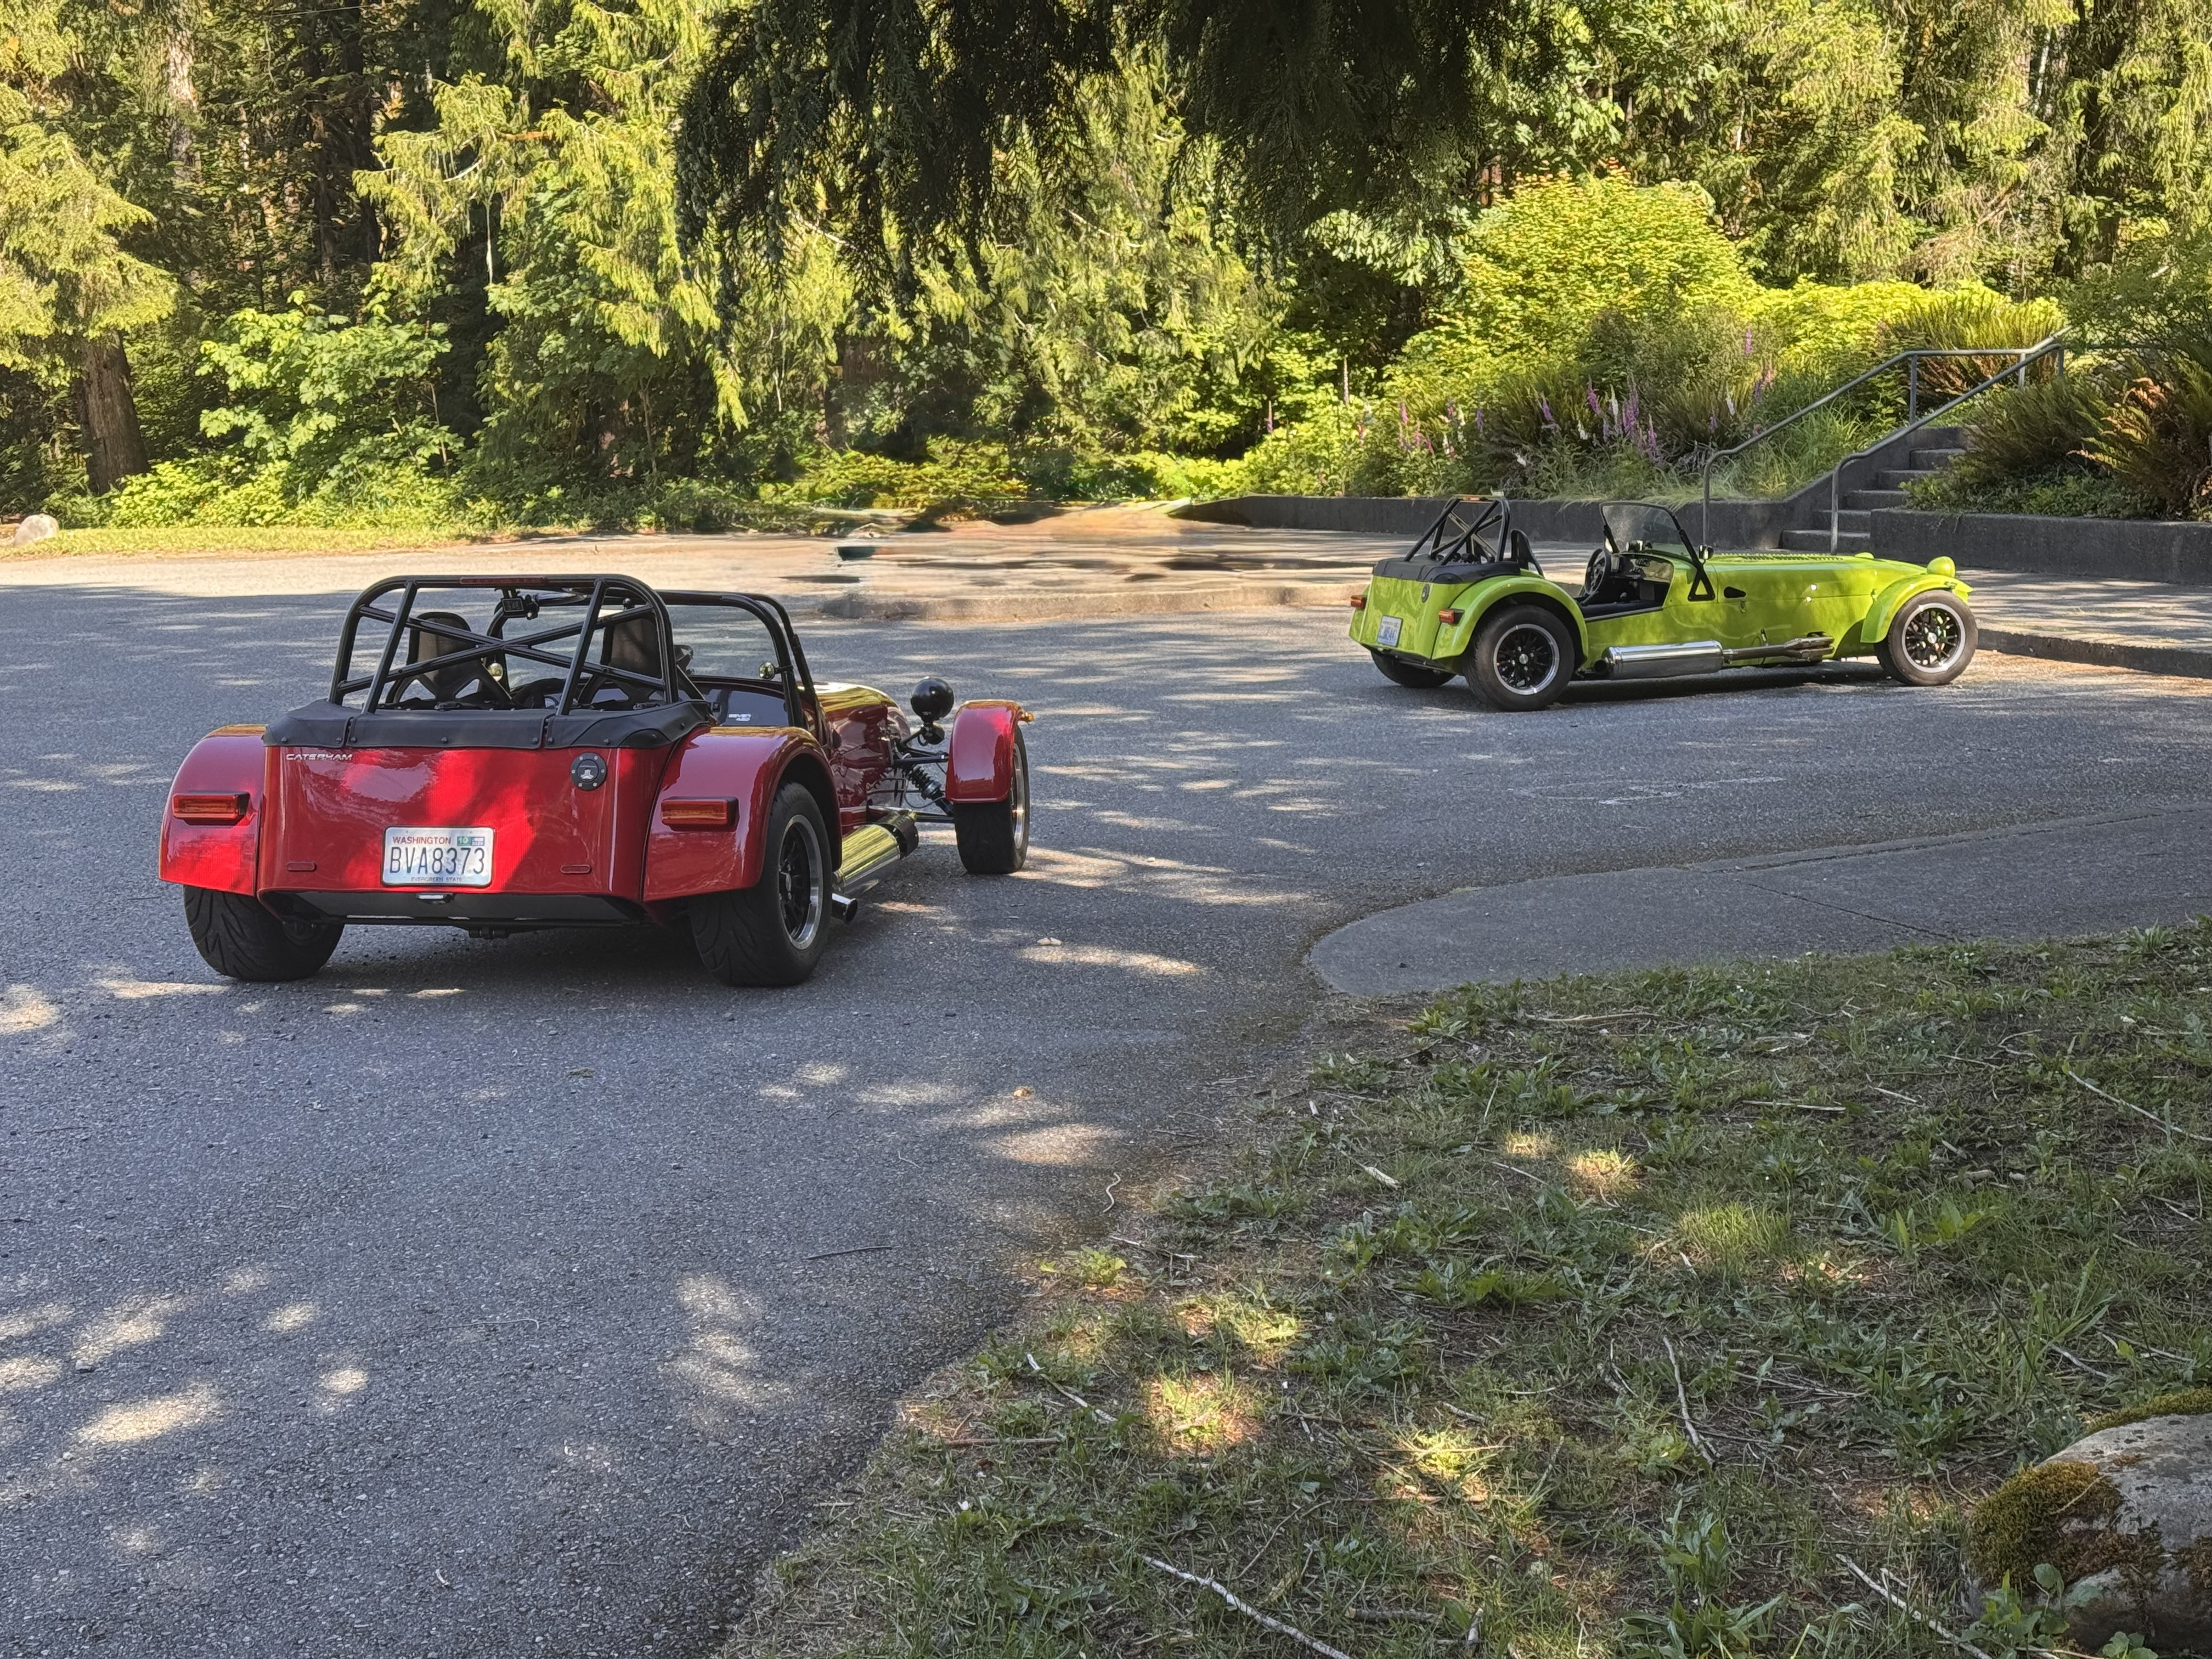
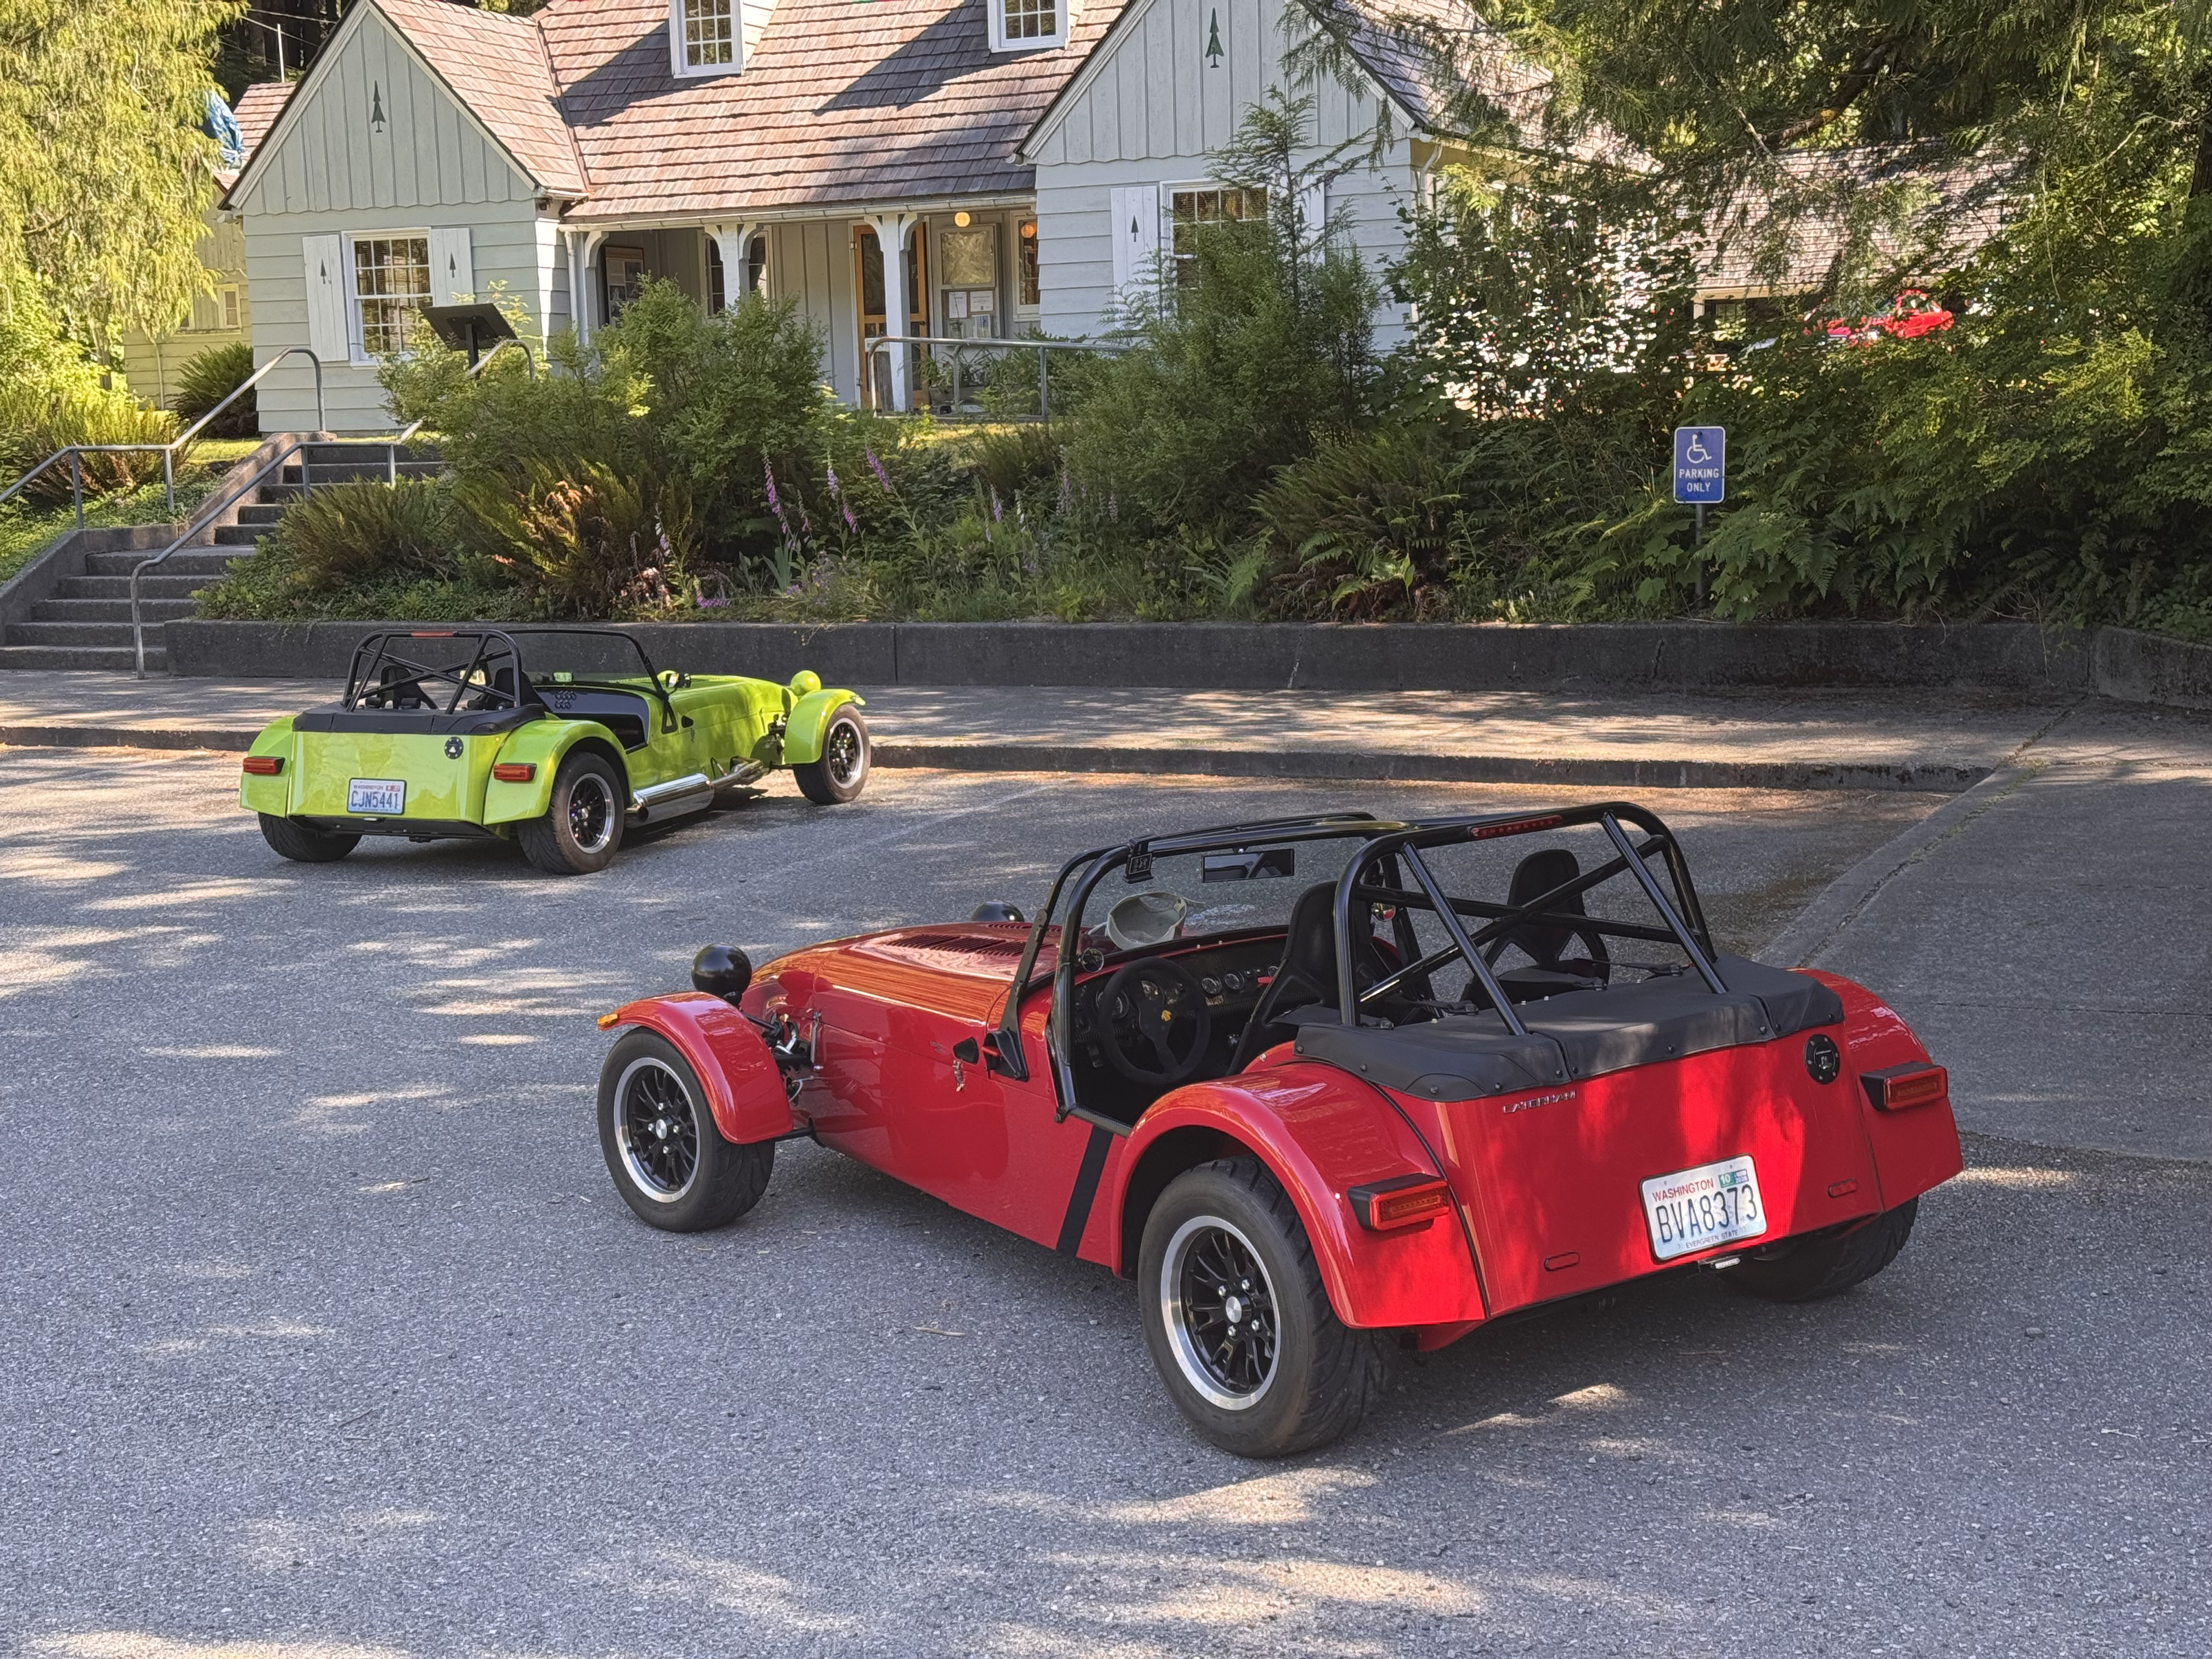
Did a 130 mile blat today with @Pokey.

-
Glad to hear you're okay. Hopefully the insurance company treats you well.
-
@pethier when you get a chance to look through the owners guide I linked to in the other thread, find the sub section under Fuel called Filling Difficulties. As per @Croc's guidance above, they state to fill it slowly and not to fully squeeze the handle. Their advice differs only in that they state not to rotate the nozzle. However, like Croc, I find a slight rotation is helpful when filling my car.
-
You're missing out on a lot of valuable information. Click the Library link at the top of the page, then look for the list of folders on the right. The number next to each one identifies the number of documents it contains. There are a number of CSR-specific files in both the "Caterham Build & User Guides" and "ECU & Electrical" folders.
-
I've updated the title to reflect the car is sold. If you've missed it, @Przemek started a thread on the car in the Members Rides section:
-
Have you checked the owners manual in the Library? The CSR 260 used 12:1 pistons, and doesn't have knock control, so I'd personally be more comfortable with 92 or 93, but it really comes down to how they set the ignition map. Given they sold that model in CA, where 91 is the highest available at normal gas stations, it might be ok. Hopefully an owner can chime in with real-world experience, rather than my speculation.
-
It's not. The pump is chain driven off the crank
-
You need to start a thread on how the 420R, 620S, and CSR 260 compare on track. #peerpressure
-
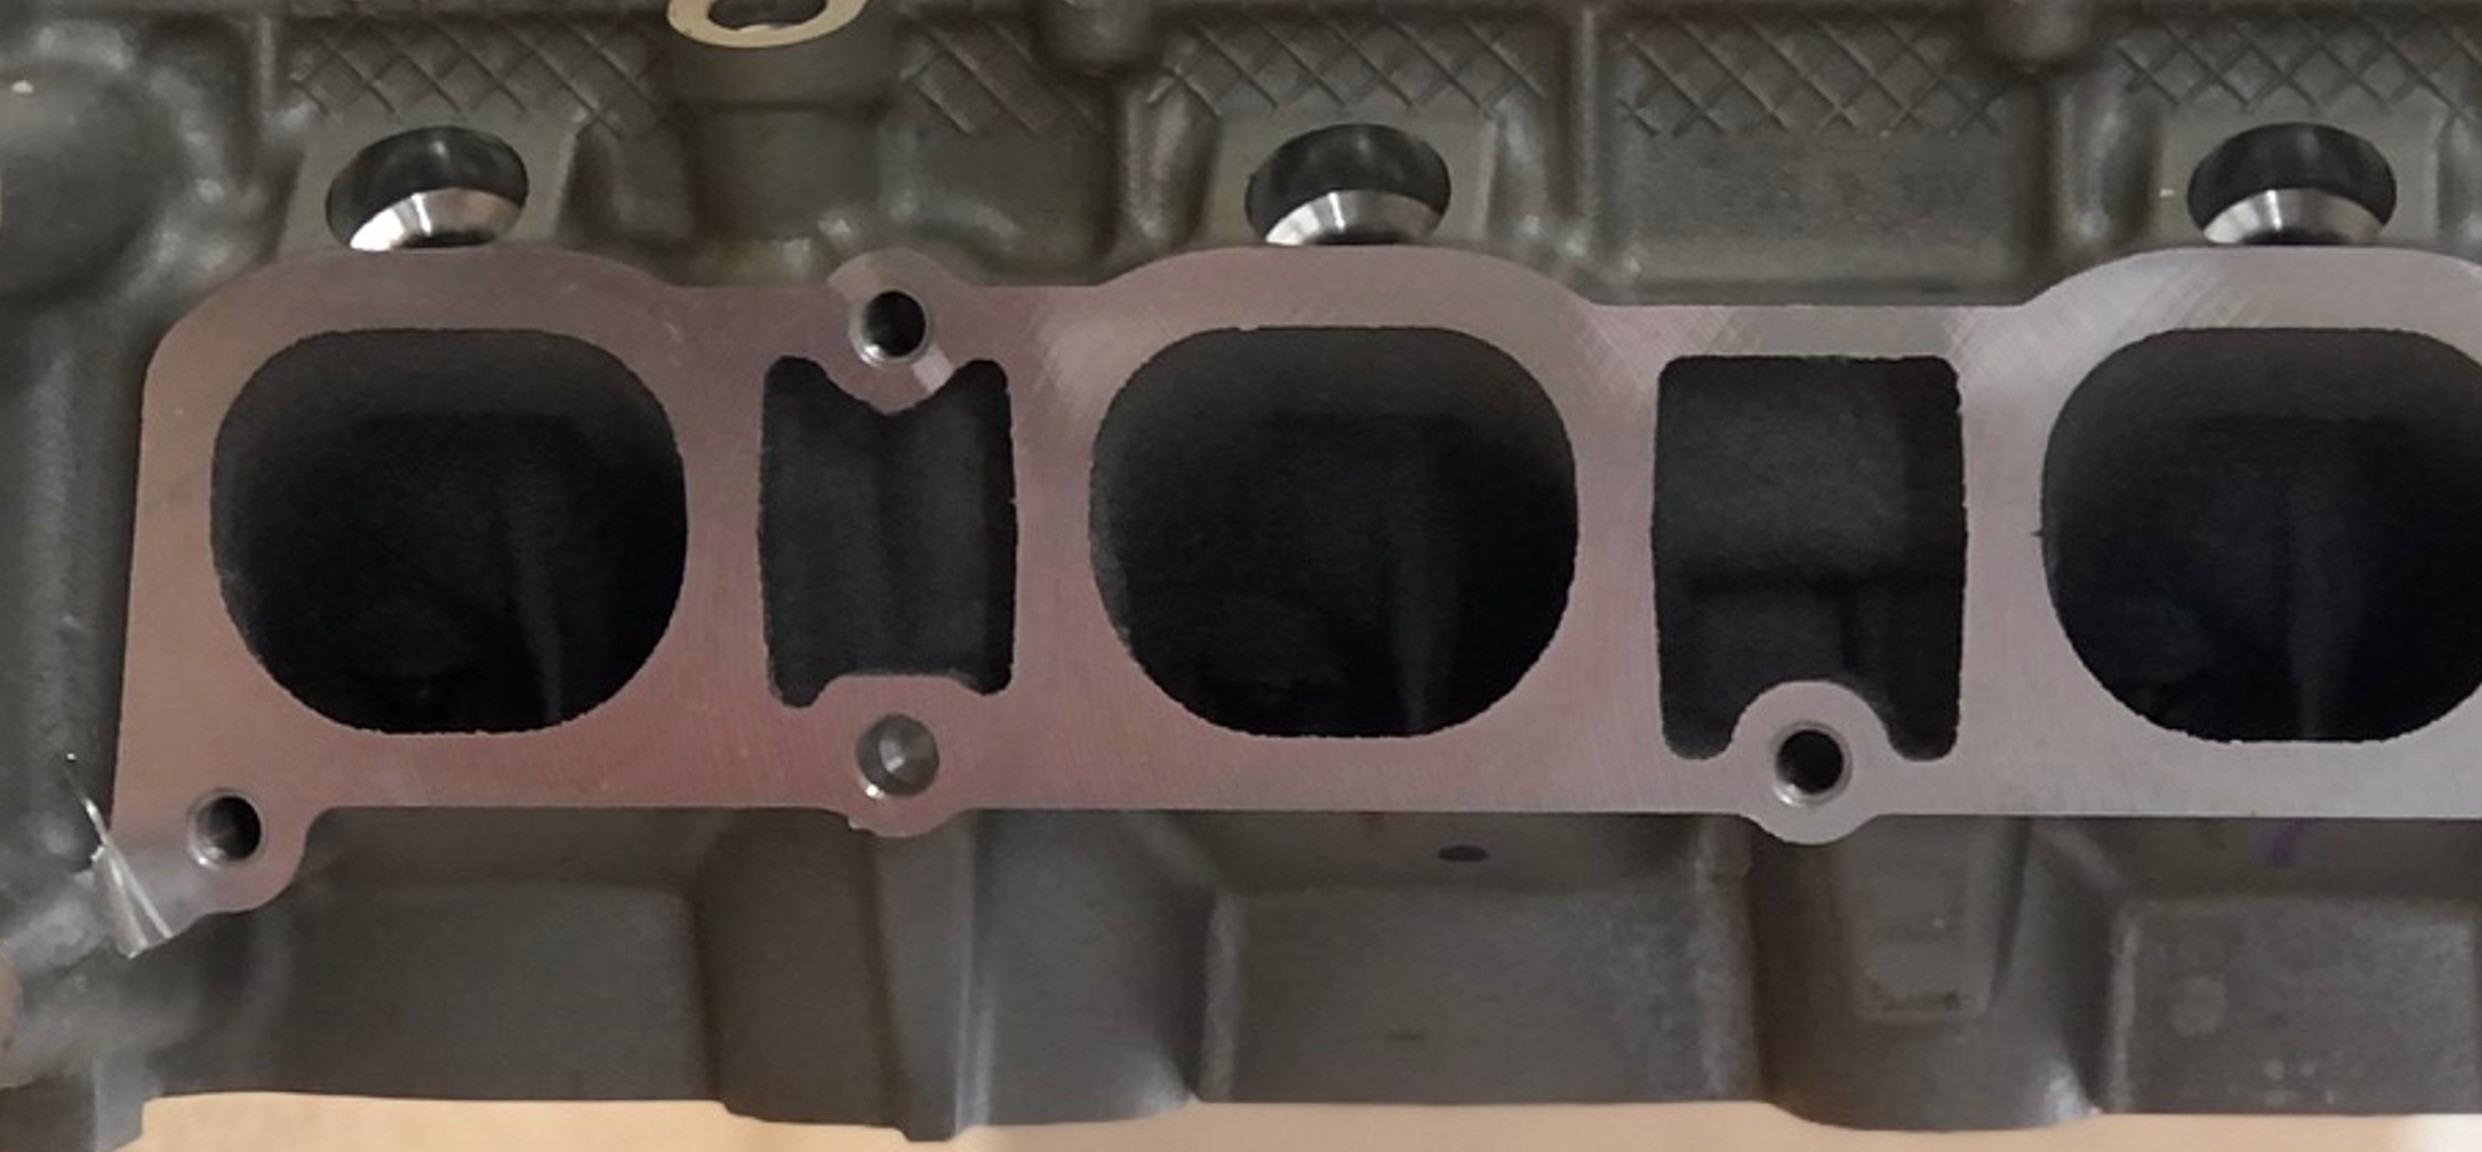
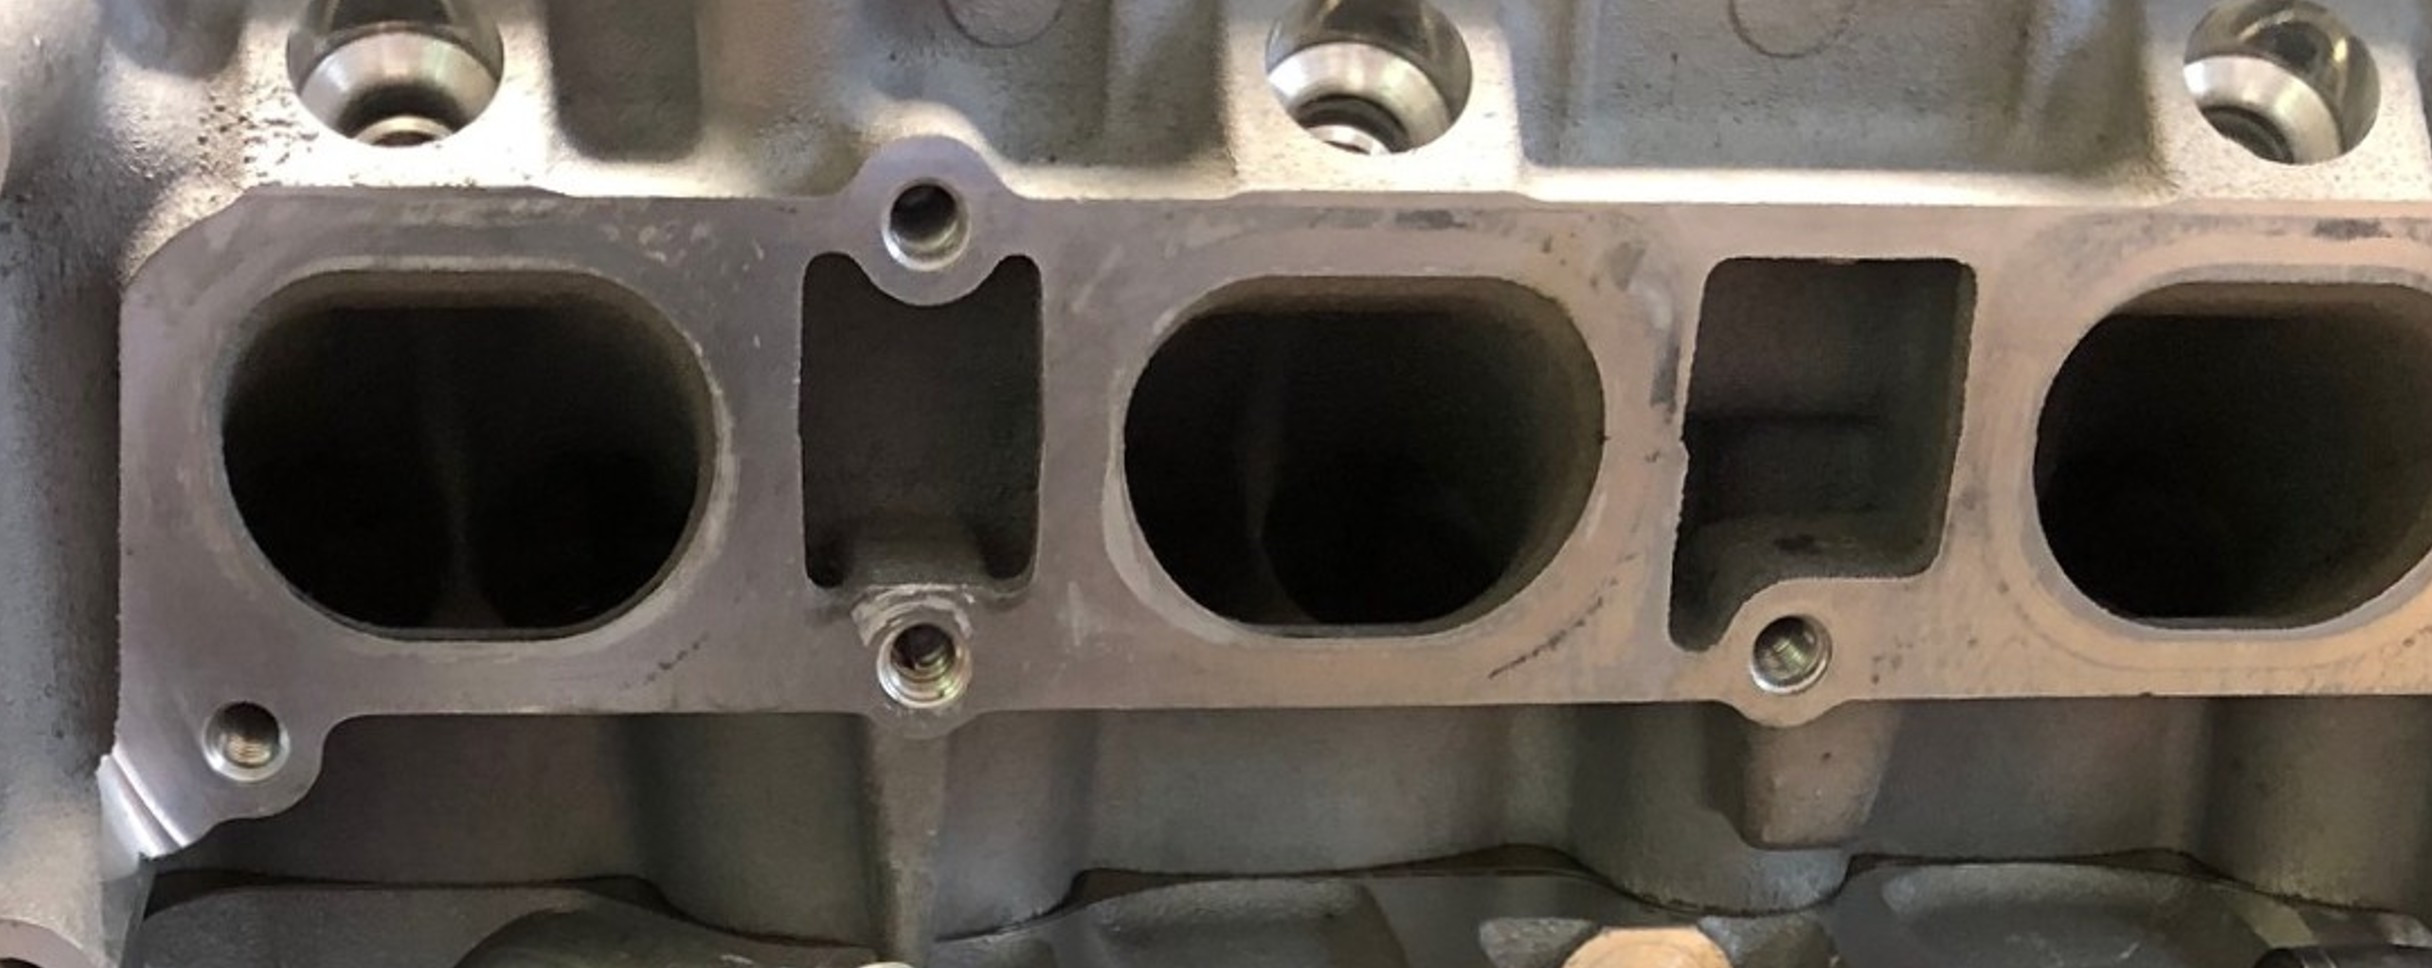
Both the CSR 200 and 260 used the 2.3L, which has a 13mm taller block than the 2.0L. To get the extra power for the 260, Cosworth used more aggressive cams, higher compression forged pistons, forged rods, head work, and roller barrels. Your comment about the visibly larger ports and throats is puzzling. I've researched this area a lot over the years, and the heads in both cars should be the same. The topic of Duratec heads is a little convoluted, so I'll share what I know based on that research and having had 2.0L, 2.3L, and 2.5L heads in my shop for comparison. If anyone has information that refutes the following, please jump in. The 2.0L and 2.3L heads are the same down to the casting numbers. Each was available in either a low port or a high port version The better flowing high port design, which refers to larger reshaped throats, was used in the 2.3L Focus, and various non-US 2.0L Fords, whereas the low port was used in the 2.3L Ranger, all US 2.0L, and some non-US 2.0L Fords. My understanding is that Caterham has always used the high port in their Duratec-powered cars. The only head that has visibly larger port openings — i.e. the opening that mates to the intake runners — is the 2.5L. They are taller, giving a more squarish shaped appearance than the more rectangular openings of the 2.0/2.3L. The first photo shows a stock 2.0L low port, and the second is the 2.5L.
-
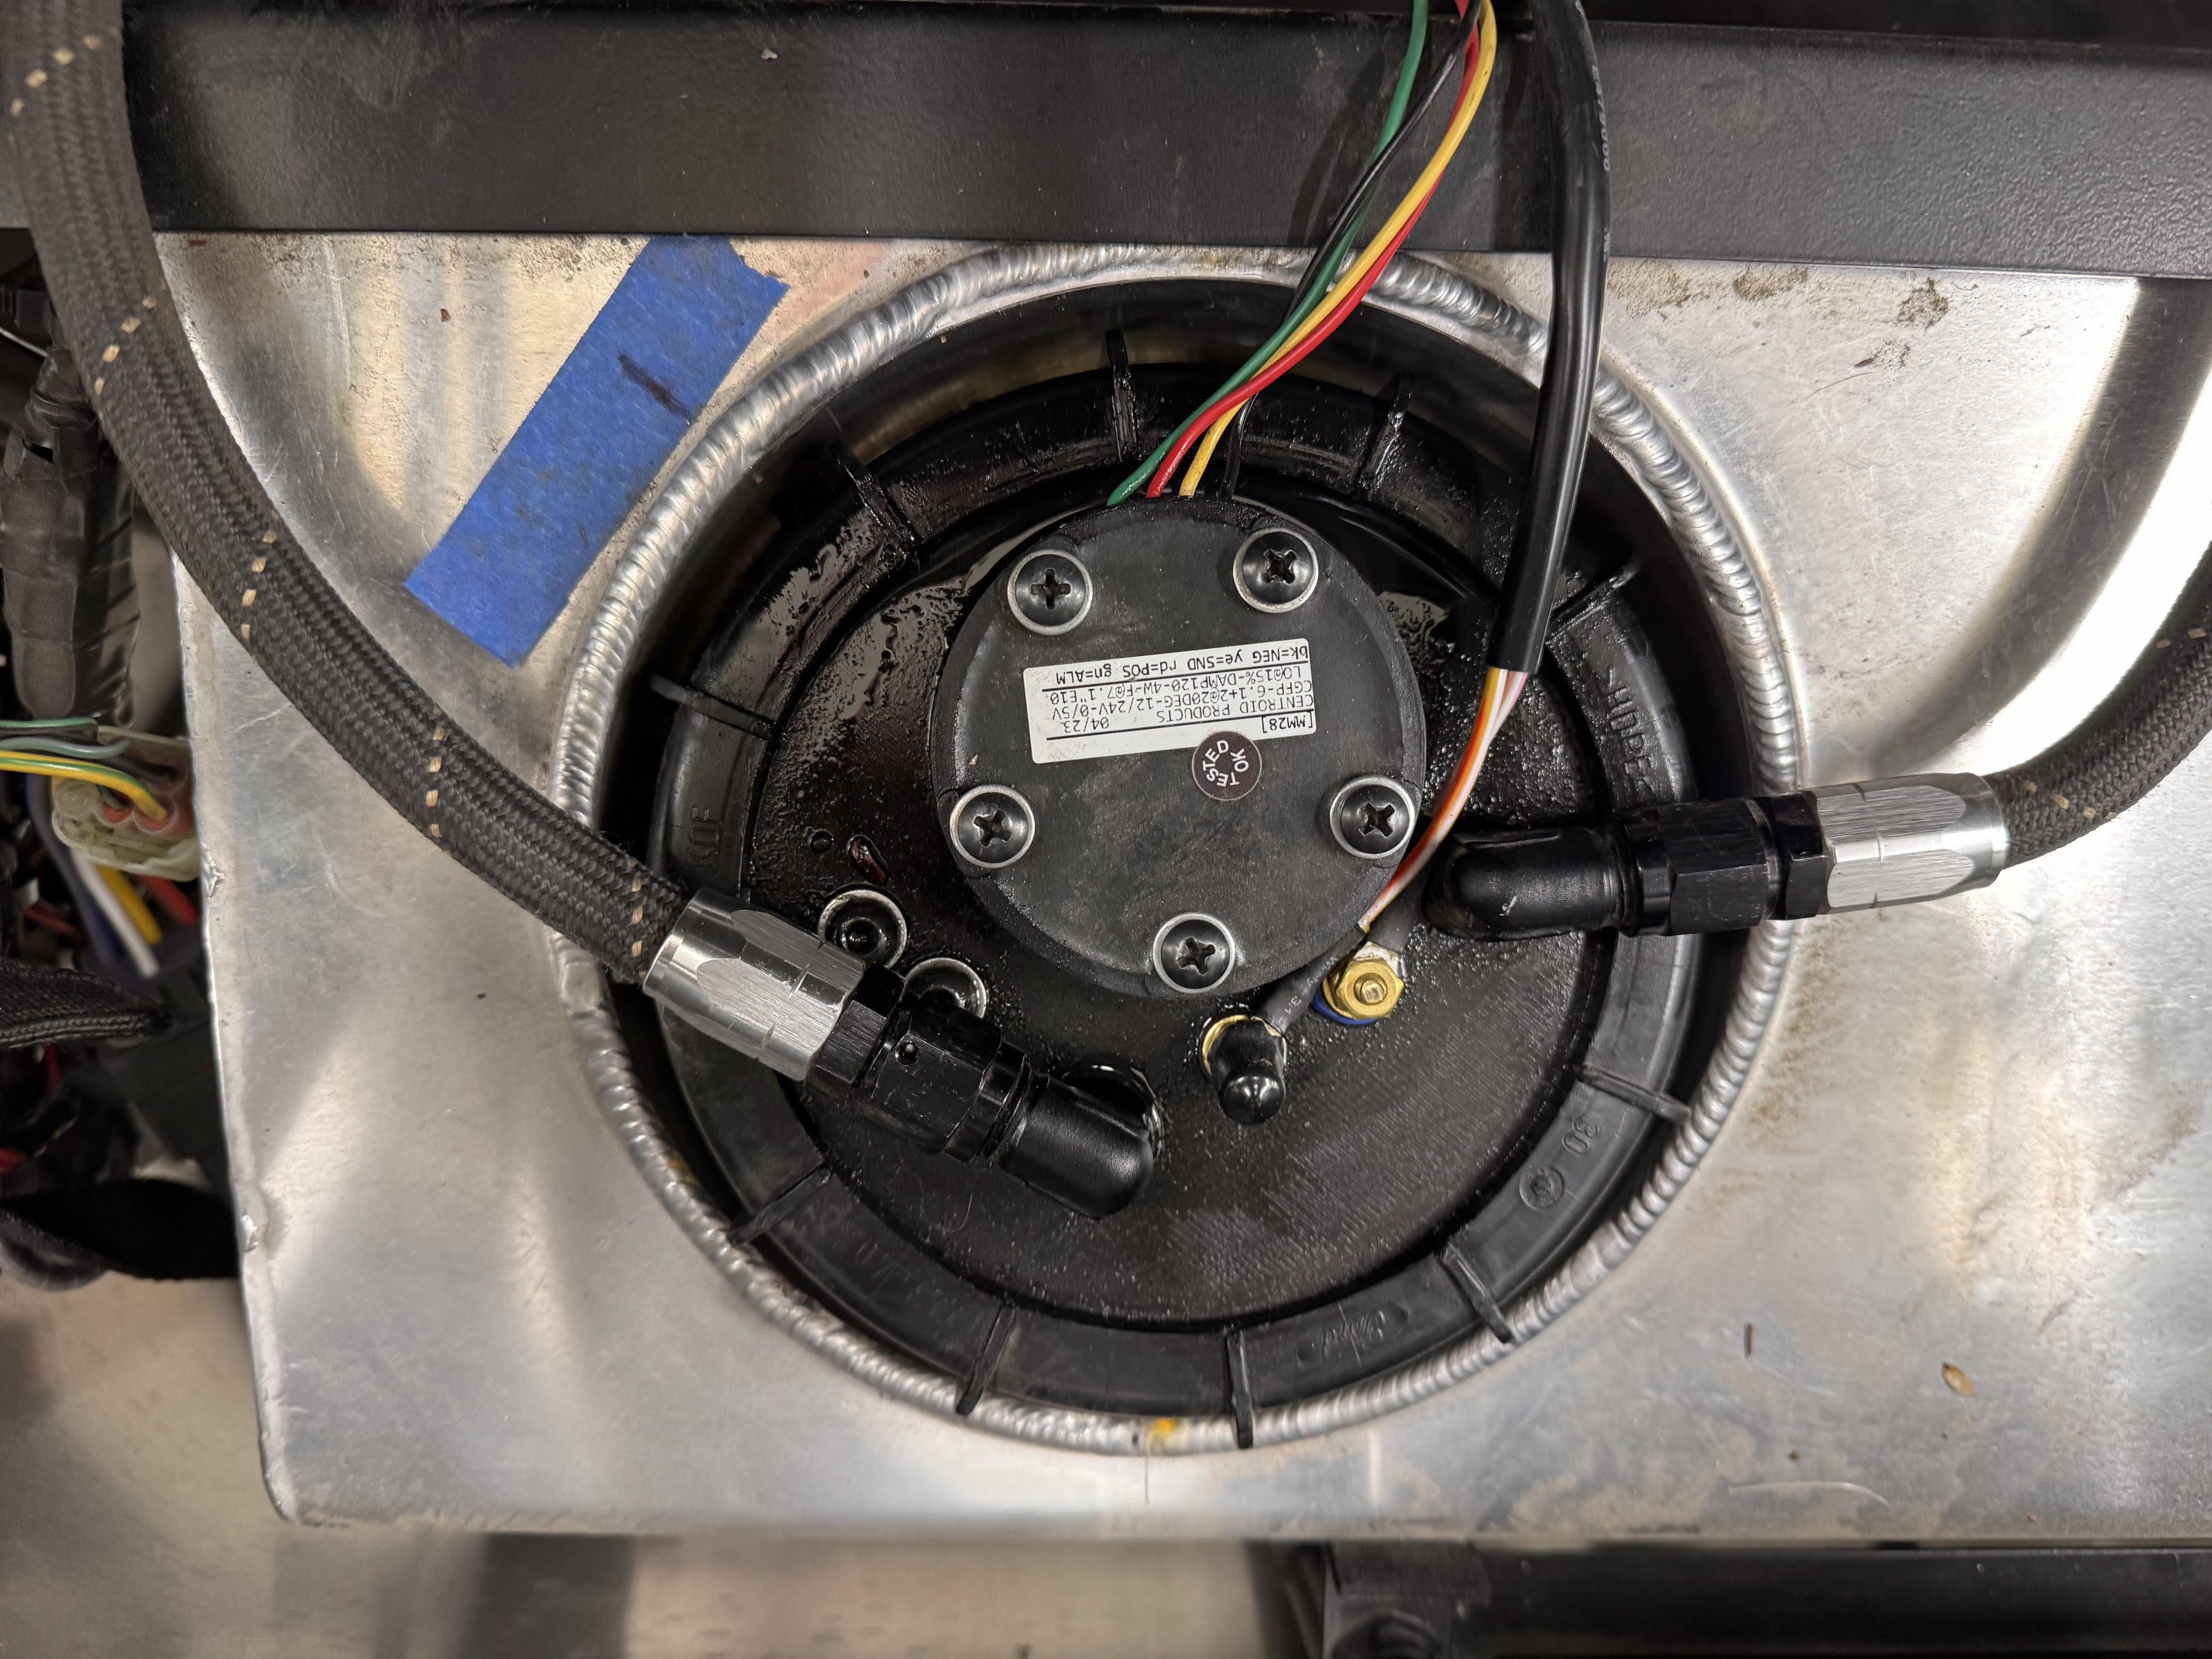
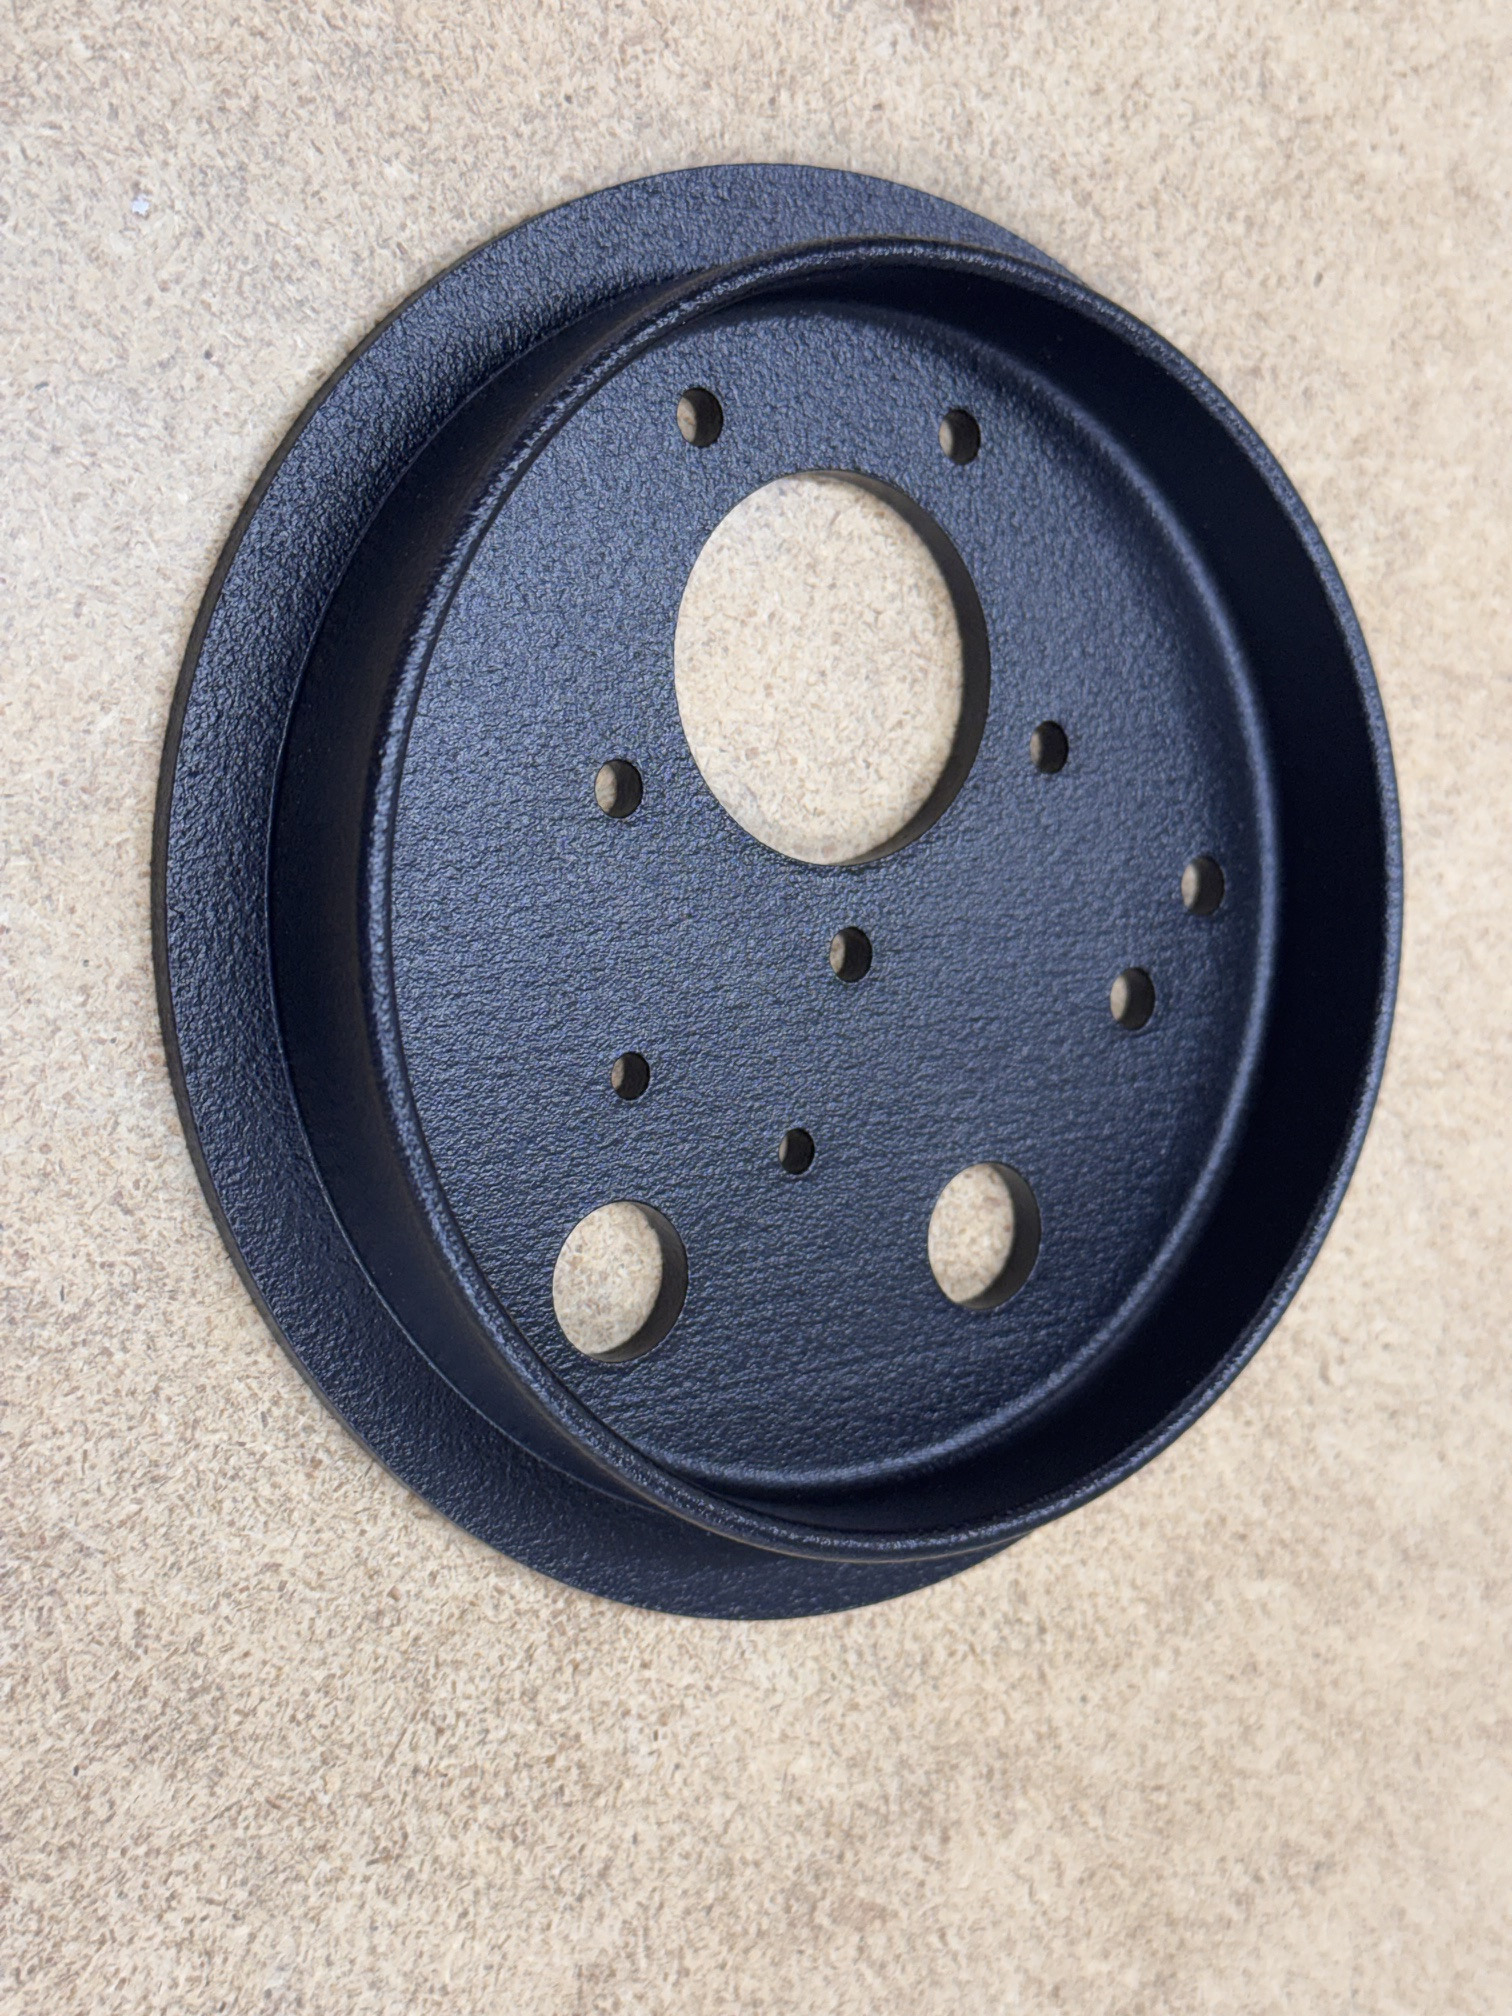
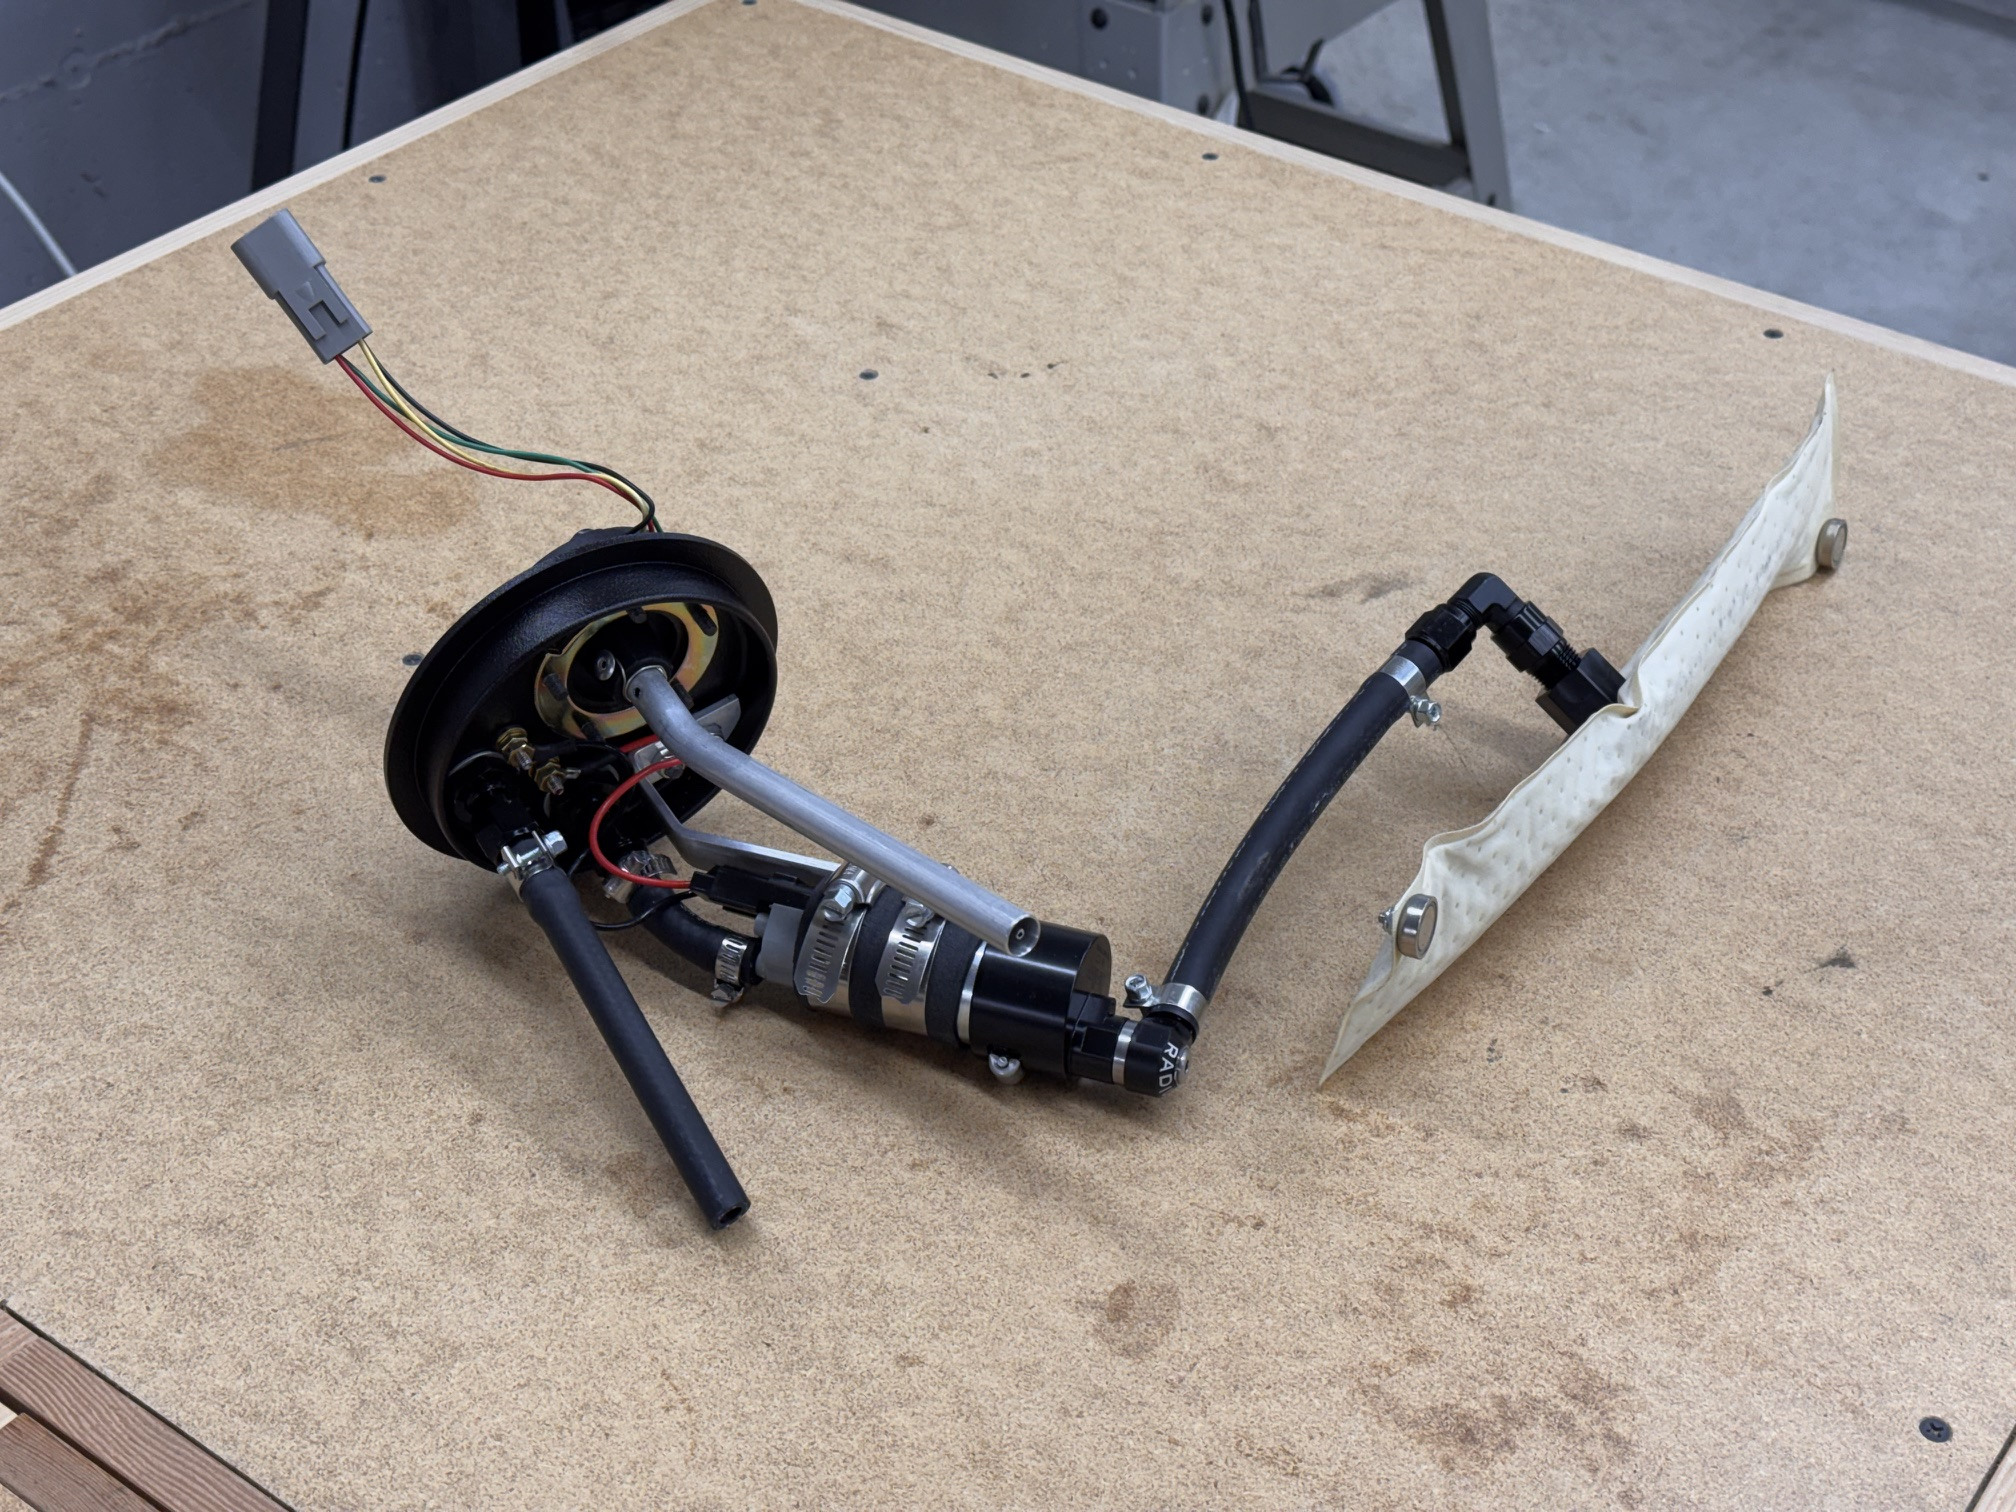
Time for an update given it's tied to one of the modifications performed during the original build. When I redesigned the fuel system, I knew there was a risk the 3D printed lid which seals the tank and mounts the various bits, might eventually leach fuel through the layer lines. Although it worked fine for nearly 3 years and over 3500 miles, it eventually started seeping after sitting for a few days with a very full tank. The easiest fix was to reprint the lid, then coat the underside with a plastic fuel tank sealant. The other option was to have it printed on a commercial Multi Jet Fusion printer that fuses Nylon powder rather than Nylon filament, then have it vapor smoothed. That latter process melts the outer surface, primarily to provide a glossy finish, but with the side benefit for me of closing off micropores on the surface, thus further improving the water resistance. In theory, that combination is effectively waterproof and still resistant to E10 fuel. Since I was curious about MFJ printing, and I wasn't certain how well the coating would hold up, I decided to go that route. This was also an opportunity to make a minor design change to the lid that would make future removal much easier. Underside of new MJF printed lid: Fuel assembly bits attached and ready for installation: While it was apart, I decided to tackle the Centroid capacitance fuel level sensor which has never worked well. Although I used an earlier version of that sensor in the Westfield with great success, the newer versions feature auto rather than manual calibration. This is to compensate for the significant capacitance differences between E10 and E0 fuel for those people who switch between the two. Their auto-cal feature has a trigger point at the top of the tube that resets the 5V capacitance map point every time the fuel reaches that level and the ignition is cycled (i.e. as when filling up at the gas station) thus optimizing for the type of fuel currently in the tank. With everything apart, I messed around with the sensor using a topped up gas can and a multimeter. After taking a few readings, I triggered the auto-cal function and retested everything. It is now correctly outputting 0-5V as expected. It looks like the issue was either that the trigger point was never reached when filling the tank, or the empty calibration was faulty out of the box. As a result, the sensor never had an accurate sense of remaining capacity. If my multimeter readings are to be believed — checking at full empty and half a can — this is now resolved. A few tanks should tell me if this is accurate or just wishful thinking on my part.
-

Help picking a tow vehicle and trailer for my Caterham
JohnCh replied to savagete2860's topic in General Sevens Discussion
Sticky posts are intended to keep important topics that I want everyone to see at the top of a sub forum. They are not intended to aid discoverability for non-critical or non-time sensitive topics. As soon as you do that, you open the door for a metric shitload of pinned topics in a forum that negatively impacts usability. A simple search for "trailers" returns this as the first topic. Granted it's new, but search works for simple subjects like this. If someone wants to invest the time to turn this thread's information into an article and include links to any relevant threads, I think that would make a great addition to that section of the site. Any volunteers? -
Factory Tour Today: Anyone's car in production?
JohnCh replied to 240's topic in General Sevens Discussion
I love the two photos of the factory floor. Really interesting to blow them up and see the assembly bay details and also some of unique color combinations under build. -
Are you signed up for the annual event at NJMP? Not exactly in your backyard, but you now have a trailer
-
Rear uprated ("race") brake upgrade finally done
JohnCh replied to KnifeySpoony's topic in General Tech
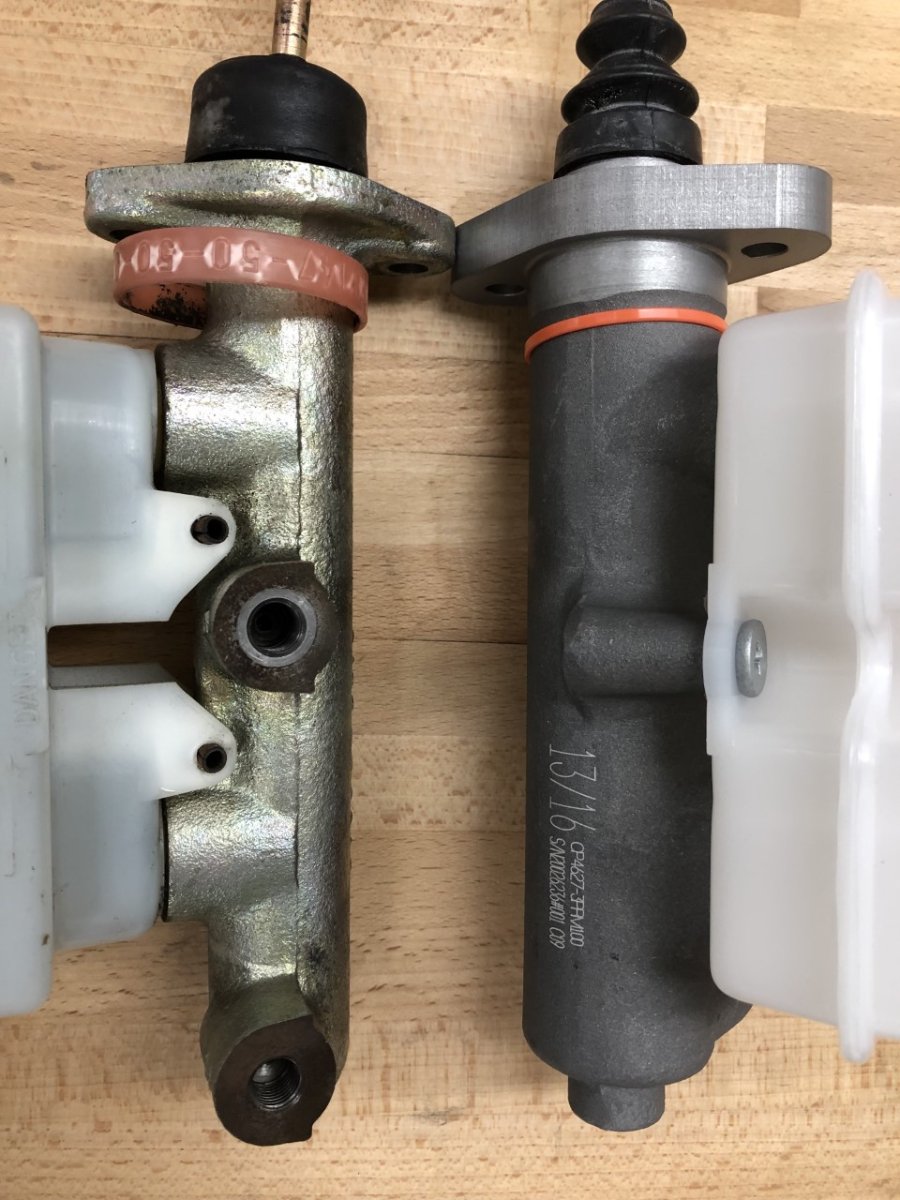
I upgraded my old Westfield from the standard Girling 0.7" master cylinder to the AP Racing unit. The mounting lugs differ slightly from the Caterham version to suit Westfield-specific packaging constraints, but otherwise the assemblies are effectively identical—including AP’s practice of individually shimming each unit to account for production tolerances. Both cars use the same rear calipers and feature four‑pot fronts, but the piston layouts differ slightly: the Westfield setup uses four 1.5" pistons, whereas the AP calipers use a staggered configuration with 1.5" and 1.625" pistons. So while the brake systems aren’t identical, they’re very close. The difference between the MCs was immediately noticeable—firmer pedal feel and easier modulation. Zero regrets despite the price and 6 month wait for AP to do a small run. Here are the AP and Girling 0.7" side-by-side: I also played around with brake pads on that car and found feel differed wildly. My assumption is the non-assisted nature tends to exacerbate differences in initial bite. @KnifeySpoony how is the dust with the Pagids? Is it just a little worse than the stock pads or is it excessive?
-
I finally got around to reading @chrisp993's blog. It's well worth checking out if you haven't already done so. It's brought back a little trauma from my build, but other than that, I've really enjoyed it.
-
x Sorry, your tangent threw me and I assumed that was a generalization. I should have read it more closely. I took the car for a longer drive today and can confirm that vibration is now reduced to inconsequential levels. When it did vibrate, it wasn't enough to distort the view, and the rest of the time, it was rock steady. After more than 25 years of se7en ownership, this is a first.
-
Light from bright headlights immediately behind you will still reflect into your eyes. The extent that bothers someone or impacts their night vision for the road ahead is specific to the individual. Given the plethora of LED headlights and trucks/SUvs on the road, I find this issue more problematic today, and of course, it is compounded when the person travelling just a few car lengths behind doesn't realize their high beams are on. Been there/done that even with a day/night mirror fitted. As mentioned earlier, the convexity of this mirror is quite low. Much closer to a flat mirror than a traditional convex side mirror.
-
I've done touring through very hot areas and recommend a small, insulated hydration pack with straps like this one, which is thin enough to stow behind the seat and hangs from the headrest. Fill it up with mostly ice before you leave the hotel in the morning, and you'll have cool water later in the day when you need it. The bite tube makes easy to hydrate while driving, and the location keeps it out of the way. https://www.amazon.com/Hydrapak-HydraSleeve-Insulated-Shape-Shift-Low-Profile/dp/B0BRBR82BG
-
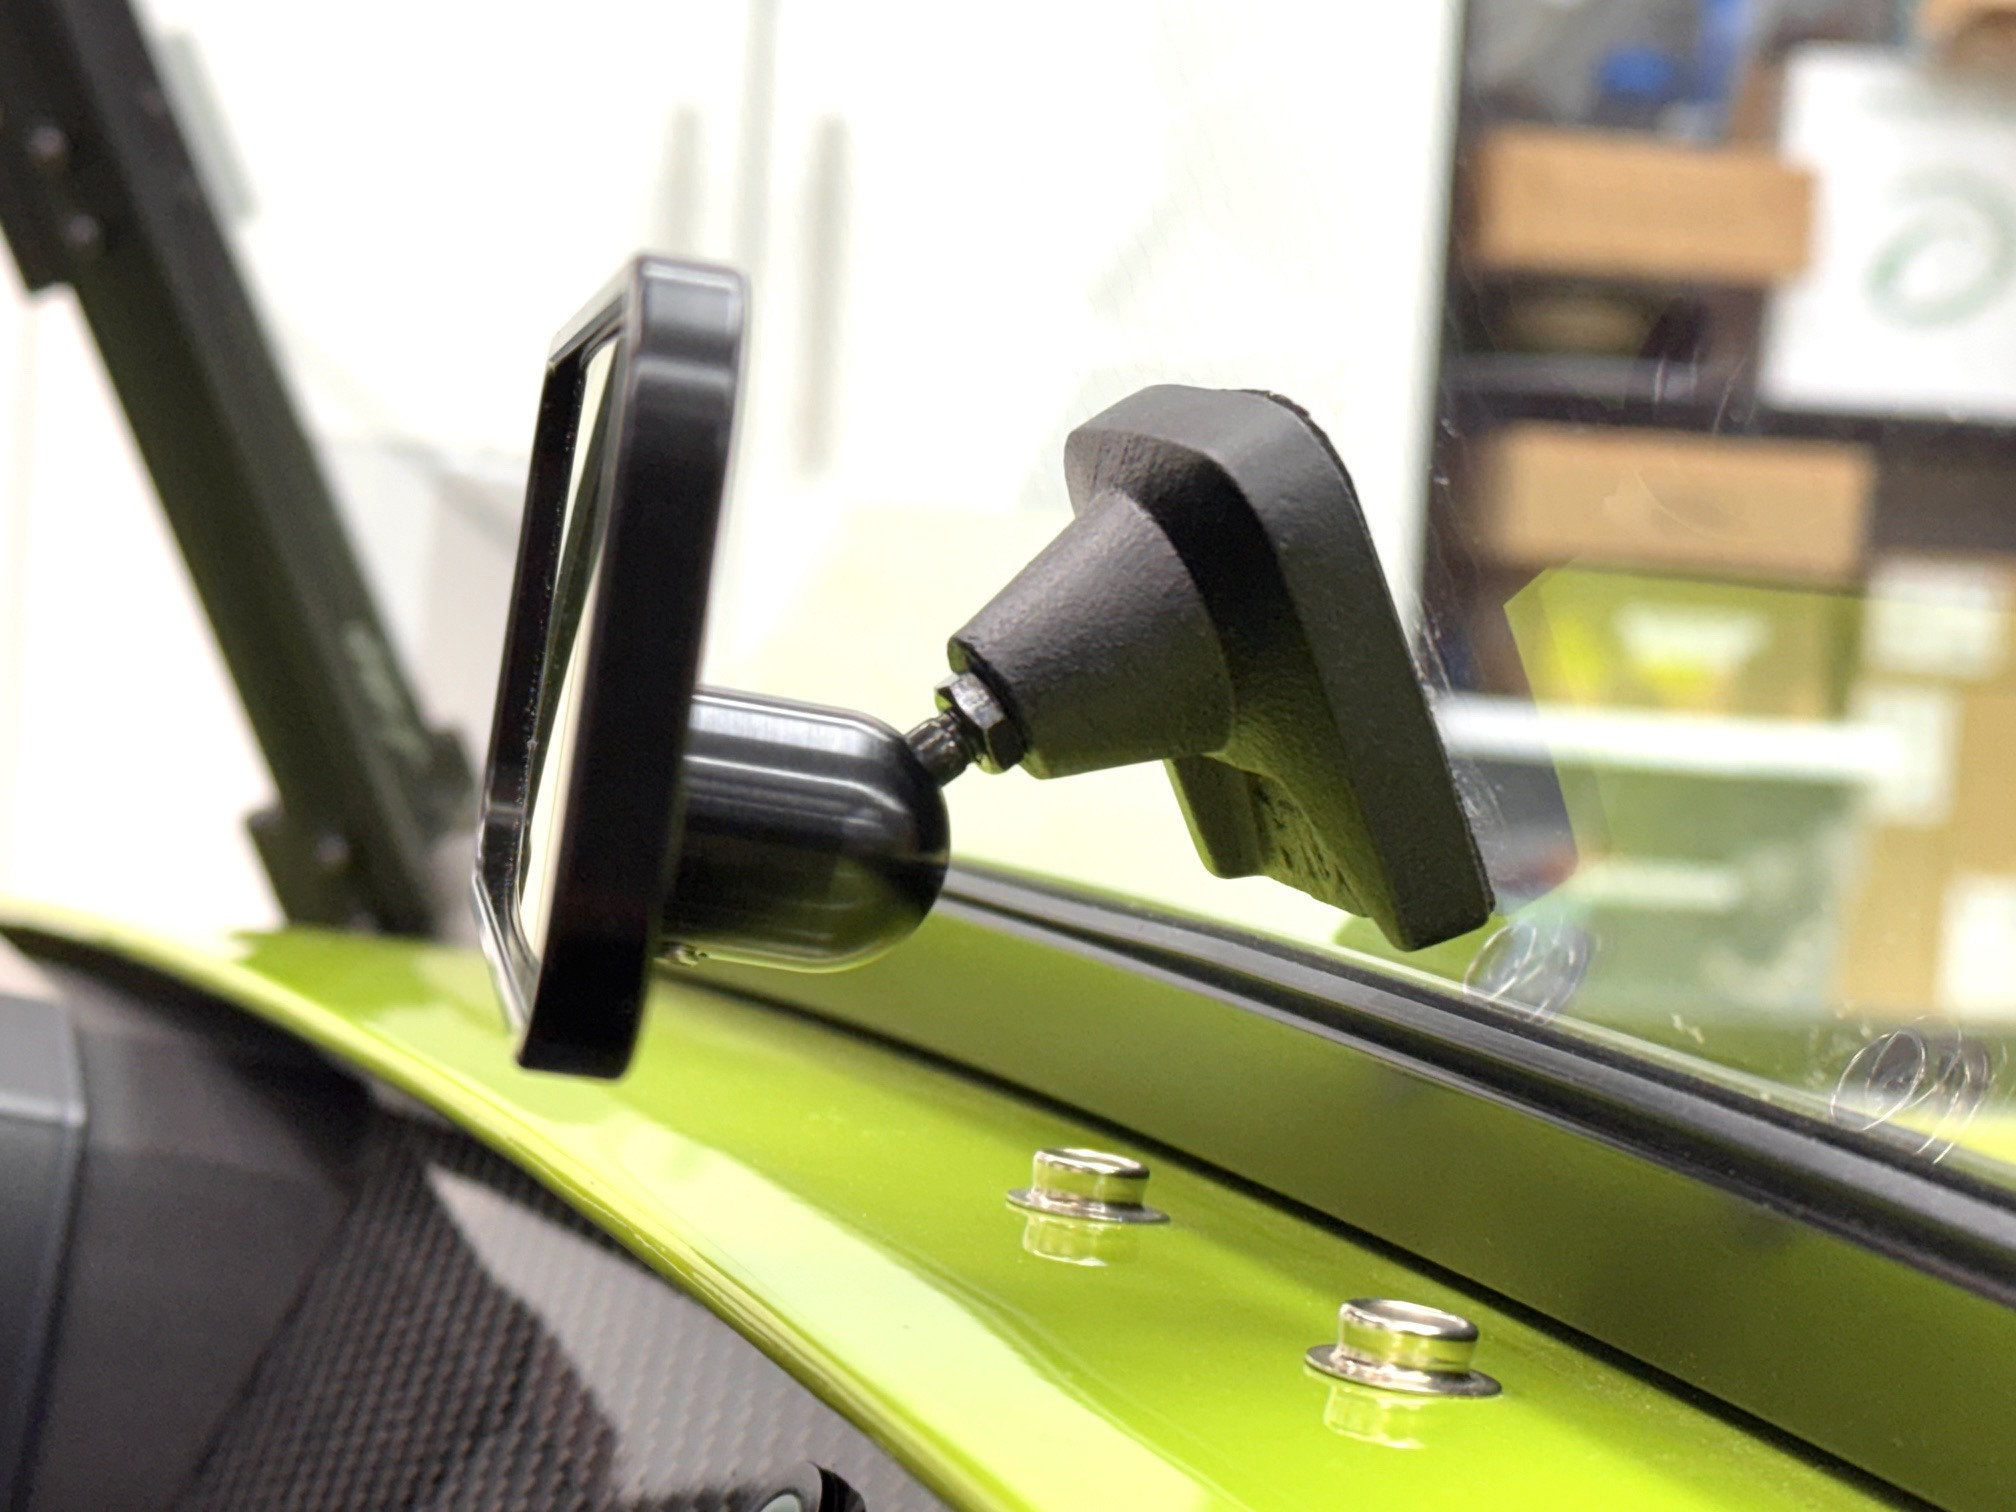
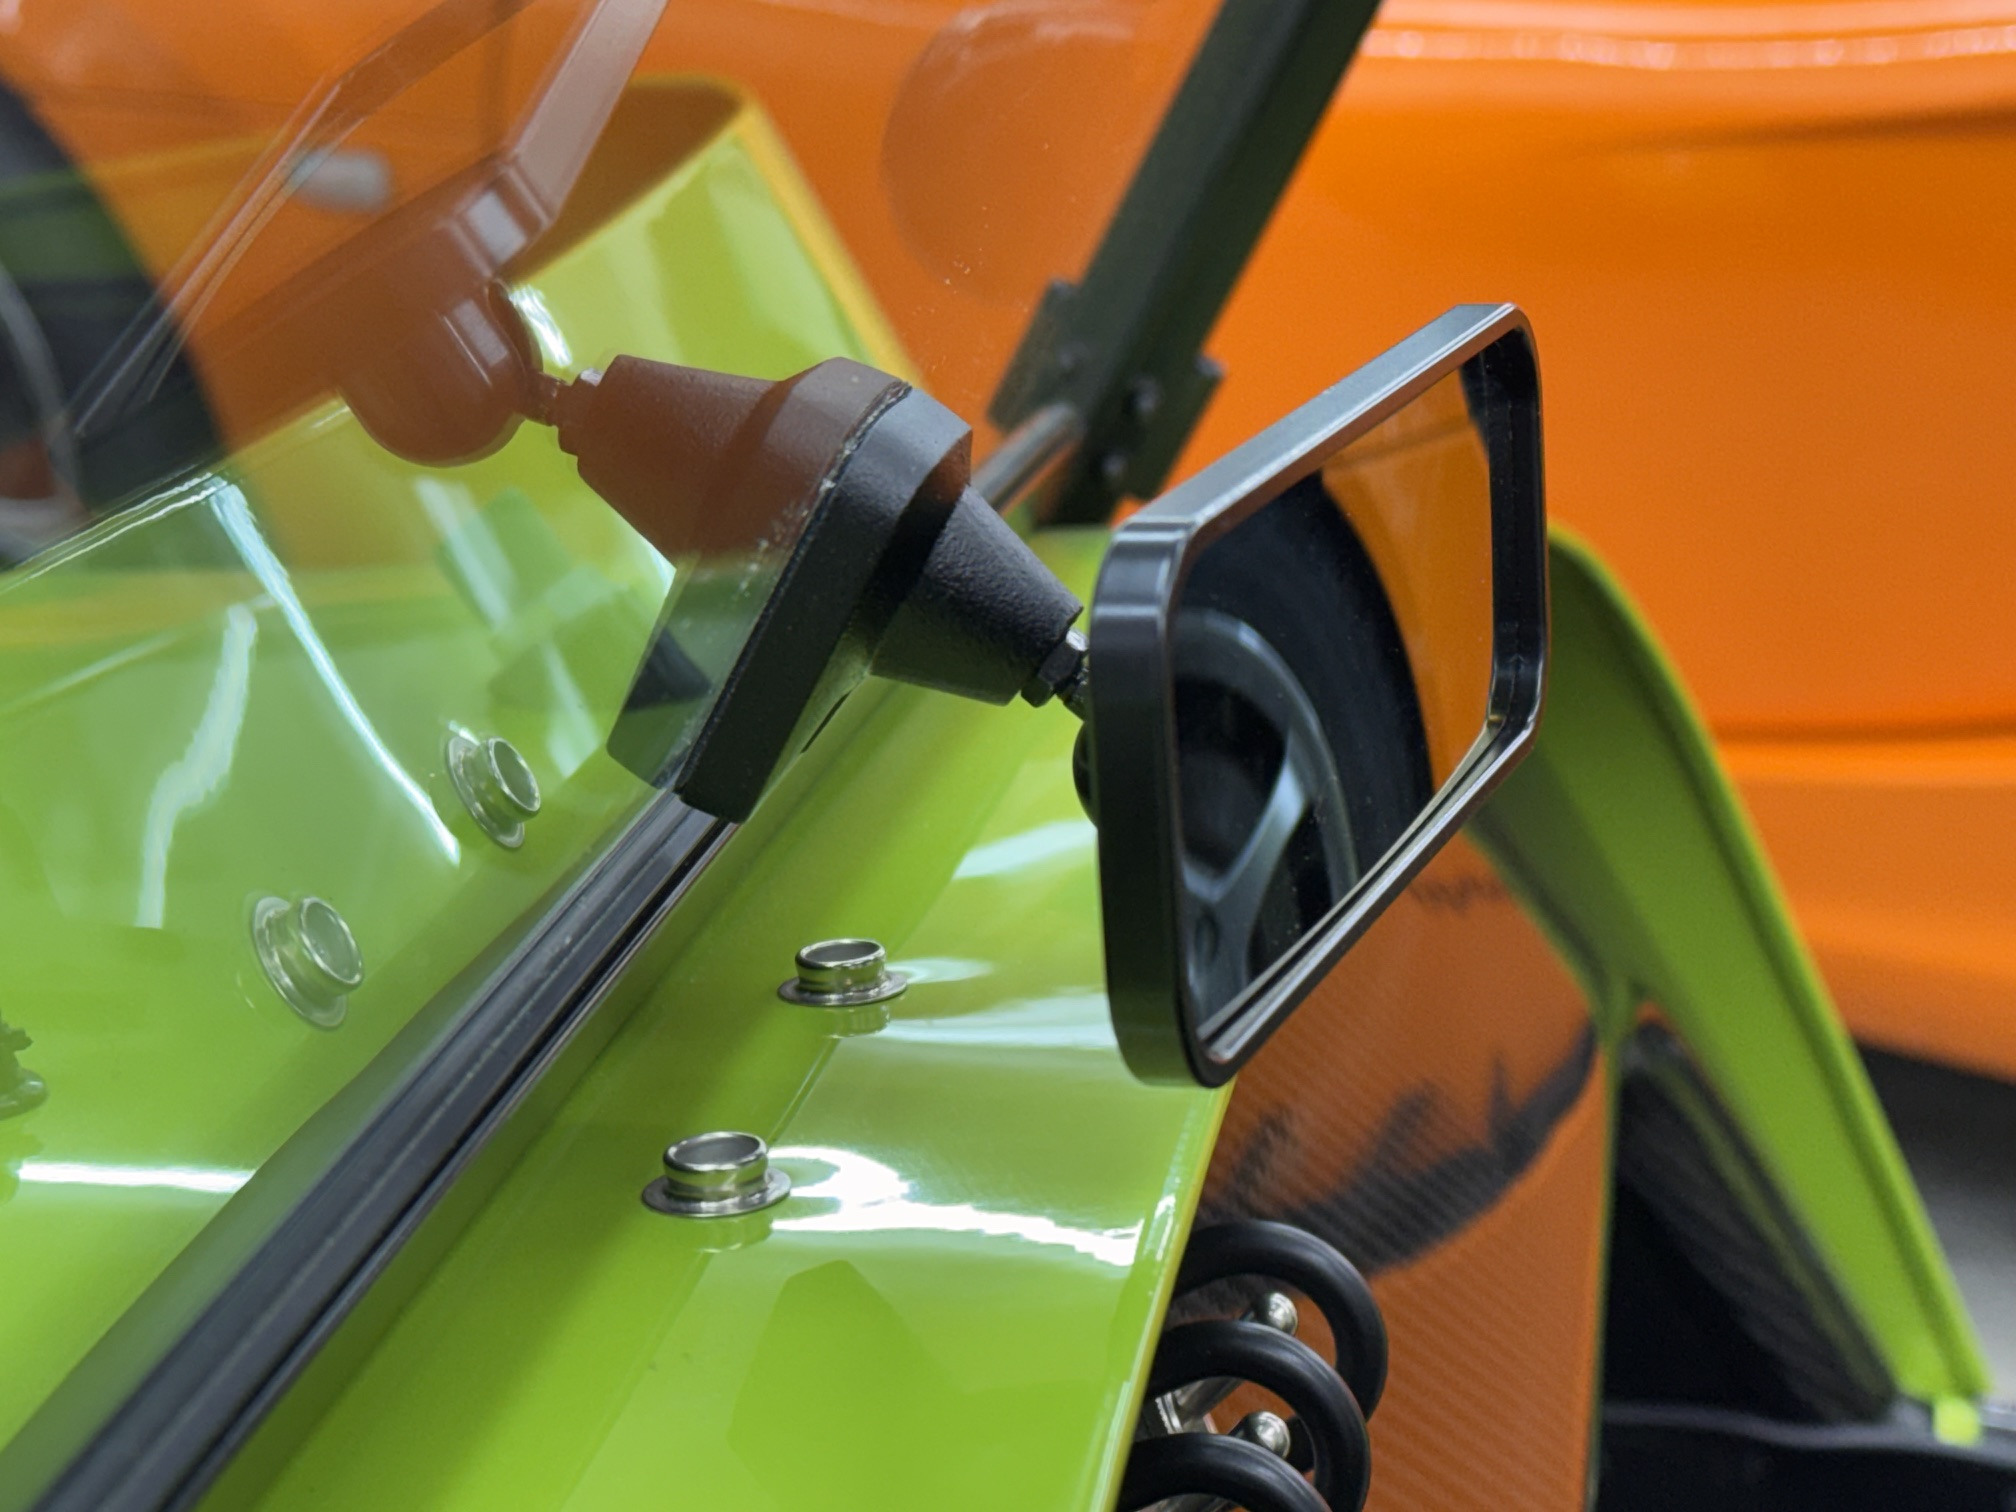
yep, the same setup @Outbound mentioned earlier. Zoom ships via Japan Post who handles the tariff payment and bills through Zoom, which simplified everything. The mirror was $115.23, the mount another $28.81, shipping to Seattle was $28.55, and tariffs were $20.03 for a grand total of $192.62.
-
It's not a badge, it's the horn button. I had it laser engraved with the logo.