NSXguy
-
Posts
216 -
Joined
Content Type
Profiles
Forums
Store
Articles
Gallery
Events
Library
Everything posted by NSXguy
-
Perfect! Thanks for sharing that. I seems some are rectangular and some round. Wonder if it had to be spec'd from the factory.
-
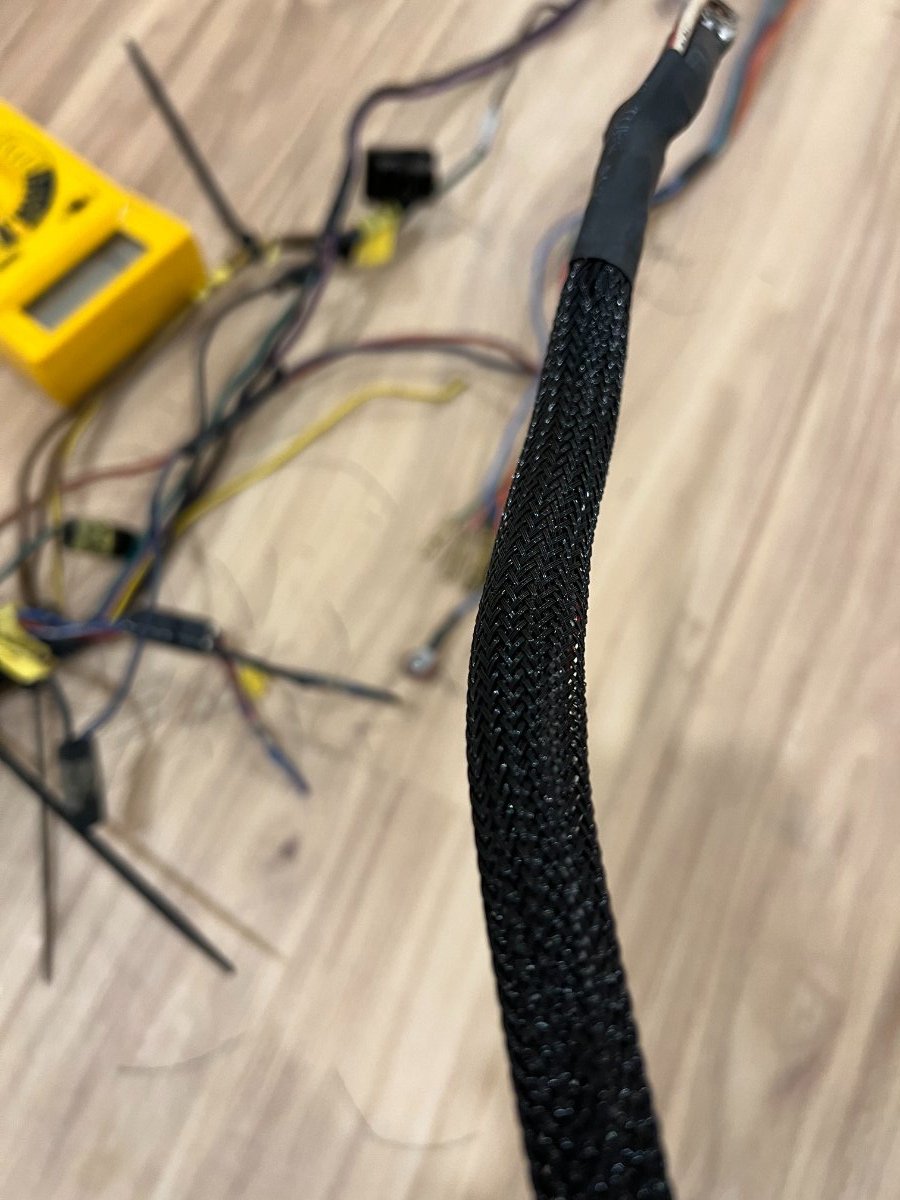
Hi Scott, The entire harness sheathing will be redone in Techflex black braided sleeve like this with heatshrunk and sealed ends (this bit is for the starter i did today as that circuit is all set)...much more superior installation than just electrical tape alone. Cheers, Des.

-
Thanks for sharing that @Rosteri . I was contemplating keeping my Type 2, but have a friend who has a few T-9s from the US offered Merkur Xr4ti so that is helping to convince me to go ahead with the swap. I believe these US spec T-9s are different than the UK/Europe ones in some respect and through online research i've found a few articles from folks in the US who have mated said Merkur T-9s to the 711M block so i feel alot better and knowledgeable about tackling this and of course, will be documenting the process here. I should be picking up the box this coming week, so i'll be able to assess further. Request for the community: Could someone please post photos of this rear cross member on an earlier standard body S3? I plan to replace the lap belts with a 5/6 point harness and for some reason my car has round stock on this member where i believe it should be square/flat stock for the 'over the shoulder' harness mounting points installed. I don't know if it came round because original builder opted for lap belts... but according to the assembly manual, it seems the chassis should've been delivered with a suitable member with provisions for mounting harnesses at a later point without the need for additional mods. I'd like to get an idea of what this member should look like so that i can replicate or weld something to achieve the same result.
-
 Man! can't wait to join you guys this year! wasn't ready and comfortable enough taking my cat on the track last year.
 -
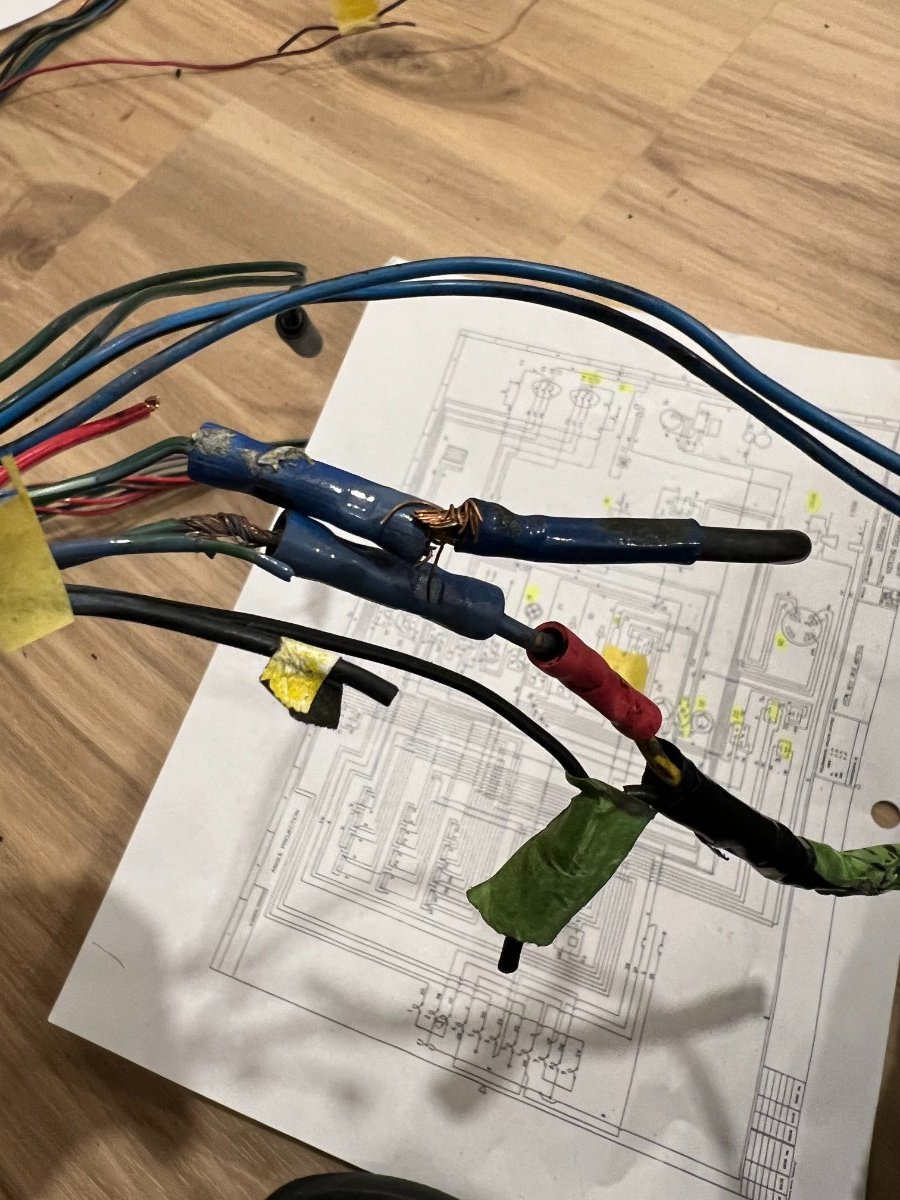
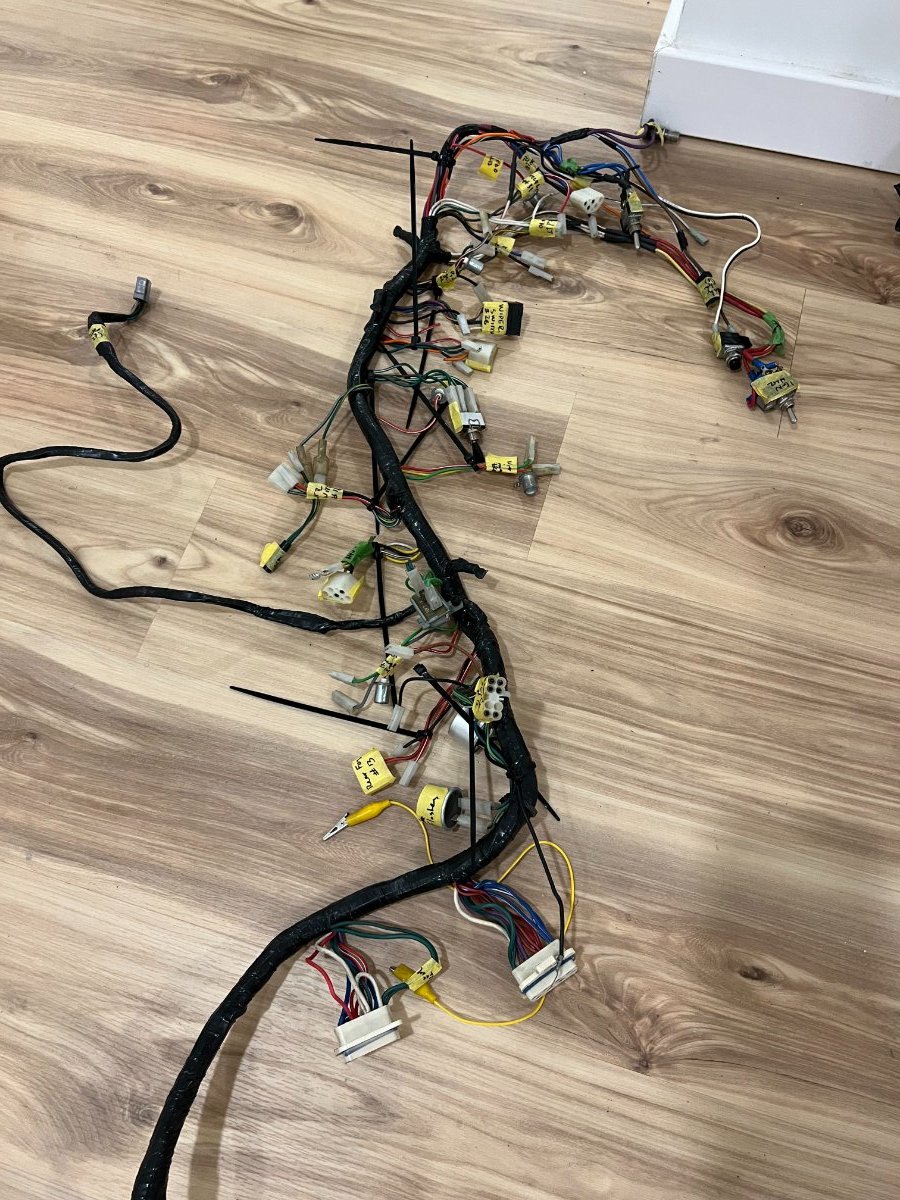
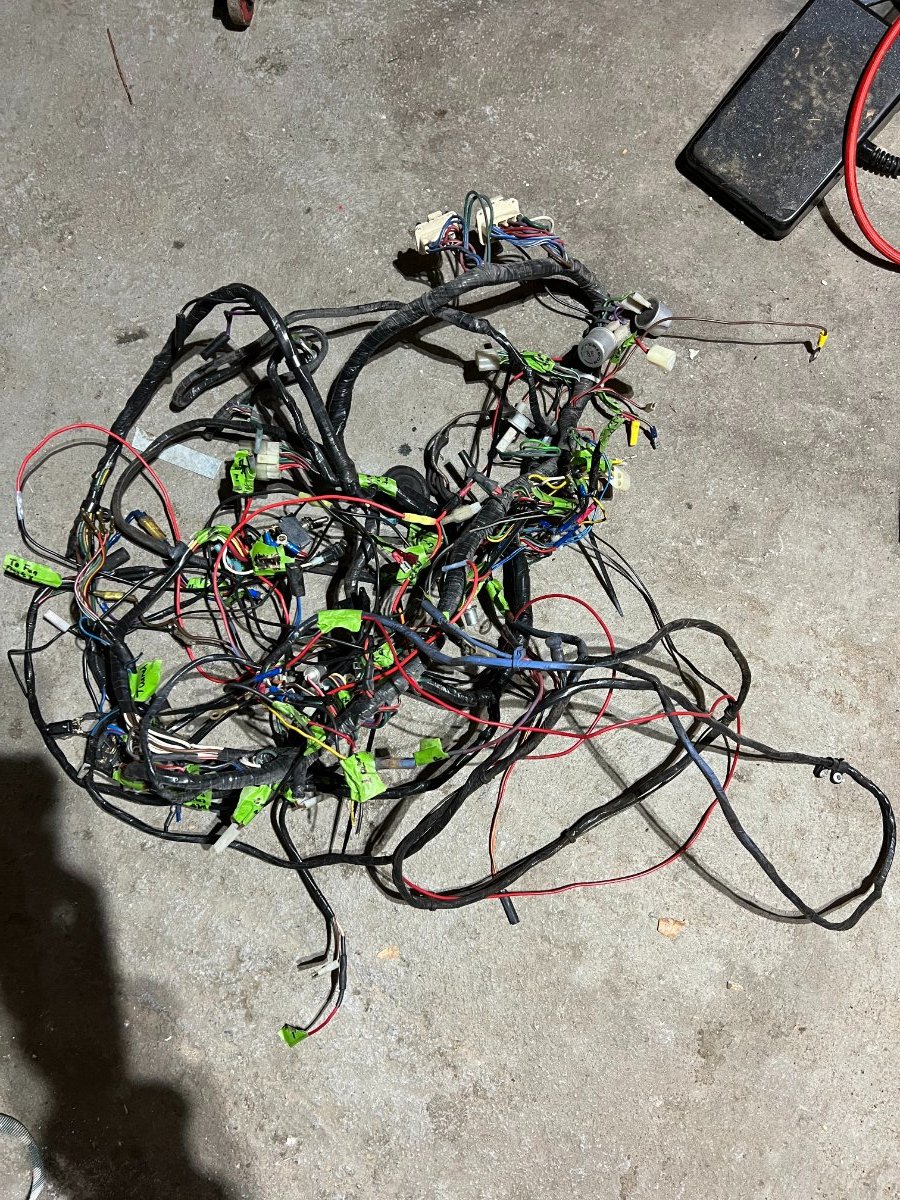
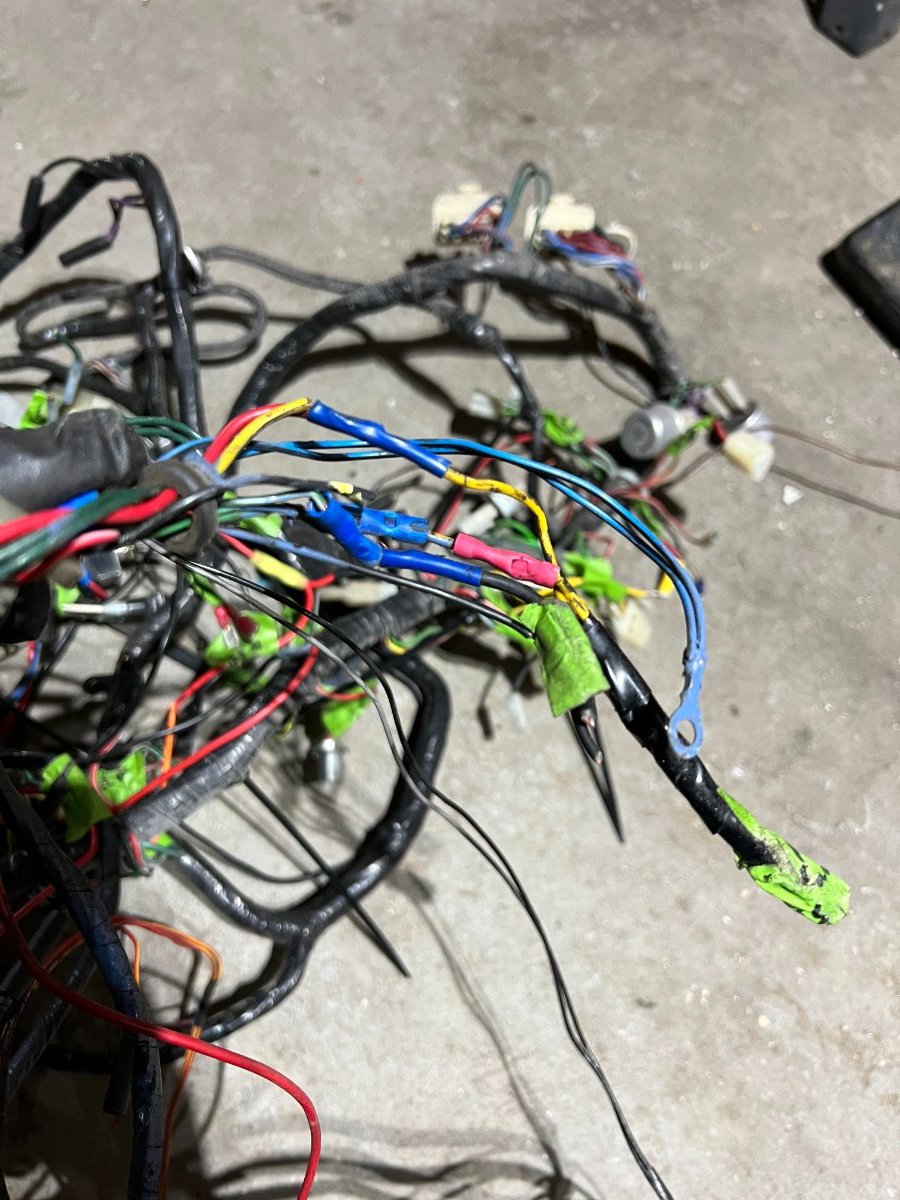
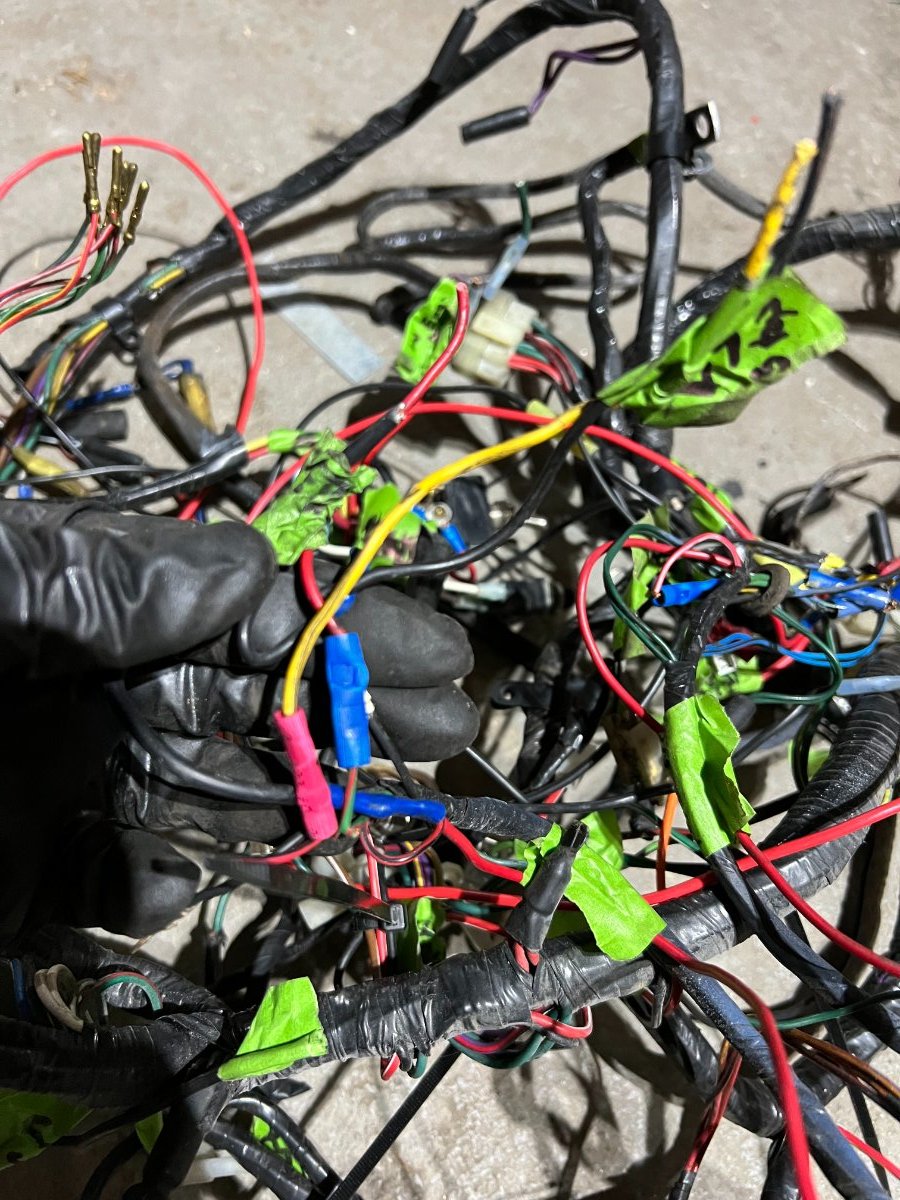
Cool Mike. Just did. TODAY'S PROGRESS: So after 2 days of going through the whole spaghetti line by line and comparing factory spec'd diagram to physical harness, I now have everything mapped and labeled as it should be! It seems at least in part, that some of the hackery in the harness in response to an improper in the rear section of the chassis harness (between tail lamps, number plate) that was affecting the lighting circuit and whoever made the fixes with the jumper wires to fix didn't do the best job either. I could tell the error was from the original build(or maybe as supplied from factory) because those areas were under the original loom electrical tape sheathing- I assume these kits were supplied back then with a fully assembled harness. Also, the referenced diagram is for a 1988 model year build and is a 90% match to my 1984 build harness; in that most of the circuitry and wiring colors match well enough except for some few instances. In the near future i will be posting an an updated wiring diagram that reflects the differences i noted for pre 1988 cars (or at least my car). All in all it was a great experience going through this and "ohm'ing" it all out. I definitely learned alot. Now that we have baselined, next is to undo the hacks, repair the factory defect and get this harness back to proper factory spec. Baseline ( mapped , ohm'ed and labeled). before any repairs: . Out with the old (no more jumper wires and but connectors in this harness' future) : .
-
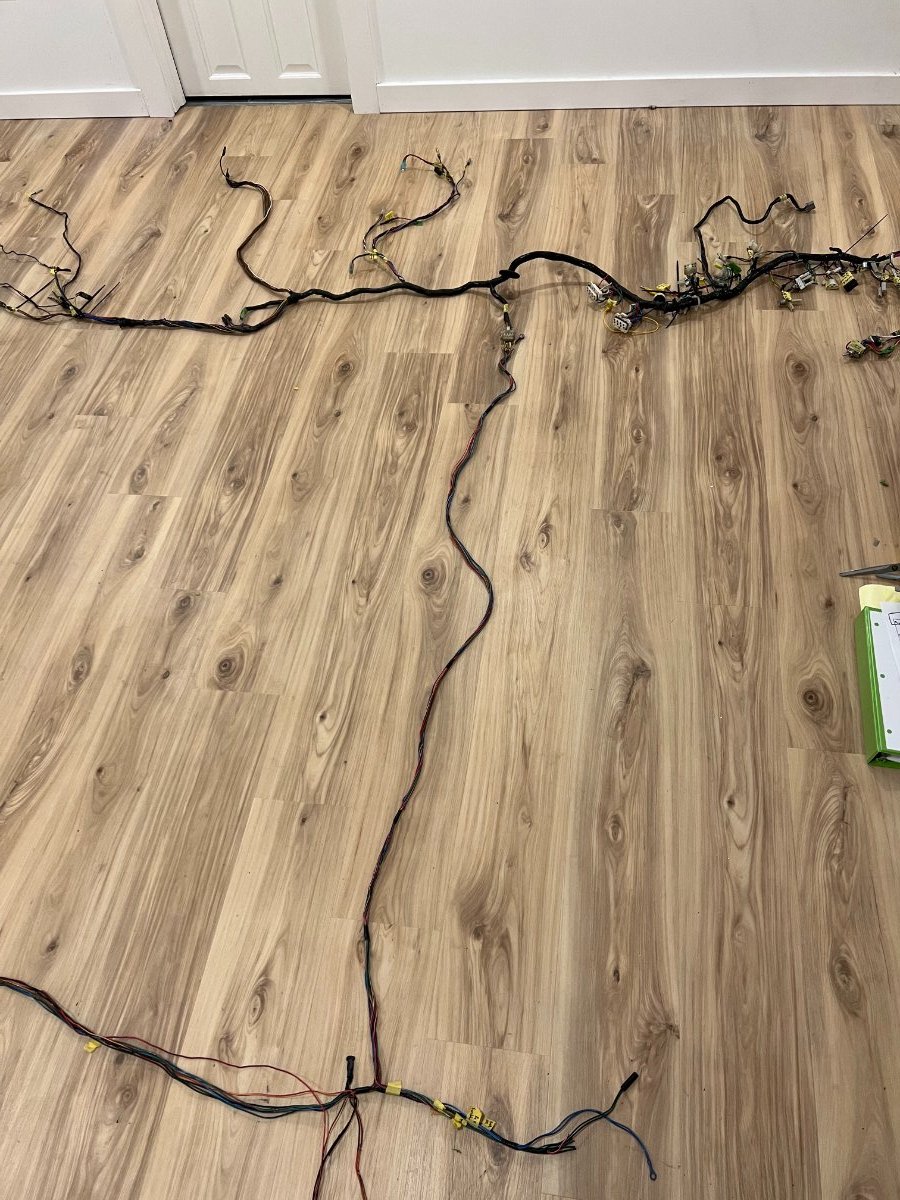
Thanks for sharing that Mike. Was referencing the assembly manual for my car's year and didn't see any mention of those brackets in the sections i looked. Speaking of assembly manual, today,I was able to find and print a full volume of the assembly manual for an 80s Caterham which has proved to be very helpful in the wiring portion of this refresh and i'm sure will come in handy in the reassembly and overall knowledge of this platform. . The wiring all laid out in the basement floor for this messy surgical exercise : . I was bracing myself for the worst, given all the hacked terminals on all 4 corners of the chassis harness, but to my surprise, with the exception of those and a few spots under the scuttle, the rest of the harness was actually in good shape, actually very good shape for it's age. So that saves me some work. I painstakingly went through the entire harness, comparing each circuit against the factory wire spec in the diagram to inventory what had been modified. Once complete, next week, i should be able to rewire anything that is incorrect, adding waterproof connector around components in the engine bay. It should work much better and be more reliable for years. New thermostat came in for the header tank conversion/installation, so I gave it a test fit. I like that the outlet to the radiator actually points towards the front now. Still need to decide which tank i'll go with; hoping to find something in the states, if not i'll make one as i don't have much space on the engine bay bulkhead (fire deluge tank sits there)
-
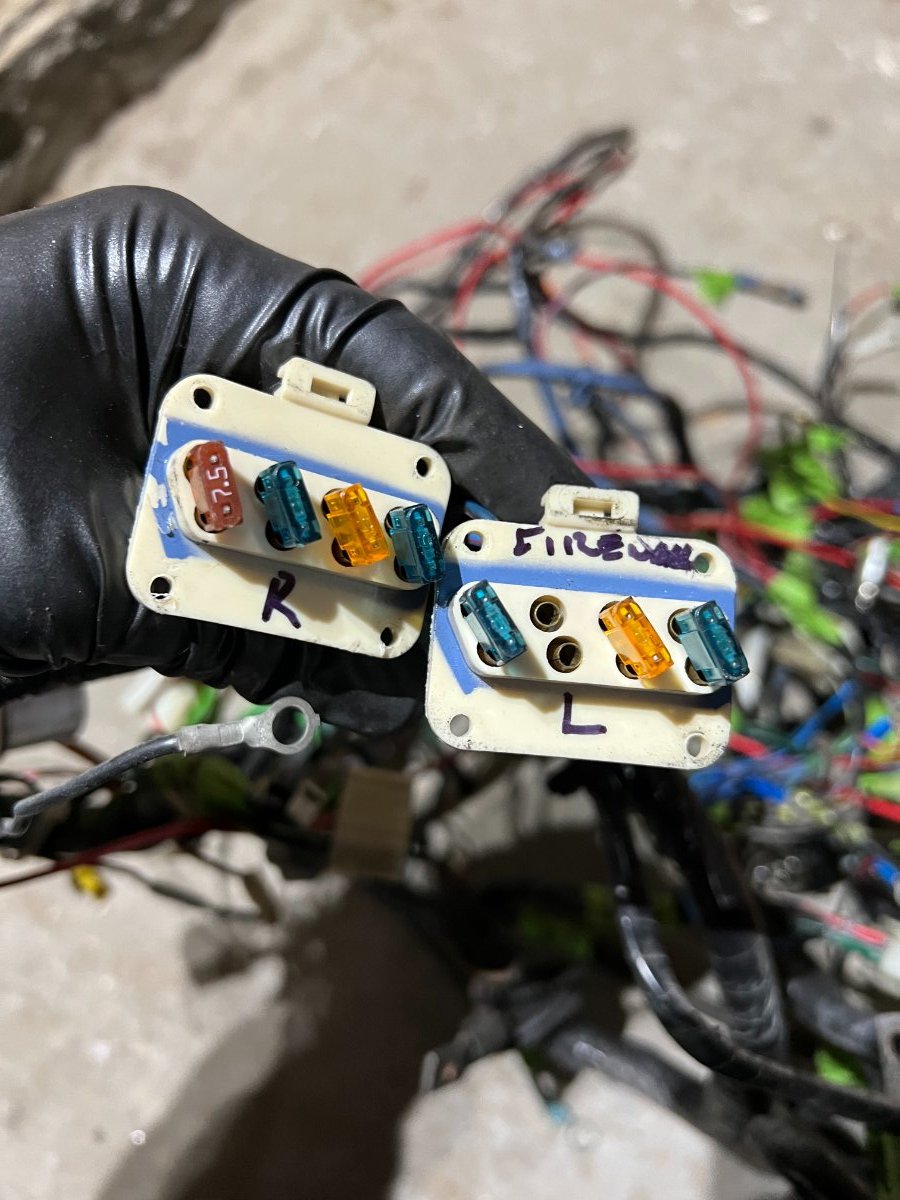
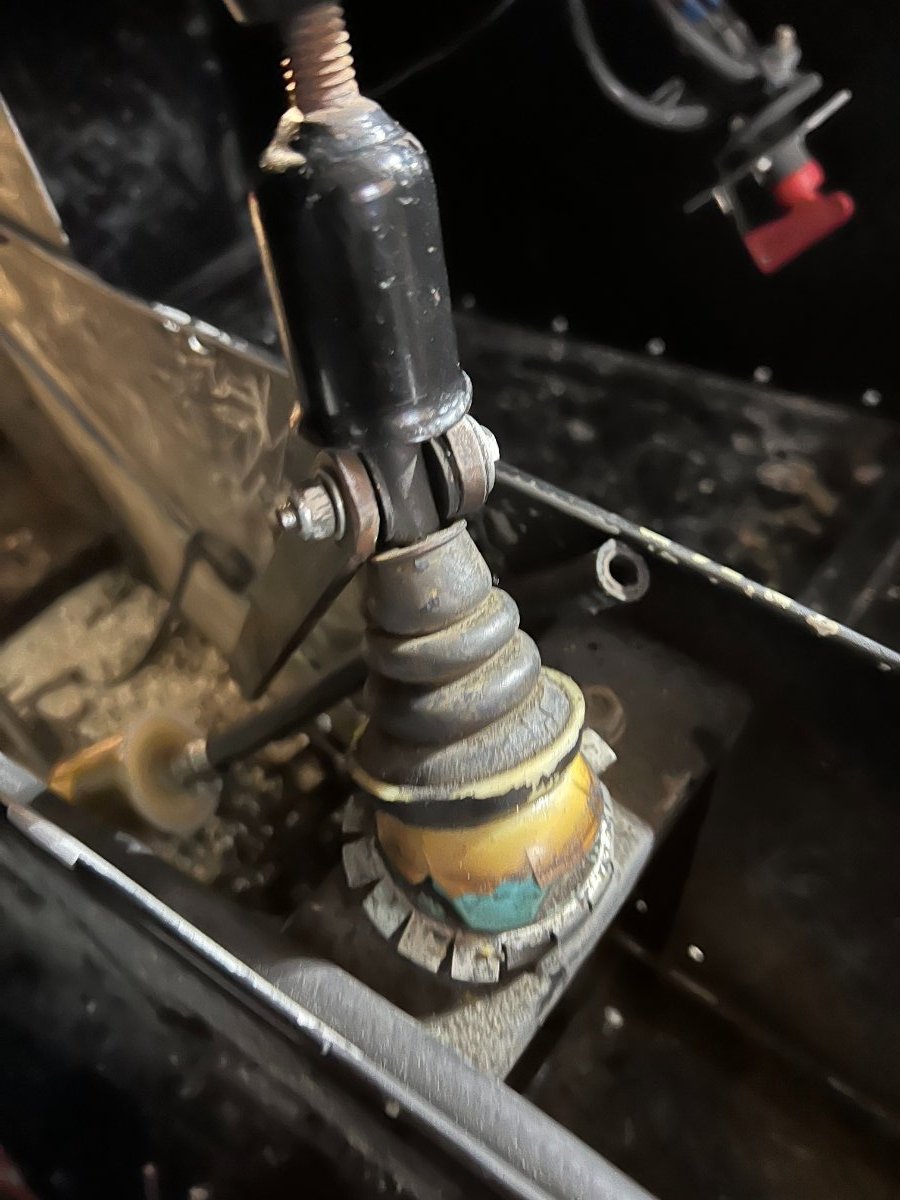
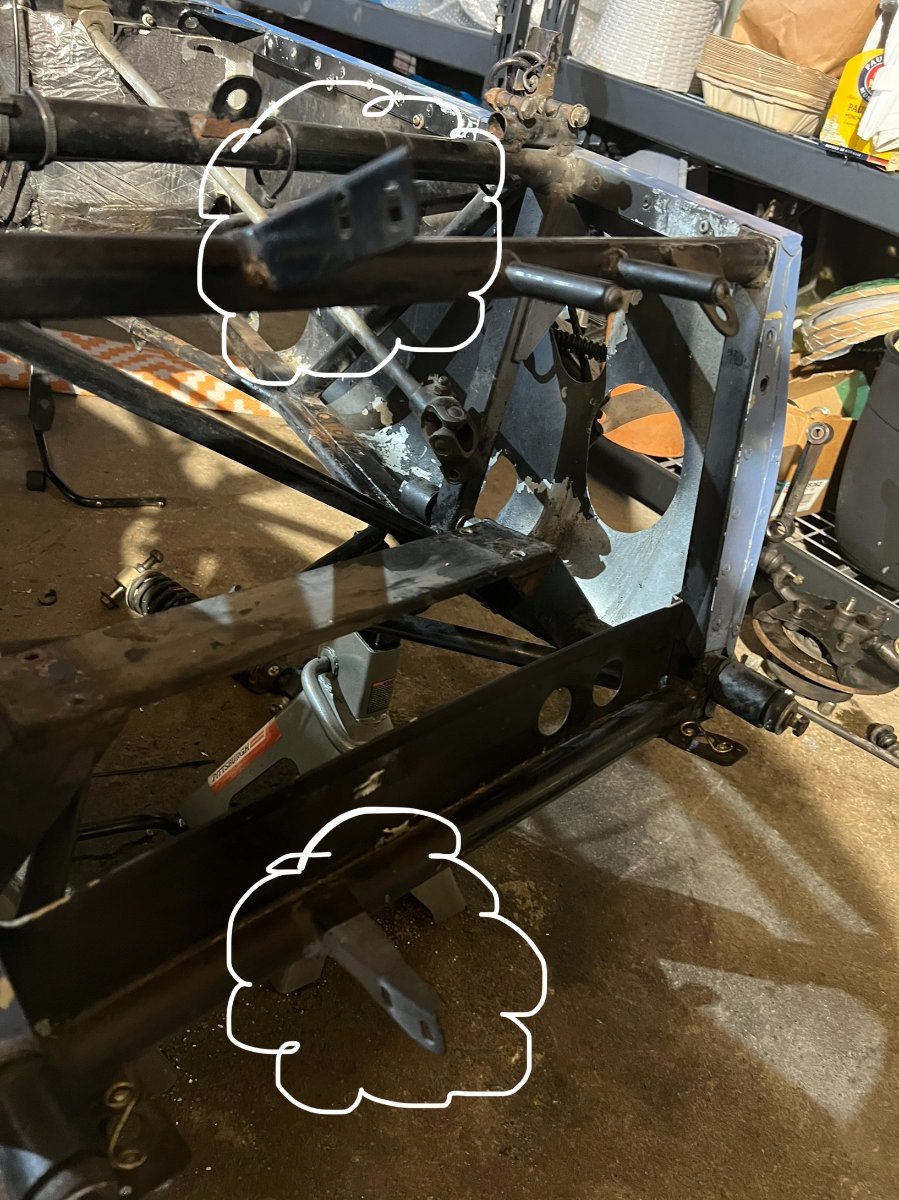
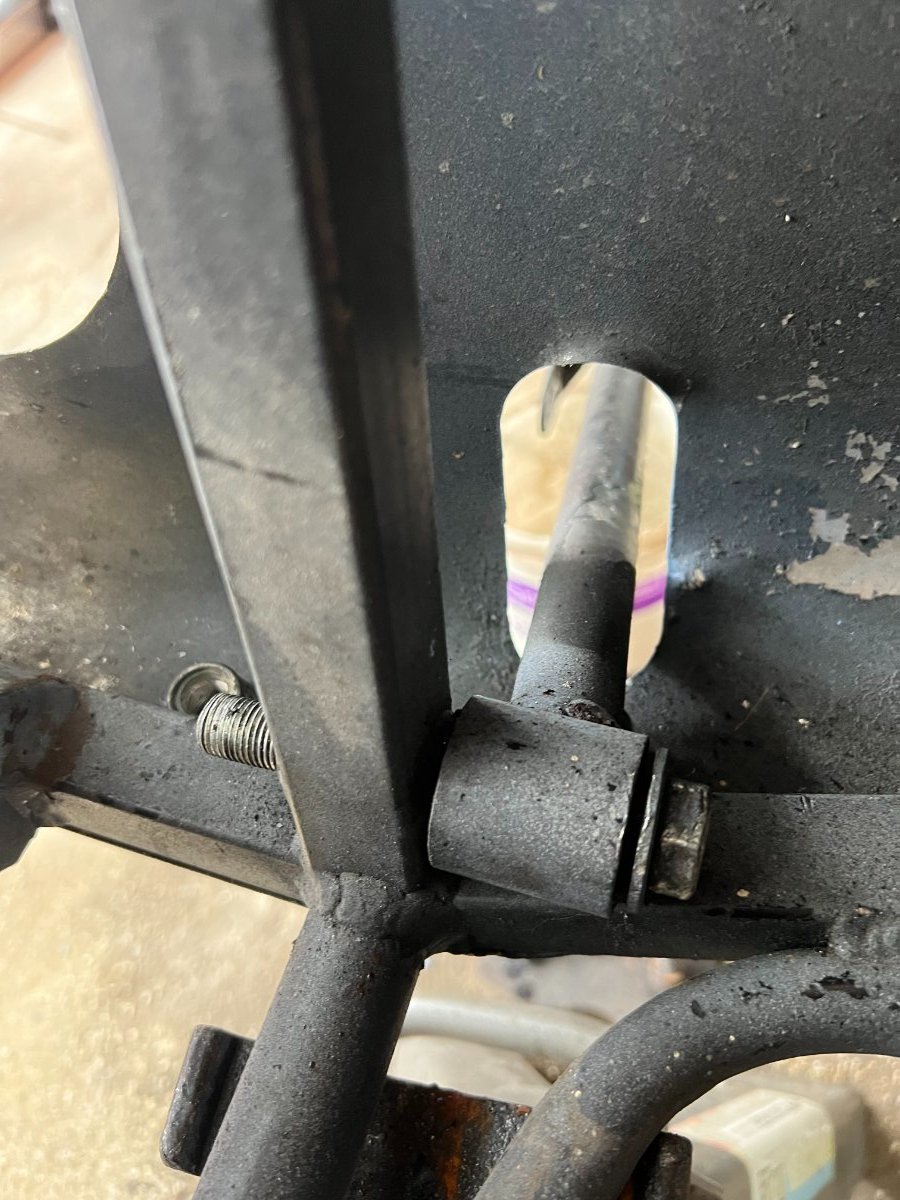
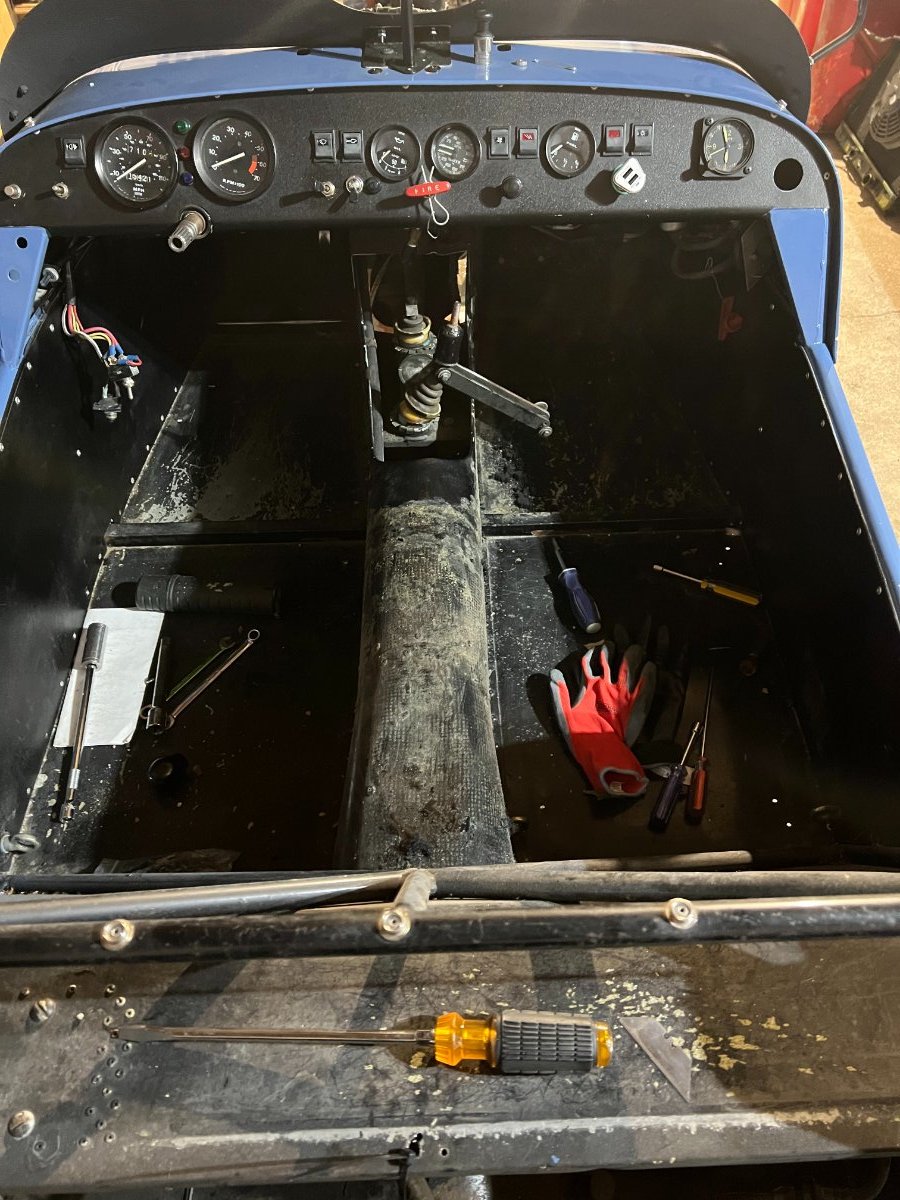
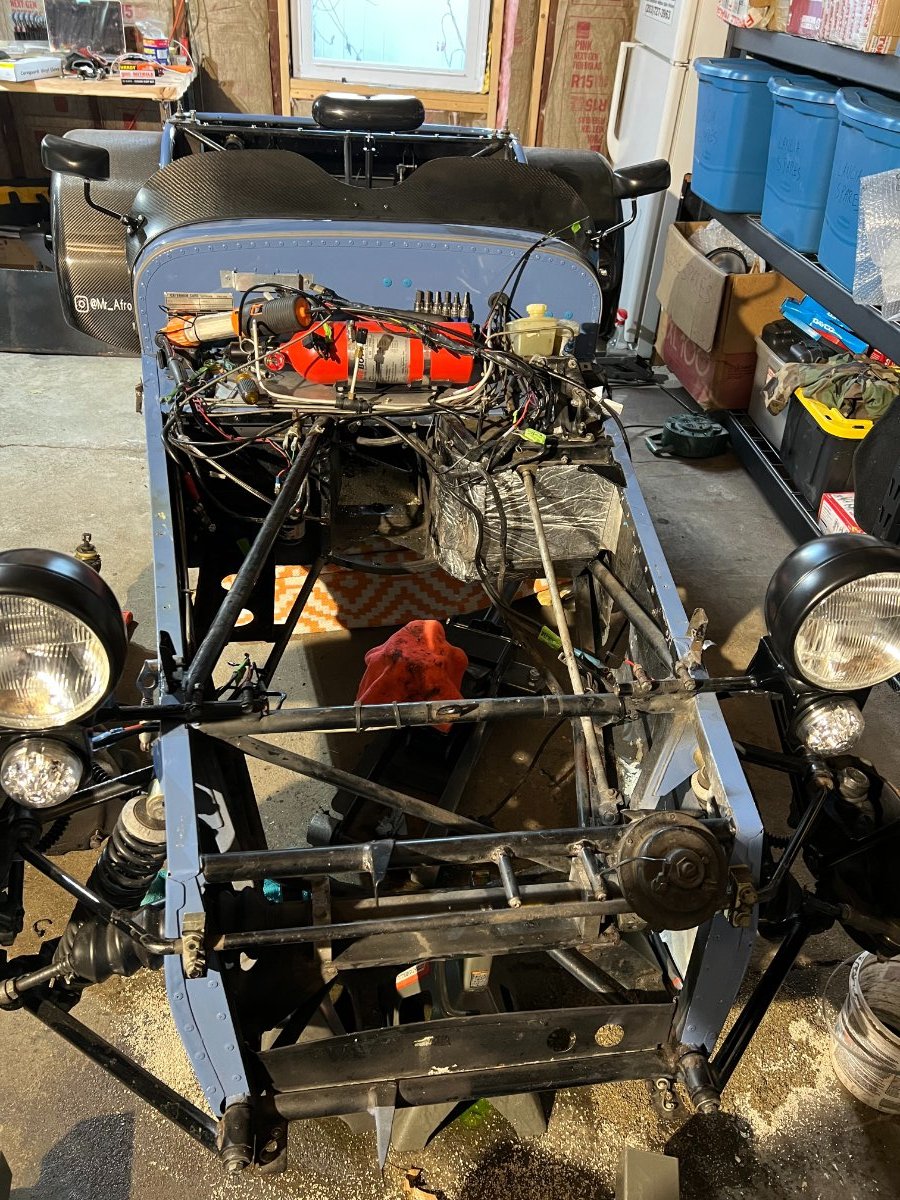
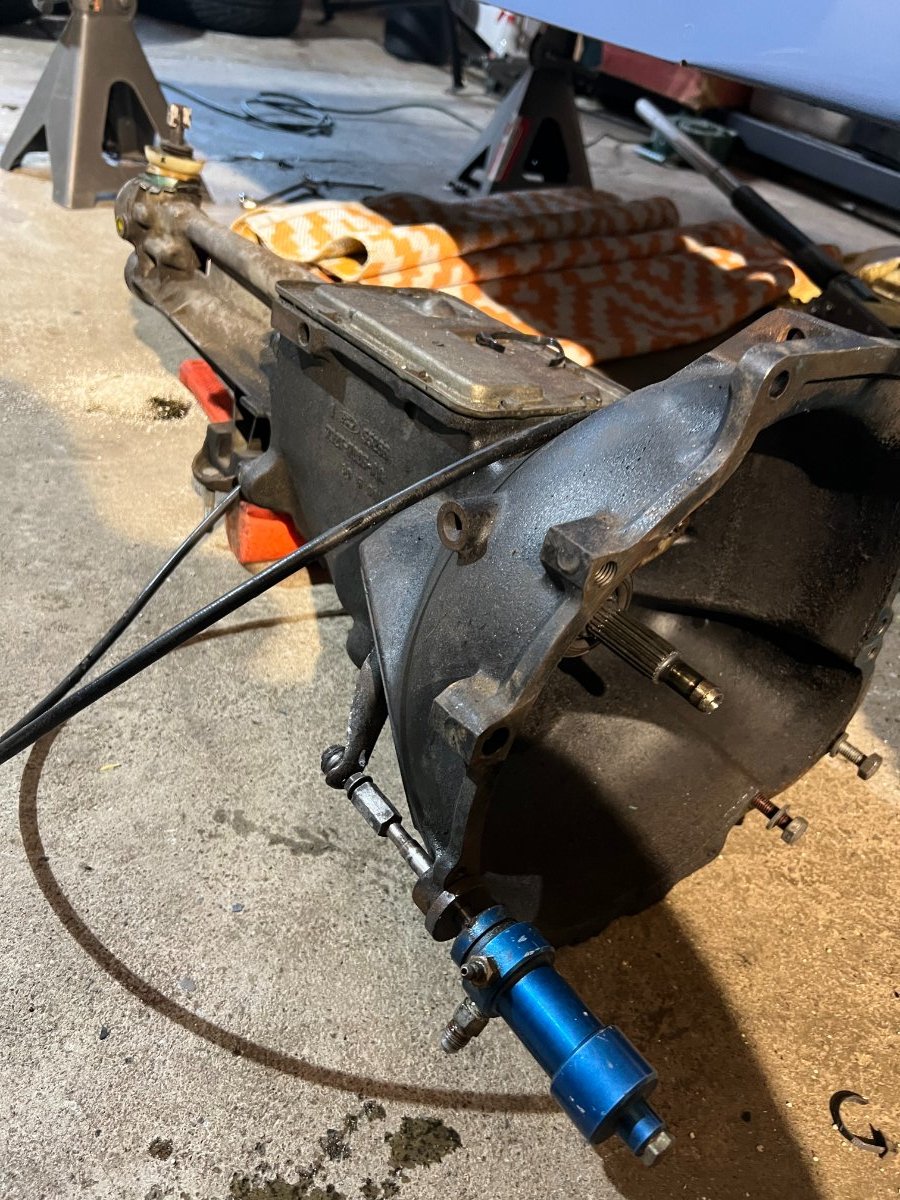
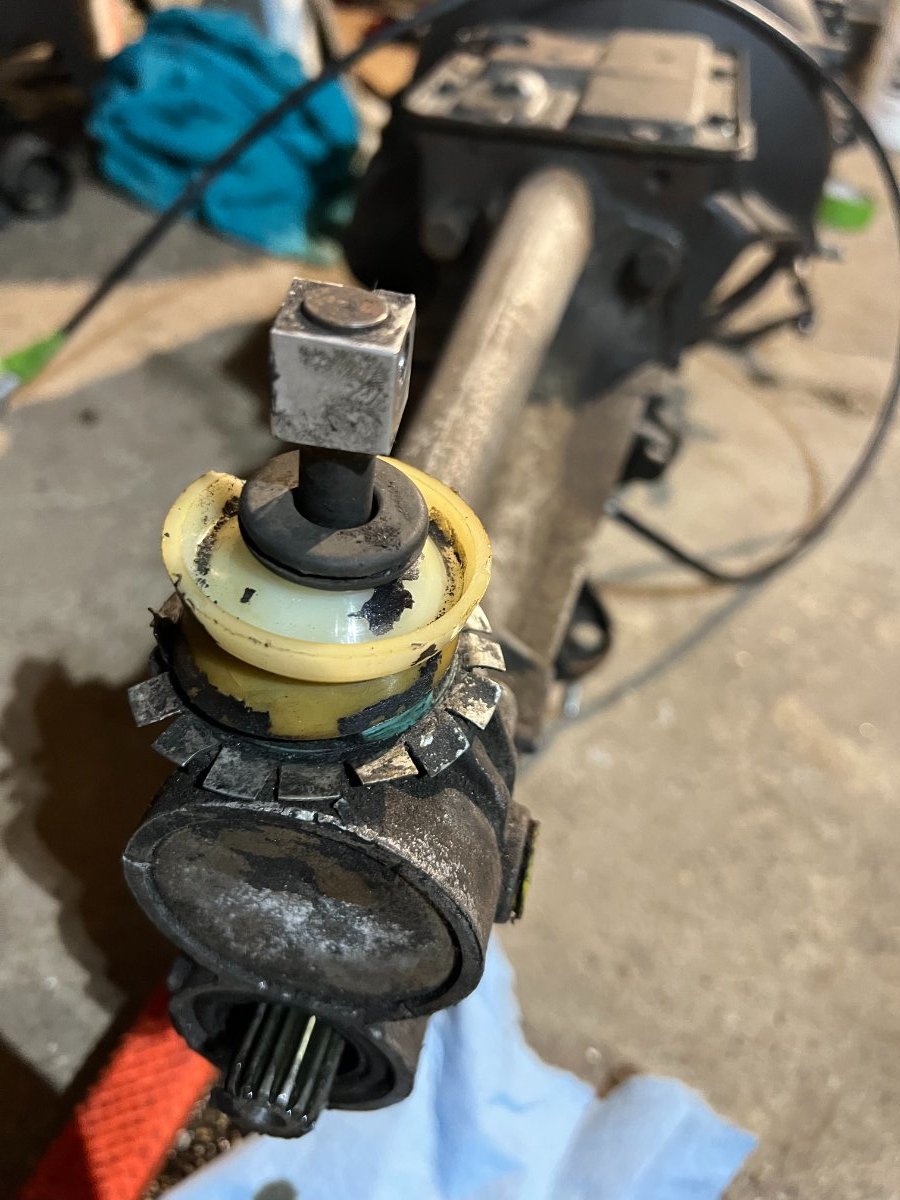
The upper spring cap/perch is removable on my coilovers so i'm sure they can be serviced if needed. I would probably go with new if i considered that route though, as they aren't too expensive. Removed the wiring harness today so i can clean it up, strip out anything obsolete, repair any improper circuits and run new feeds where needed. There's close to 40 years of history on this chassis and it shows, but this is how i love to get into a new platform; from the ground up! Wiring gremlins... The wiring to the lighting circuits front and rear were the most mangles. Fan circuit was also altered to convert to a manual fan switch in the cockpit. Contemplating if i want to retain that or go back to standard. I will be running a new aluminum radiator and a sealed coolant system. . Temporary mod i made after reason someone doing similar. Installed mini fuses in place of the standard fuse block as it kept tripping prematurely and causing strange behaviors while driving. I will be updating to a modern fuse panel when the new wiring harness goes back in. Also took out the front and rear wings after the harness was removed. The clear coat on them was looking tired, so they'll also be refreshed and cleared. Here's how she sits today. Chassis is so light at this point, makes it easy to move around. Contemplating ringing a friend hook up to a fresh coat of paint on it. won't take much to get it done with a bit of prep and masking...watching out for scope creep (but this is good scope creep ha!) As I end today's update, 2 Questions: Q1 - Anyone know what these brackets were for? I plan to fab up some mounts the new radiator at this location (in front of the crossmember and under the nose cone), but just curious what they were for from the original build. there don't appear to have ever been used. Q2- Does anyone know if these shifter bushes are still available for purchase? I will shoot Chris at Redline a message but figured it's always good to ask here first.
-
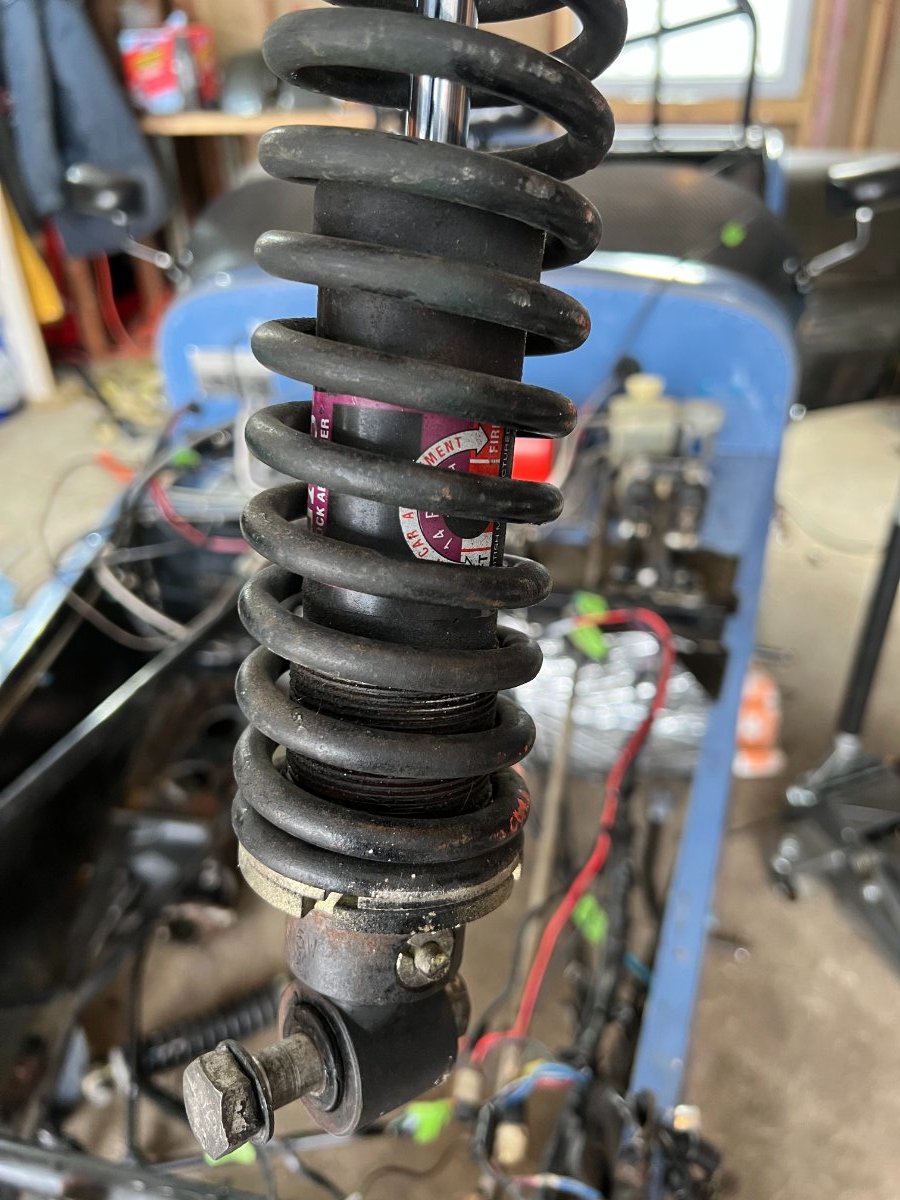
@Pokey Any leads/ideas on where to get a rebuilt done? I remember a few years ago, i asked all the race shops around me about rebuilding the bilstein shocks on my Cossie coilovers and none were willing to take it on. I looked online and the pricing for new units doesn't seem too bad for all four corners, even with UK shipping; will have to compare that with rebuild cost.
-
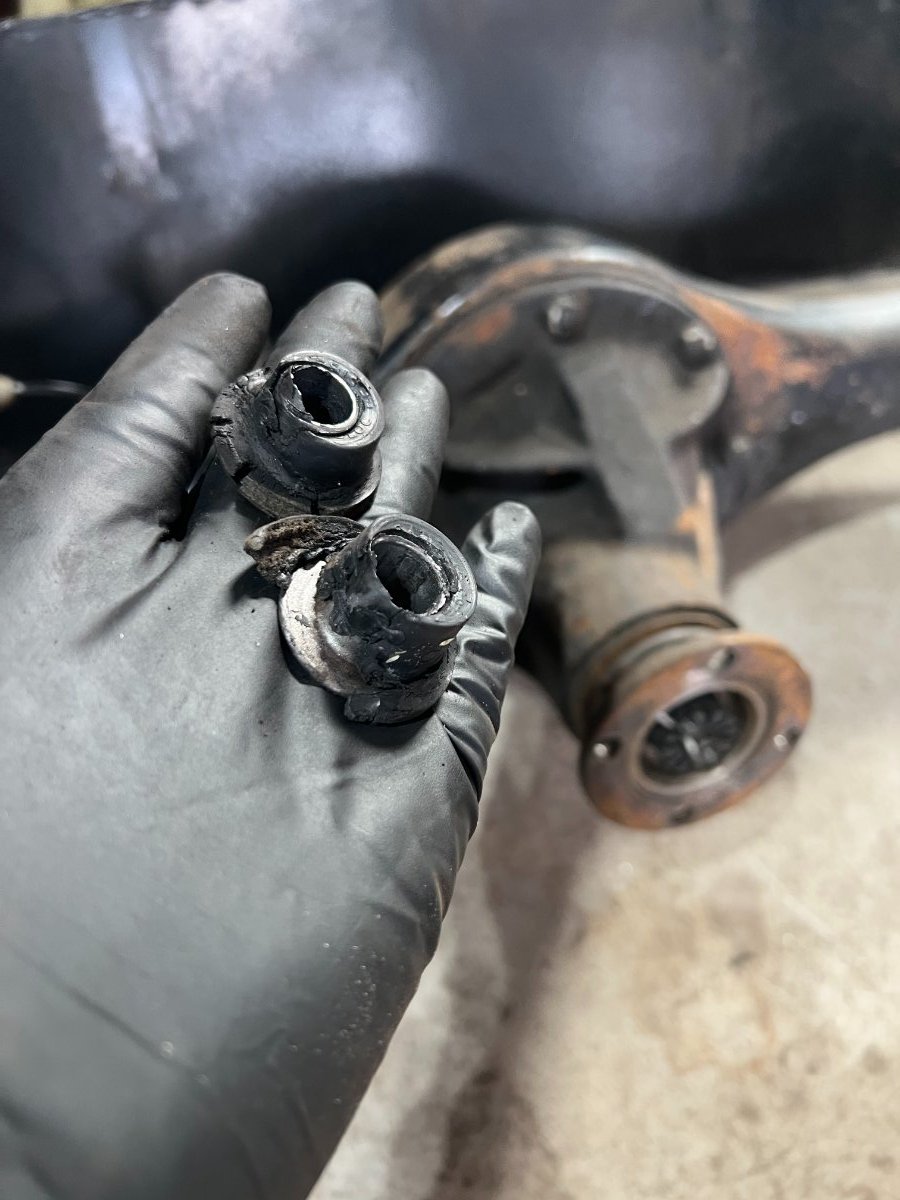
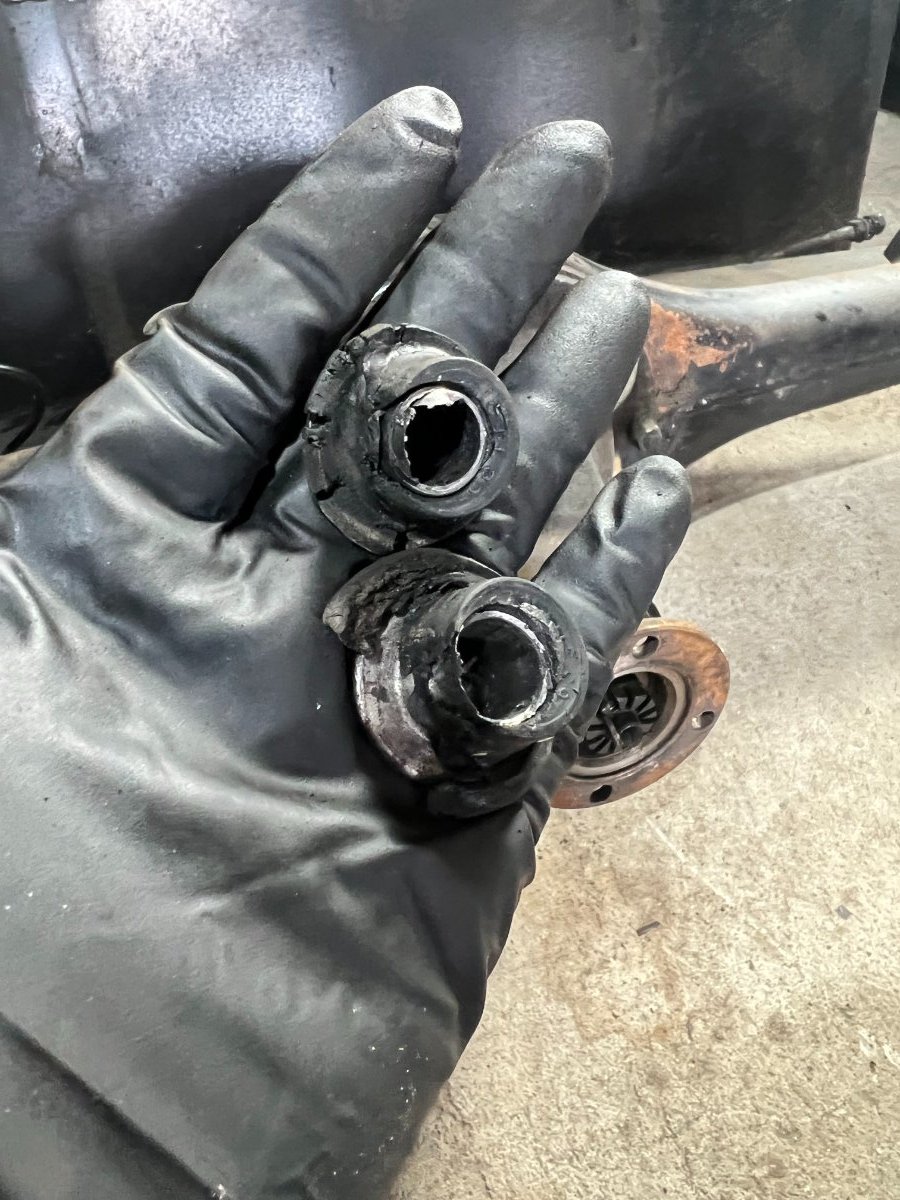
Thanks for the feedback guys. I gave a go again at the lower arm and upper arm ball joint but they didnt budge. I have some other ideas after getting my hands on the assembly manual for a 1988 caterham S3 (same as mine) so will report back when (not if) i get them out. I just hope i can still purchase the bushes and ball joints after i get them off. So earlier this evening. I got the rear end off! after reading Mike (Croc's) thread about the bushes on the rear A-Frame, i was eager to check mine out as well...Take a look! Question: is the a readily available (somewhat direct swap) LSD option for the live axle? Just out of curiosity and for my personal edification i will check out quaife. . A Nice empty rear end! Disassembly of wiring happens next!
-
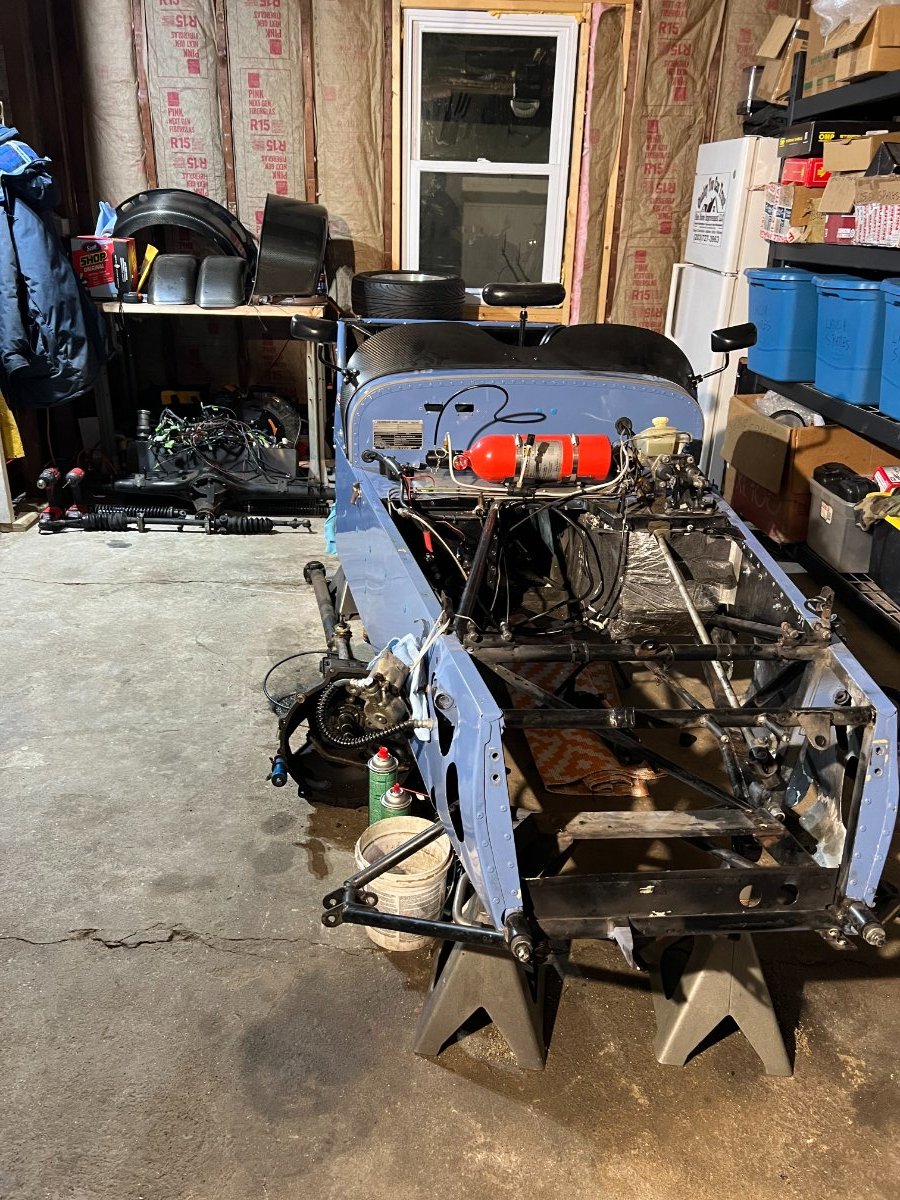
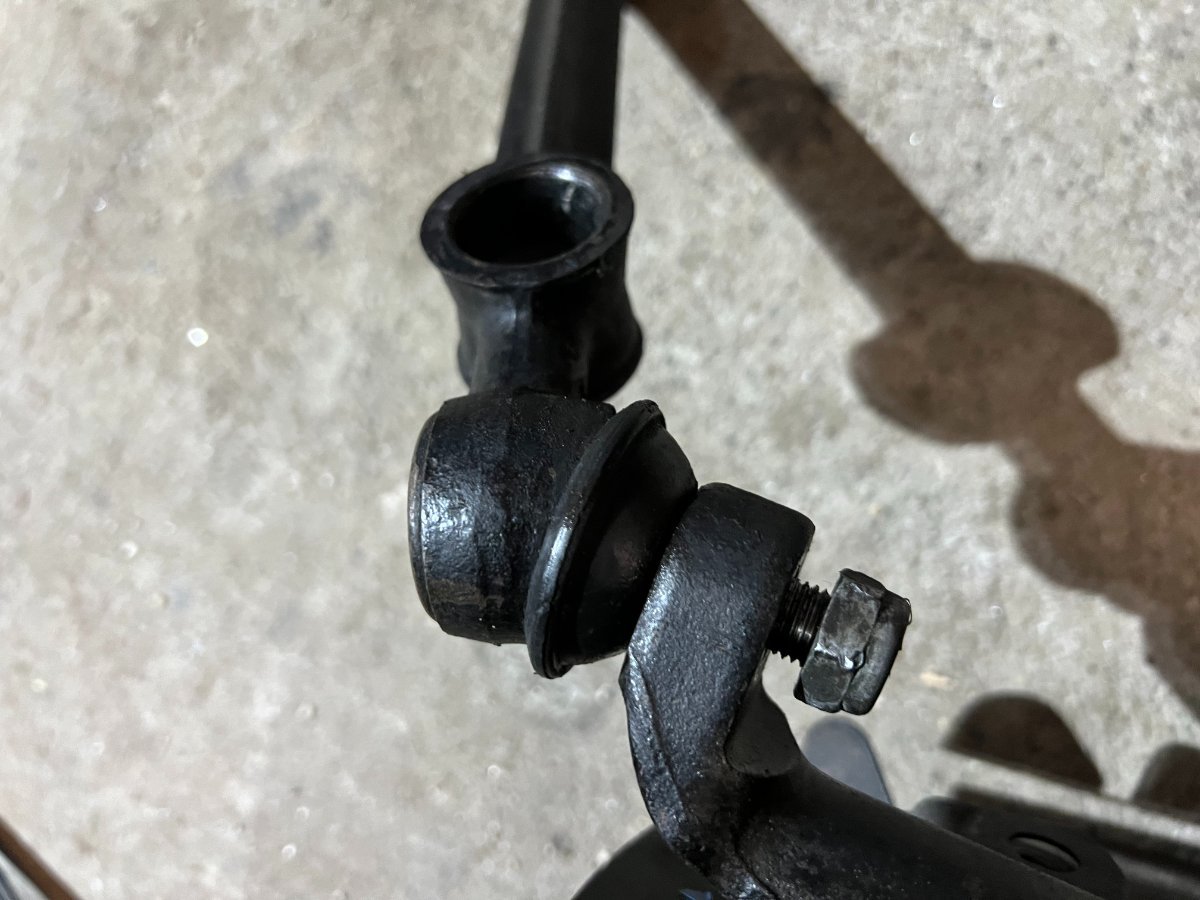
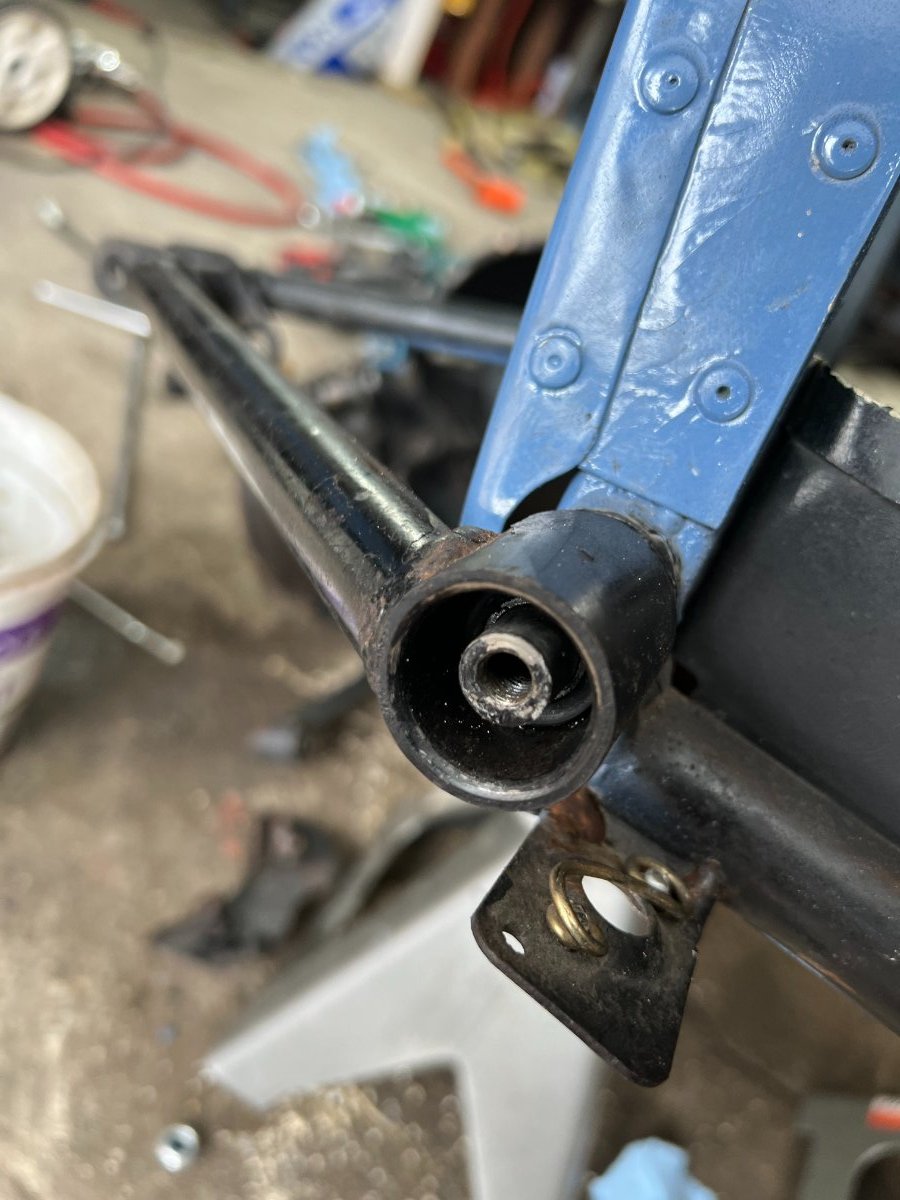
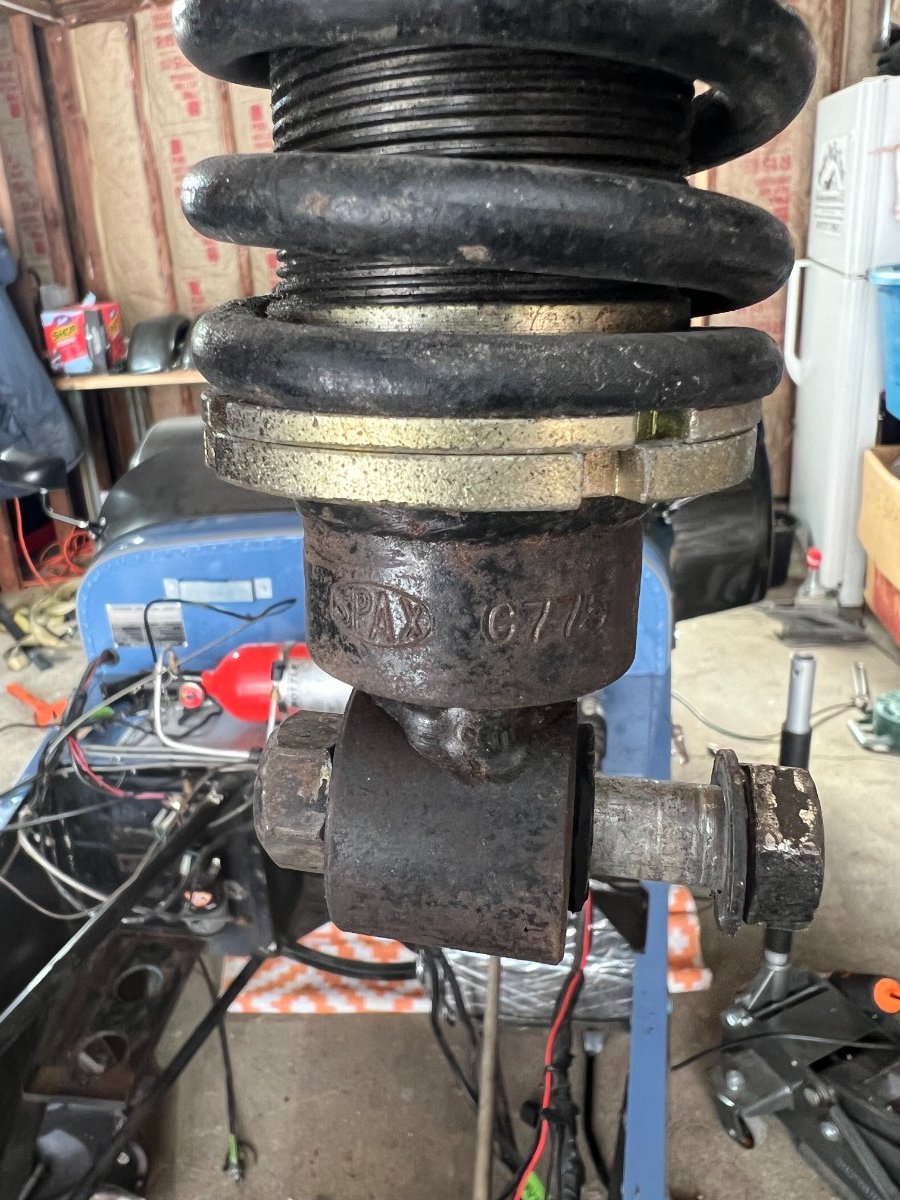
So i've spoken to a number of folks in the past couple of days and i think i will follow through with my current plan for a straight forward refresh, retaining my type-2 box and enjoy the car this season with the current setup. The trans has been handling the tq without issue, so i'll concentrate on learning about this platform from taking it apart and putting it all together, then some more from driving it through the season. At the end of this year i will decide if the best path is to keep it as is, Progress with modifying or if the track bug really bites, consider selling to upgrade to a newer chassis as better base for future mods... Also for anyone who has an instagram account- My username is Mr_Afropreneur. I have and will be uploading frequent in depth video updates on IG stories of the refresh. That said, Made some progress today disassembling the front end ( lots of consumables need replacing, bushes etc). Will also be refinishing hardware. Front end disassembled, less lower control arms: . Question- Does anyone know what two perpendicular brackets coming off the upper and lower front chassis rails are/were for? Having a royal pain in the rear getting the lower control arms off the chassis and the upper control arm off the hub...have thrown the book at them but they wont come off. Any tricks to this? it shouldn't be this hard to get off. The bolt in the back appears to be seized on the bushing on both driver and passenger side, but i wonder if i can get the whole arm off even if i got those bolts out, since there's not enough play in front of the rear section of the arm (to the square stock chassis member), to slide the front section of the arm off it's threaded sleeve... hope this all makes sense. it essence, it appears to be wedged in. The good news is that the bushes on the lower arms are in very good shape and the arms move freely, so worst case, i can keep them on the car for the refresh. It would definitely be easier to get them coated/painted off the car but nothing some careful masking wont do. Lower arms : Upper arms: Upper control arm is very tight as well wher the ball joint fits the hub. I've sprayed PB blaster, let it soak and gone at it with a mallet but they wont come off. I almost suspect these may be original pieces and have never been off. Coilover assembly - Appear to be cosmetically beat but still in good working order without leaks. Ride height and dampening adjustable- Part number Spax G775. What is the good word on these? Would they have been original or upgraded units. I suspect they will be good enough to run after cosmetic refresh. . Next up this week: Removal of the rear suspension items and then the wiring harness.... Stay tuned.
-
I was worried about that as well, getting it off and on to the ground once assembled will require a herculean effort . I have mine completely apart at the moment and i have it sitting on some heavy duty jack stands about 18-24" off the floor and able to do all the break down and reassembly comfortably from a rolling stool.
-
I've used the adhesive style reflective thermal insulating material on my xflow seven and it made a huge improvement. I installed this just around the footwell and partially into the trans tunnel areas that were accessible since the engine and trans were still in the car. Now that i have everything apart for a refresh, i anticipate doing something similar (or more robust if i can find) before everything goes back in. I agree it can be absolutely brutal if driving for long periods without some insulation in place. I believe what i used was purchased from Amazon.
-
Perfect timing Michael. I'm interested in the T-9. I just started a build thread for my xflow 7 refresh and was advised by Burton to ditch the old Type 2 in favor of a Type 9.
-
Right on!
-
Oh yes. i've already located 2 Type 9s. Just researching now as to what is involved with the conversion. At the least, I understand the 1st gear ratio is not ideal for caterham and the driveshaft needs to be modified.
-
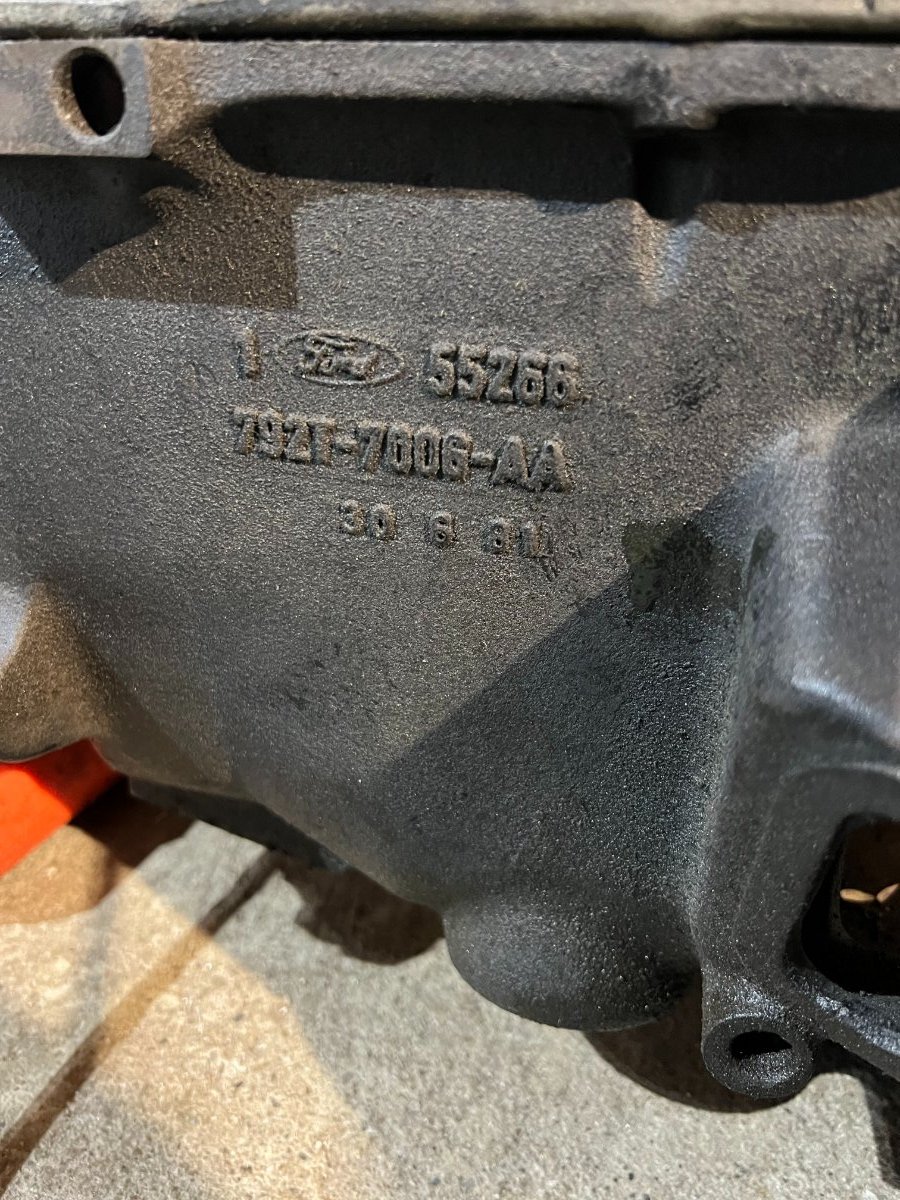
Thanks! why didnt i think to check Burton! i order alot from them already for my other cars. I just confirmed with Burton, that it is a Type 2 box, and Anthony who i spoke with promptly suggested that i consider changing it out if i plan to do any sort of hard driving!
-
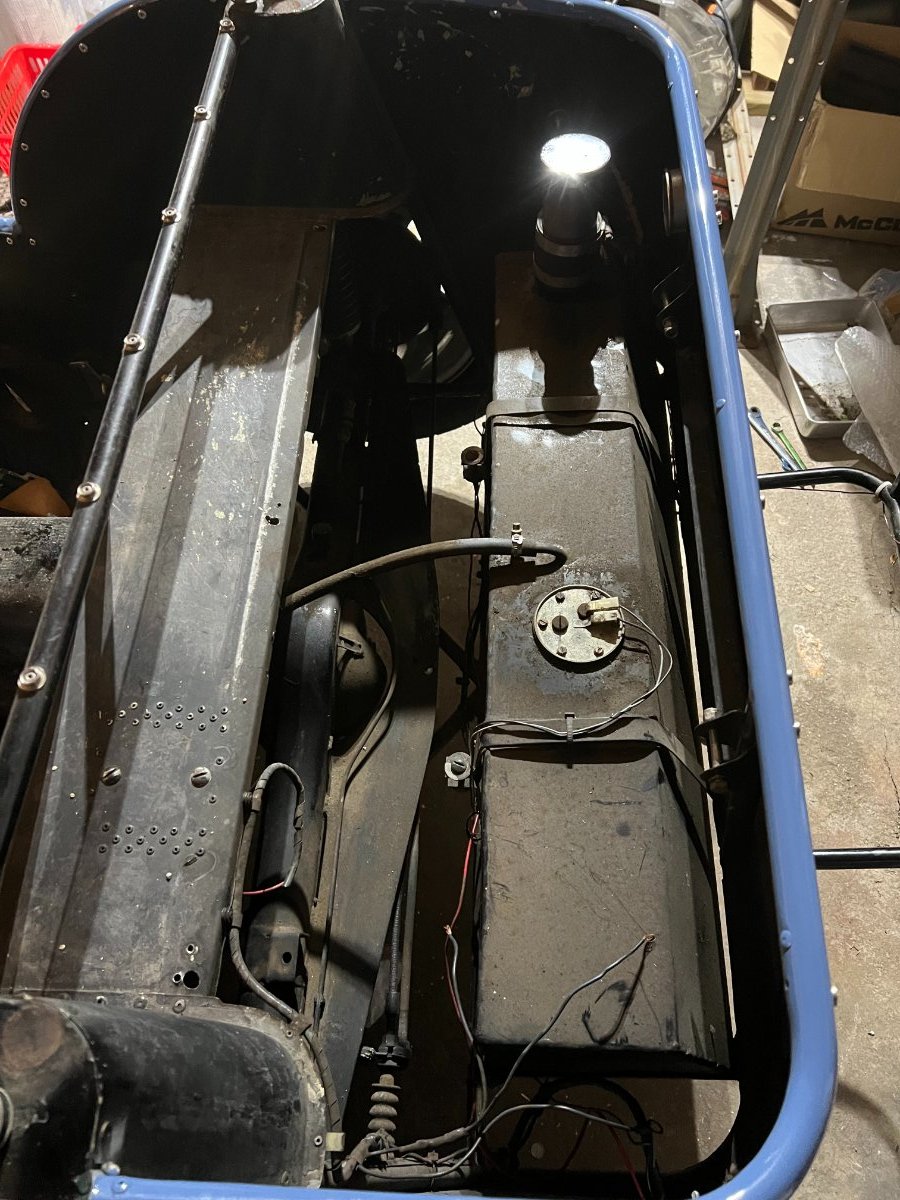
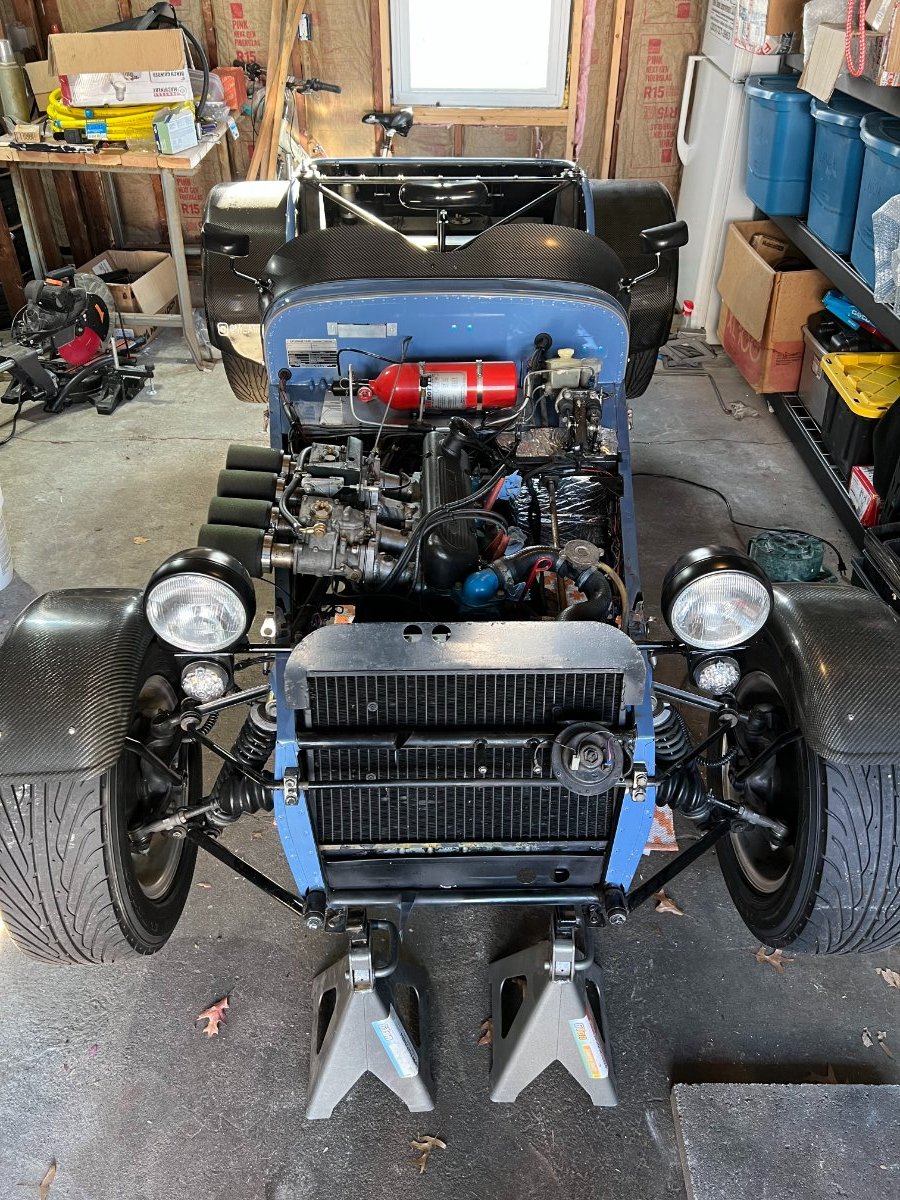
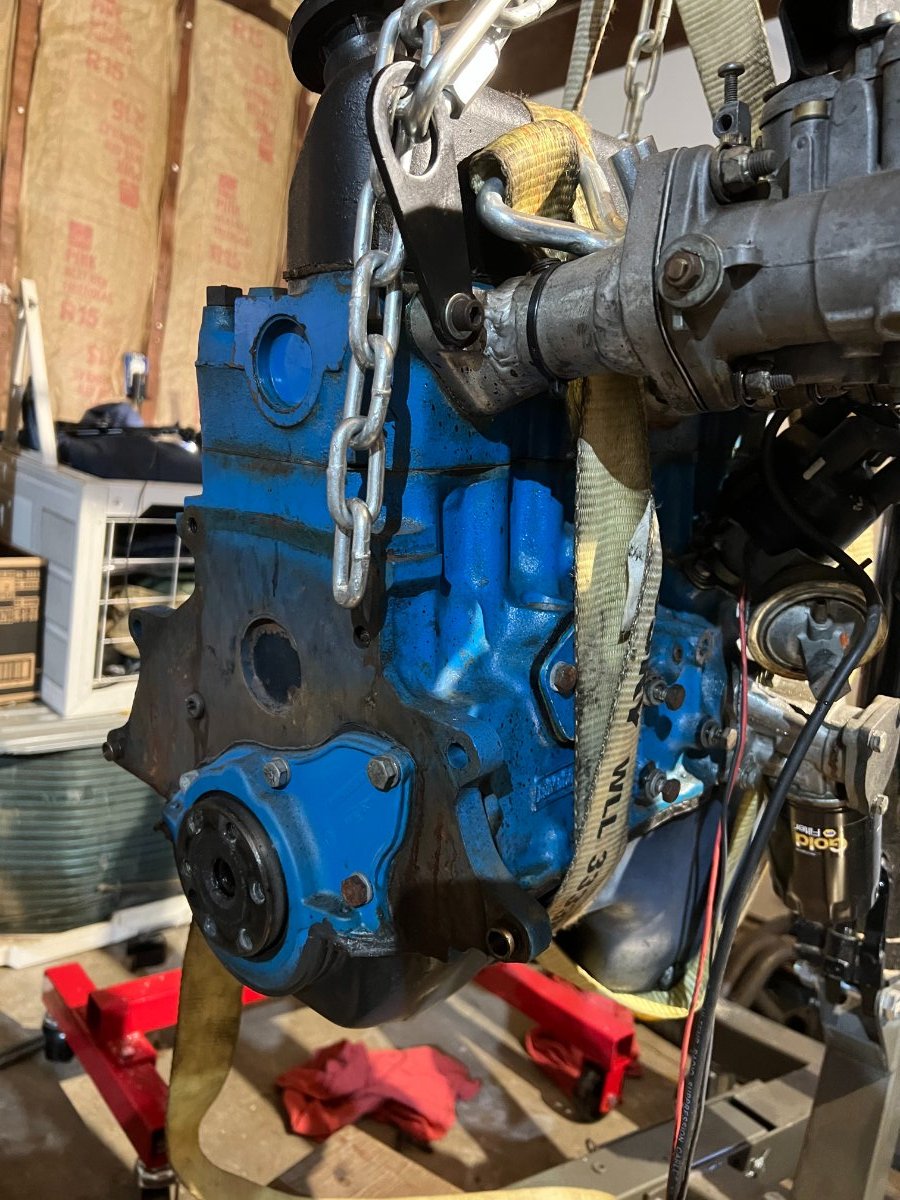
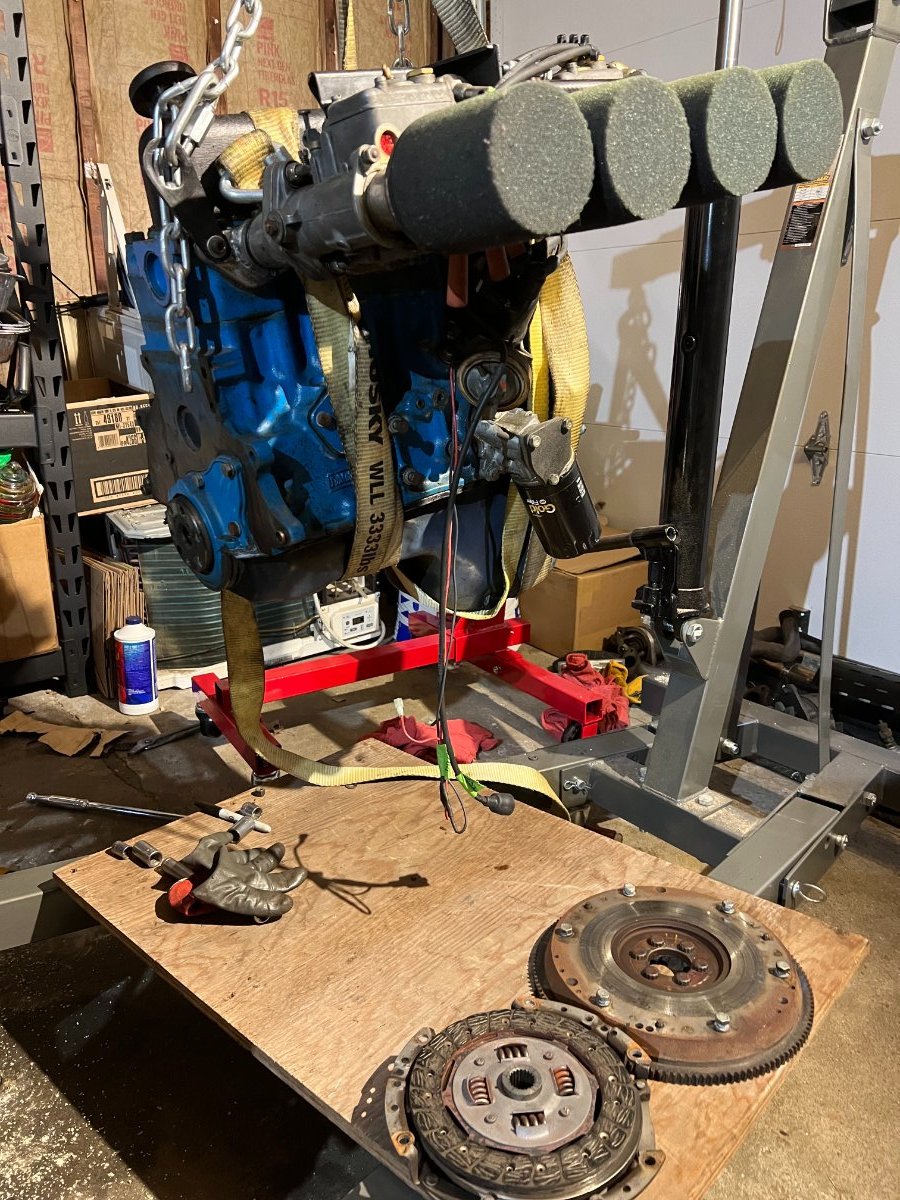
Hi guys, I'm finally getting around to taking on the refresh of my 1600 xflow powered Cat. I got this car a little over a year ago and really enjoyed driving it last year but in so doing, i discovered that there were some things on the car that need sorting so i started thinking of taking it apart (as i do with most new car toys i get) to establish my ownership baseline and build on from there. Well, it's winter now and while i have a few projects i'm doing on the Cossie, i have some free time to get on with this refresh so i can enjoy some worry free driving this season and maybe even attack some autocross or join some of you at NJMP in the fall :-) * So with that said i'll be taking the car mostly apart, doing some upgrades, addressing maintenance items, going over the chassis members to make sure all is structurally good and then cleaning/painting said members. * I will use this thread to update my progress, solicit and receive feedback on ideas and share ideas/learn from others... So here goes. First, Here is a photo of the car as she sat prior to the start of the refresh. exterior wise i don't anticipate changing much. She sits on 14" panasport minilites with yokohama tires that are old but we'll be swapping for some toyos this season. WEEK 1 : So this week is not over yet but we accomplished a few things: -Interior seats and carpet have been stripped out (The panels over the outer chassis members will remain). Contemplating if i want to remove scuttle, but will most likely have to as i will need it off for sorting, rewiring the car. lots of loose wires, cut ends and dodgy connectors there! -trunk has been stripped out (removed and inspected fuel tank). Lots of 30+year old dust built up there! I plan to add some anchors for harnesses, however i have noticed that most Caterhams have a square stock or flat cross brace at the top of the seat back (which makes it easier to add said anchors). Many parts of the chassis in my car is round stock including this cross brace so i need to decide what to do about this. May cut and weld in square stock or drill through and reinforce with bracing... more to come on that. -removed engine and trans today. Plan to relocate the radiator forward to under the nose cone area. Still deciding which rad to use. I have a brand new rad that was supplied with a 1984 build but not sure if i want to run that. Thinking of a new aluminum rad instead. Also will be installing header tank. Before After engine and trans removal This is where i am today. Taking stock of the parts i have and still learning the platform: Engine: Was rebuilt and runs strong but carbs need dialing in. some oil leaks under carbs (cyl 1 and 2) and a few other minor leaks but other wise all good. front and rear main seals look fresh but will will replace regardless. I have a lot of consumables i purchased from Chris at redline but is there another source for crossflow parts in the states? Trans (4speed Ford): In overall good shape. Will change fluids. Need to make sense of he clutch slave cylinder used here. Also the clutch fork was not connected at the retaining clip in bell housing and not connected to throw out bearing...very strange and explains why clutch actuation was dodgy... Clutch itself appears fairly new and will likely be reused. Any help positively ID'ing this trans? Does anyone know if / where i can replacements of these shifter bushes on the trans?
-

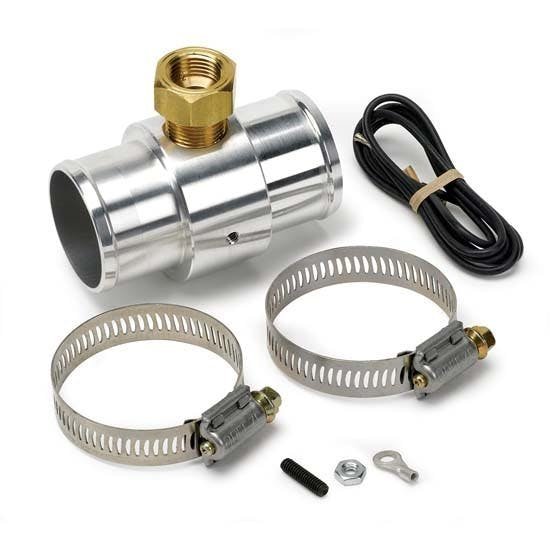
Thermostat housing for Crossflow header tank intall
NSXguy replied to NSXguy's topic in General Tech
Thanks for the discussion and inputs, I'll run with that. -Re-using bung on water pump for fill from header tank and relocating the temp sensor to upper rad hose using the saab adapter as suggested. As for rad placement, i will take some measurements to look into that as well. If i'm going to relocate that with a puller fan, it'll make sense to do before the header tank mod, so the rad hoses only get made up once. Fun. cheers, -
Thermostat housing for Crossflow header tank intall
NSXguy replied to NSXguy's topic in General Tech
Possible misunderstanding- I thought the saab piece you referenced earlier is what you used to solve the relocation of the water temp sensor to the lower rad hose (which seems like a good solution). Plan: -Relocate the existing water temp sensor into the saab adapter piece you linked, then with the bung on the waterpump housing now free, repurpose for coolant fill, -The new thermostat housing will have the air bleed nipple to new header tank and a bung for fan switch (which i'll rewire to eliminate the manual switch currently in place). Sound correct or am i missing any other piece(s) ?
-
Thermostat housing for Crossflow header tank intall
NSXguy replied to NSXguy's topic in General Tech
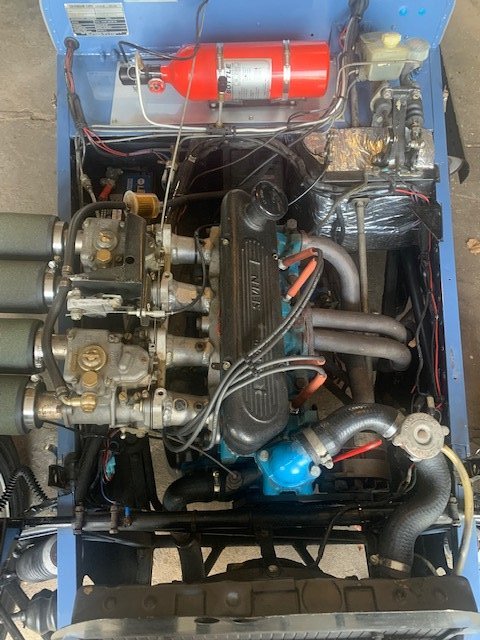
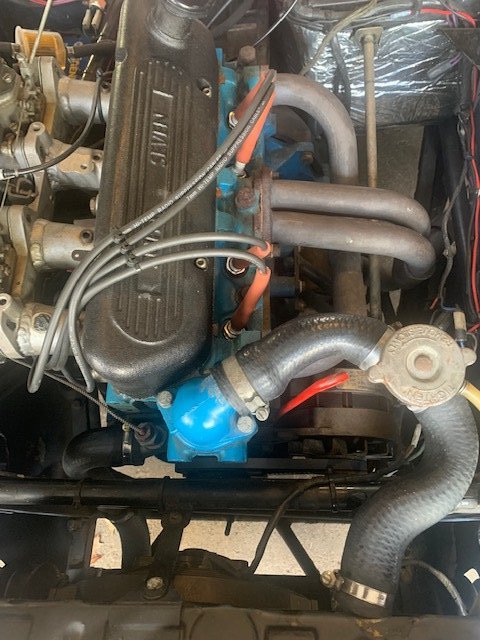
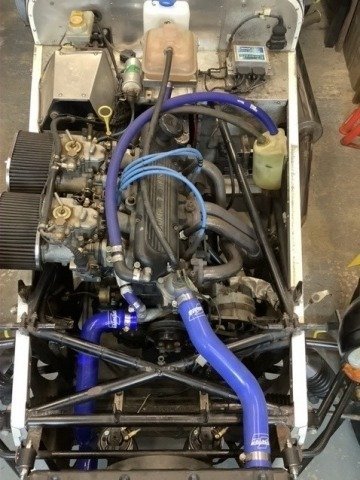
Thanks for answering one of the questions i was starting to look into. So if i understand, you relocated temp sensor into that saab piece and used the nipple on the waterpump housing for the header tank, yes? Few pictures of what my engine bay looks like. As an aside, ive noticed a few quirks on my car compared to many other period sevens. For one, car doesn't have the cross brace infront of the engine. I noticed some guys have their radiators mounted more forward in the nose cone area. My engine bay: . Other engine bays (X Brace):
-
Thermostat housing for Crossflow header tank intall
NSXguy replied to NSXguy's topic in General Tech
Thanks for sharing that John. My current setup has a manual switch in the cockpit to turn the fans on, but ideally i would prefer with this upgrade to have the fan switch on the housing and operated off water temp. Alternatively i could leave the fan switch as is, and just install the housing with nipple and get on with it; that's if the other option proved too challenging but i don't believe it would be...seems straight forward enough. -
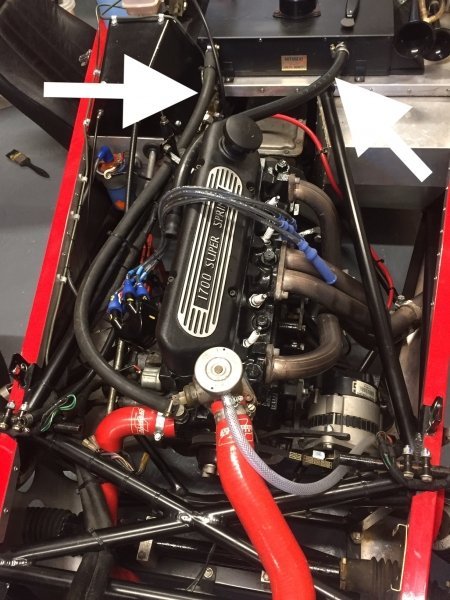
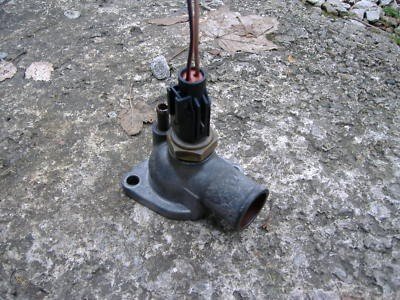
Hi guys, i've been doing some research and finally going to tackle this upgrade and the only part i'm having a hard time zeroing on is where to source the correct thermostat housing with the vertical pointed nipple (pictured below). Reference schematic. Something like this.
-
updates on this? will be doing something similar on mine this winter.
-
would be nice if we could wing a CT/MA sevens meet up
-
@Anker curious what rpm do you idle at?