mrmustang
Club Member-
Posts
780 -
Joined
Everything posted by mrmustang
-
I'll take the cover off if someone wants to take a look 2: I'll hold it, then reinstall 3: No matter which car I have with me, I always let the kids sit in the car, in fact, I'll usually ask them "do you want to get a picture with your child belted in" They are, after all, the future of our hobby. Bill
-
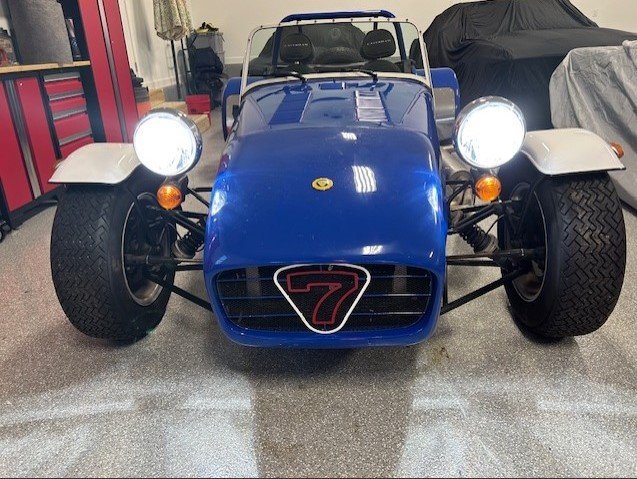
I volunteer my 7 if they want something to work on for a turn key Pectel 2 on a Zetec conversion package. I hate wiring, so if they want a car to work up a new harness to sell as a DYI to others, I'm your man. Bill
-
Two turns and the car fired up, cold idle at 1,800rpms #1 cyl-10 #2 cyl-10 #3 cyl-6.5 #4 cyl 10.5 I may disassemble the aircleaner cover and horns again to see if I can tweak #3 & #4 a bit, but my feelings are that it's running and I should leave well enough alone as I really don't know what I'm doing. Tuning wise, at this point, I'm just looking to tweak the throttle bodies and maybe fuel pressure (unknown at this time). Thinking with that done, the car should run really well and I will not have to touch the ECU. Bill
-
Ok, well I adjusted back to as close to original as I could get it. Car now idles at 1,400 rpms warm Cyl 1-10 Cyl 2-10 Cyl 3-10 Cly 4-5 Go figure- It starts, it runs, I've locked everything down and will allow it to cool so I can see if I can get it to fire again. If I had actual instructions on how to balance them, I think I'd be alright, but as of right now, I'm gun shy. Sent a PM to Tom to see if he wants to lay eyes on it. I'll be happy to throw it on my trailer and haul it up to him, even if it's for just the basics at this point as he has far more experience with this than I ever will. Bill
-
Did you send the whole assembly to them? Given my location, I'm wondering if taking my car up to 1turbofocus shop in NC (about 95 miles from my location) would be a better choice. I don't want to screw things up worse then I already have. Thinking I'll try for a few minutes tomorrow morning with a charged battery and see if I can get the basics down. Bill
-
Ok, so vacuum ports are plugged, fired the car up, still the same three to four cycles to get the car to run and took a quick read 1 maxed out at 10 2 maxed out at 10 3 sitting at 3 4 maxed maxed out on 10 Go to loosen the nuts so I can start adjusting and find them all loose already. Start at number 1 and all of a sudden I get a fuel ignition flash out of number 4 and the car dies. Reversed what I had done (I think) and killed the battery trying to get the car to run again...SIGH. Did I screw the pooch, or will this be a reversible error once I've charged the battery overnight? How can I get the adjustments done if the car won't run? Do I turn the adjustment downwards or upwards to lower the numbers on #1. Downwards will pull the thread in, while going upwards will pull the thread out (clockwise thread) Then again, how the hell can I make adjustments on four throttle bodies with only three doubled threaded (clockwise and counter clockwise) adjustment rods. HELP!!!!!!!!!!!!!!!!!!!!!!! Bill
-
I have a similar tool that I've used over the last 20 years on numerous vehicles. Can't beat the right tool for the right job. I have a cabinet draw filled with them. Some used once, some used multiple times, all saving me a headache. Bill
-
Might I suggest a picture or two of your engine and it's specs, the more you put out in your ad now, the less duplicate questions later. Spring is coming in the northeast, so buyers will be out looking for their next toy. Good luck with your sale.
-
Thanks for responding, that is what I figured, I'm going to try the small adjuster screws at the top of throttle body, if I pull the horns and their mounting plate off, I might be able to adjust the linkage while they are still on the car, but have a feeling I'll have to pull the unit and do it on the work bench. Time will tell. I'll post once it is done. Bill
-
I could have gone to the local hardware store (Ace 2.5 miles down the road), but with all of the cars and other fuel related items in my garage, it was easier, and probably less expensive to just buy a 110 piece kit, as eventually I'll need more. Once those are installed, I'll get to work on the throttle body butterfly adjustments, I'm going to try the adjustment screw at the top of them first, and if worse comes to worse, will yank the whole unit off and dive in that way. Per your earlier advice, I purchased the vacuum tool you linked me to on Amazon, vs using the old (35+ years old) balancing tool I have for my old SU equipped TR's. Bill
-
The Regular Summary of Classified Ads of Se7ens Found For Sale
mrmustang replied to Croc's topic in Cars For Sale
This just popped up in my facebook feed, seems like a good deal for someone: https://www.facebook.com/share/1BnkzF33hR/?mibextid=wwXIfr -
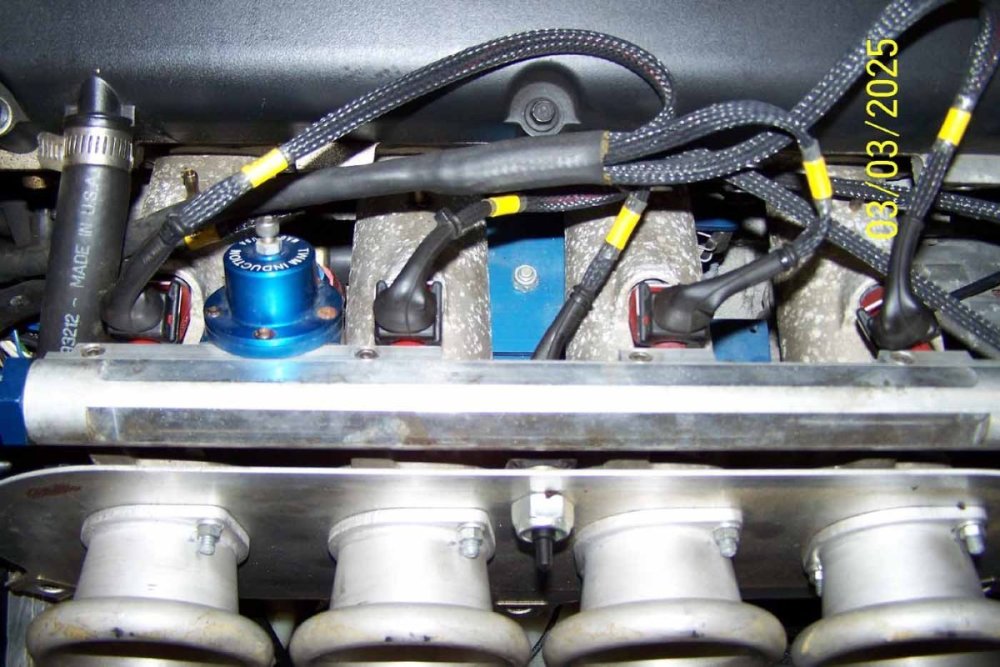
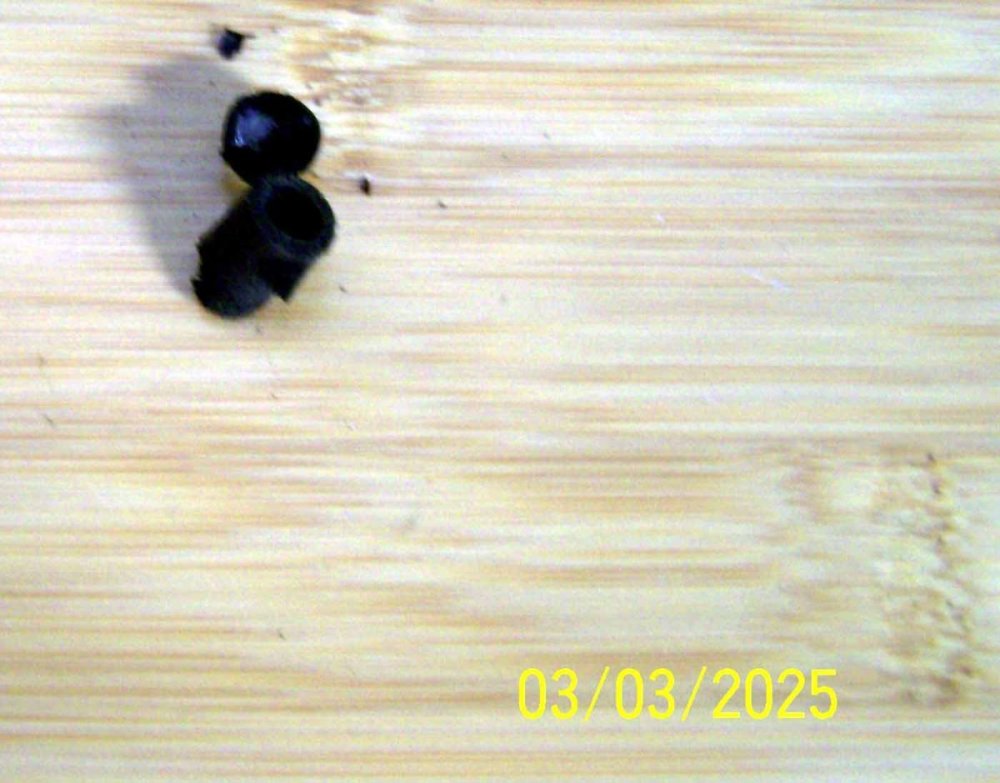
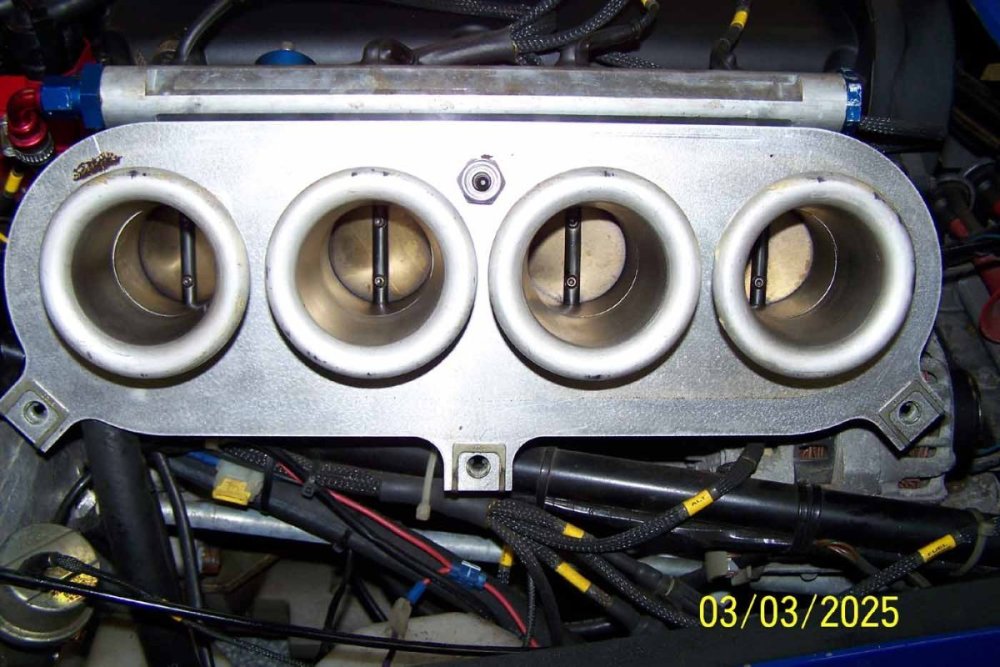
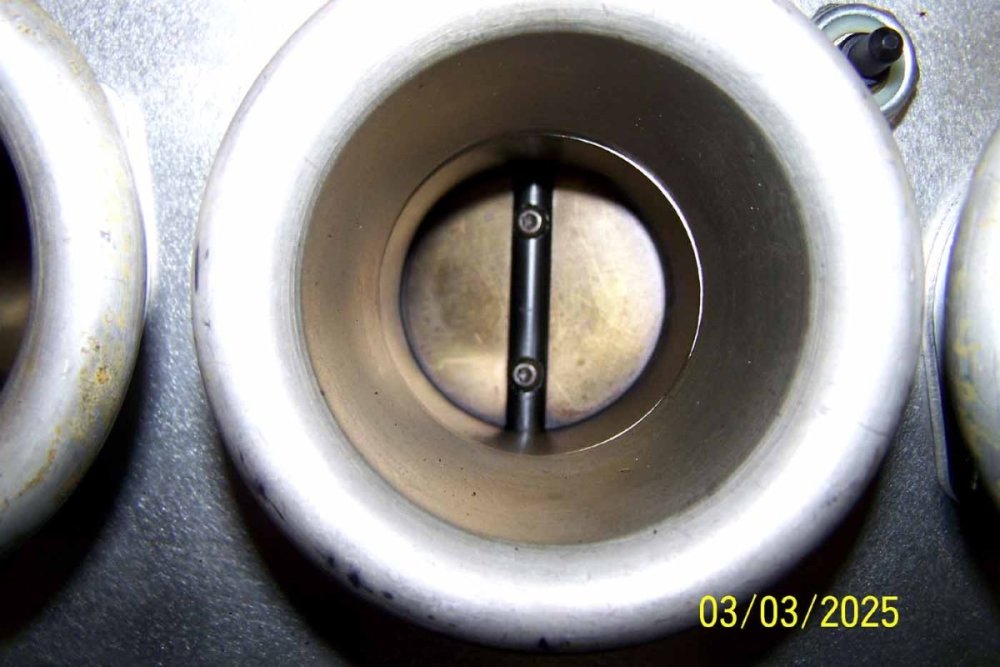
It's been awhile since I've posted, been trying to work on making the car as safe and dependable as I can while still scratching my head as to why the car takes three turns of the key (after 5 Mississippi's between each full turn to start so the fuel system is primed) to fire and idle. No fast idle appears to be set, and I cannot move the car till it warms up for a few minutes or the car will stall. Well, this evening, after reading old threads on the Zetec and separate throttle body setup (mostly Jervey, vs my TWM/Borla) I decided to go out and pull the hood off for the first time since it was back on the ground so I can pull some vacuum. Well, I see part of my problem right off the bat, the vacuum port plugs are dryrotted and cracked. Pulled this one off and it disintegrated in my hand, as did the other 3. HHHmmmm, maybe this is part of my issue, guess we will find out tomorrow when I get my new box of vacuum plugs from Amazon. I had a box of them, but ripped the new toolbox and cabinets apart and cannot find them. Frustrating, yet I won't loose sleep over the less than $20 it costs to replace with a new setup. Of course there is good news, as I could not find any drips or leaks after my replacement of the injectors, fuel filter, and some of the fuel lines Now for the next question, should all four throttle plates be adjusted the same way when the engine is cold? I ask as only number 3 is adjusted open at all, the rest are completely closed and do not pull any vacuum with my hand over them at initial start up. I'm embarrassed to say, but I was so happy to have the car running at all, that I added the air cleaner assembly and hood, and drove the car. and never looked at things any closer until this evening. Now I'm questioning my sanity and of course the cold idle adjustments. So, my warped logic would dictate that all four of the throttle plates should be adjusted the same on initial start up. Am I correct to think this, should I adjust them to be slightly cracked open when cold, then balance and adjust again once the engine is at operating temperature? I've watched enough videos (again mostly Jervey related), and have some experience with SU's and weber carbs to know how to balance using the right tools, but when it comes to fuel injection I'm strictly an amateur. Any guidance would be greatly appreciated, this way, once I've crossed these last few items off my list, I can see if I need to jack in to the ECU, which I'm less than an amateur..... Thanks in advance once again. Bill S.
-
What year is your car, and is the BRG you are trying to match the original paint? Are you planning to paint the car yourself? If not, your local paint shop will be able to match the paint. If they are not equipped with the computer laser reader, their supplier of choice can get it from their manufacturer of choice. As for BRG, even the "HU" (Mazda) or "1753,8461,HDJ, HFB, HER, and 753 (Jaguar) color codes will each come back with multiple "alternate mixes" that will each require a spray out card and most likely additional tweaking of the mix (down to 1/10th of a gram per toner used for the mix itself) to perfectly match your cars exact color. Bill Retired bodyshop owner
-
I plan to upgrade from my standard 3 point to the Caterham 4 point I got from Rocky Mountain Caterham. Did this in my 2014 Caterham without any issues. No flapping in the wind, if they did, they make strap holders for this.
-
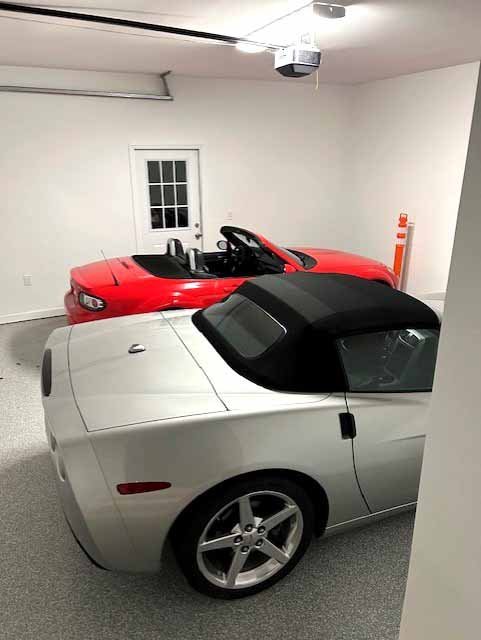
Welcome to convertibles anonymous, we like spending other peoples money. Bill
-
Ahem, I resemble that remark and respond with the following: You can never have too many convertibles Now I guess I have to sell one Bill
-
Fuel Filter on 2007 Caterham 7 SV with Ford Zetec SVT?
mrmustang replied to Taber10's topic in General Tech
To break out the quote of my post above: Fram G3727 and the ACDelco GF952 will both be a bolt in swap for your current fuel filter. Bill -
Here in South Carolina those could be fighting words
-
Headlight replacement/upgrade---IE: Holley Retrobright
mrmustang replied to mrmustang's topic in General Sevens Discussion
Lights are in, on first blush, they are 5-10 times brighter than the originals. The first picture is a comparison between the two. New LED light assembly on left, original on right Next is the low beams of both new lights installed Followed by the high beams also to show light pattern As for the original concern with the nut and bolt at the bottom, that was much to do about nothing, as the bolt does not go through the headlamp retaining ring like I initially thought. I kick myself for not wearing my glasses when I was removing the original, made more work for myself than I should have. Now I need to find a level area and wall so I can adjust them, if needed. Bill -
Headlight replacement/upgrade---IE: Holley Retrobright
mrmustang replied to mrmustang's topic in General Sevens Discussion
I chased the ground wire back when I first saw how it was set up and found a secondary ground on the chassis already. Figured I'd duplicate what I saw, better to have too many grounds then not enough. The one I'll not be reinstalling is the extra ground wire for the daytime running light, which was missing it's bulb and clearly not being used. Hoping to have the new lights here tonight or tomorrow (says today by 7pm, I'm pessimistically optimistic), will fit in the housing to see if they will work, then go from there. Thanks again for your input and guidance Bill -
I'm only here for the pretty pictures
-
Headlight replacement/upgrade---IE: Holley Retrobright
mrmustang replied to mrmustang's topic in General Sevens Discussion
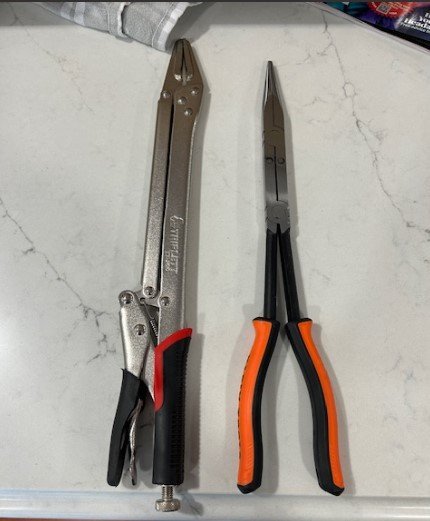
This is plan "B" if the above does not work the way I want it to both are 15" in length, but will require a third hand from SWMBO in order to make it work. -
Headlight replacement/upgrade---IE: Holley Retrobright
mrmustang replied to mrmustang's topic in General Sevens Discussion
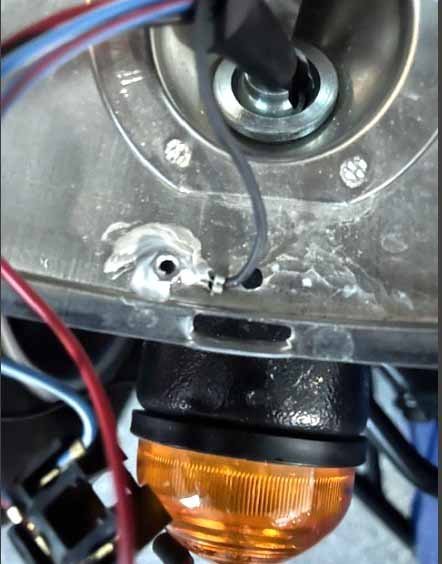
This is what I had in mind when I was talking about using an epoxy to hold in place the nut, star washer, and ground wire while I tighten the lower housing screw in place. In theory, the epoxy will hold the nut to the point that the star washer bites into the housing and the nut, then allowing the nut to be tightened to factory specifications. I'm going to give it a shot, worse comes to worse, I did order a 15" needle nose plier set off Amazon in case I need to hold the nut while tightening it down. Bill -
Headlight replacement/upgrade---IE: Holley Retrobright
mrmustang replied to mrmustang's topic in General Sevens Discussion
I had a rivnut kit a few years ago (lost in the last move) not certain they make them small enough. Thought about epoxying the nut to the inside of the housing with a star washer underneath just so it would hold till I get the screw started. (see below) I like that idea, will have to see if I can find a small enough stainless steel rivet to install it properly. Might have to swing down to the local commercial Grainger-hardware supply and see if they stock anything similar to McMaster Carr in the AM to see if it will work. Thanks Bill PS: Headlamp assemblies due in some time Friday or Saturday, will jump on the install as soon as I can and post my results.


