
IamScotticus
-
Posts
2,309 -
Joined
-
Last visited
Content Type
Profiles
Forums
Store
Articles
Gallery
Events
Library
Everything posted by IamScotticus
-
 All good points. To NTP or not, a question every wrencher will eventually ask, especially when considering permanent alteration on something as dear as a Kent engine. We'll include VW 1600s as well. Theres pros and cons to both thread systems. Pipe: straight cut, easy to cut and repair, any depth, fasteners any lenght, must use a washer or gasket to seal against a shoulder, thin wall possible. NPT: angled cut, must use a thread sealant, requires larger area to install, useful where flat shoulders aren't possible, less likely to walk out. The thing I like about straight pipe is there's less room for errors with the sealing due to thread variables or sealing application errors. Just use the correct washer and don't over do it. The same can be said for NTP but NTP requires more experience; you can't have a specific torque value. Whether or not to use pipe or NTP may be decided by the other factors around the hole. Take my adapter example above... I was expecting to use it in the oil pressure sender port by the oil pump. After studying the oil galley more, Im looking at porting on the left (from the rear view) in ports along the rail. I understand that the mains are fed from that rail and the pump feeds it across the block via a very thin passage. I would like to know the exact size of that. There are potentially three points of entry on the left galley rail. If Ivey was able to get it, the new manufacture blocks will have a full porting boss forward of the engine mount. All this changes things a lot. With less restrictive oil porting, lower pump pressures and slower pump speeds can result in less cavitation and aeration and better lubrication with higher RPMs. I need a clutch cover and an expansion tank. Open or closed? I still want to do a downdraught conversion, pushing the limits of a 32/36 DG. Possibly run a FF hacked DG. Hey, I warned everyone in the title there would be the rabbit holes! I will go back and forth a lot on what im doing or not doing but believe me, although progress is slow, I not happy with just having a 7, I love the learning! I want to really know this car, everything. Im just glad I didn't do a lot of stupid things to it 10 years ago and have a lot of broke stuff now. I have a lot of catching up! But now Im almost too old for this damn thing! I sometimes warn people to not go the route of getting stuck in a pile of parts, and as I go through this refresh, I remember some good advice, to keep the projects short and the wheels on. Therefore, the car remin a 90% assembled state as the parts and plans come together. I do have a local vintage FF garage I can give the lump to if I have to. Now we need to focus on getting it back to a driver, but with appropriate caution...an AX block is something to take care of. My current project is assembling a comprehensive bullet point step-by-step guide for the full tear down to rebuild of the Kent engine referring from at least four authoritative sources including the tiny details and tips. No thread or torque indexes; they will be given at the step needed. That's called a Haynes manual, right? No, although Haynes will be in there, theres lots more to know needing to be compiled into one good guide.
 -
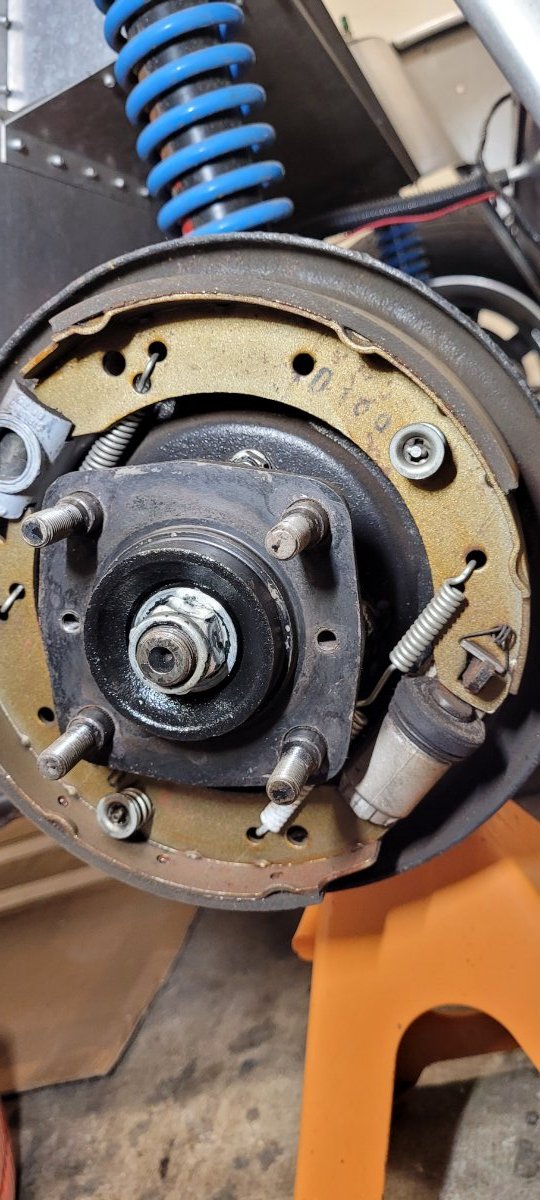
When I acquired it all I brought the eng and car to BAS to go together the eng had a seized piston to be dealt with. Not sure how much bottom end sealing was new, but on my budget, "running car" was the order. At the least, a bottom end refresh. She leaks oil in the rear that may have been part to blame for the clutch grabbing. After sitting for 10 years, Im tempted to go for a full tear down, hot tank cleaning and rebuild just to make sure everything is flowing, and I can get my red engine. While out, I will get oil ports tapped for eventual dry dump. One thing leads to another and so I have a T-9 and prop shaft ready to go in. Trying to decide on a gear kit. The V6 1st isn't horrible, but a full kit would be nicer. The brakes need refreshing after sitting 10 years. I just acquired new fronts and am needing to inspect my master to see if its rebuilable. While collecting the refresh parts, I'm assembling dry dump items for phase 2 after I get a runner going. Phase 3 will be a Quaife ATB diff. All that during some body repairs. I am in a situation where the budget is slim and parts need to come in under cover of darkness... Then when the time comes to work, it needs to go together fast. It cant be an ongoing slog of wrenching in the garage for weeks. Somebody will have a lot to say about it. I hope this partly explains the progress pace.
-
Thats like the spine surgeon telling me he can't do a fusion until I have first gone through years of drugs and physical therapy... Actually that's the insurance making those calls. I do understand that doing something difficult to reverse has consequences later. I have heard using Scotch Brite pads to brush. There's another UK 7er wirh a car called Eugene who has it down to an art but using a paste cleaner I haven't been able to obtain. But I have several alu specific options to use. I have a can of L.C. Wax Alumaslick claiming to be an anti-corrosive. The next project, If I commit to that route is to make a polishing buck for the bonnet.
-
Beautiful S2!
-
I already haggled over this on the Triumph forum. And called Moss. The bearings are sold as matching cone and race sets therefore depicted as one bearing unit in the illustration. A practice I disagree with..
-
I have this: But this is growing on me: OK, I know its a graphic rendering to imitate bare alu. But its growing on me. I don't have to preach about the maintenance of bare alu, you know. But there's more I dislike about bare alu than just the maintenance. For one, I don't want to look like an experimental airplane project. For another, there are many flaws and defects in my panels, even a streak across my bonnet I can't polish out. My build spec was a race car after all, those cars probably got some cast-offs to keep the price down. Who knows. Im thinking a nice rattle can coat of light grey would be a start. No, I have no intention on taking my Beater to a professional paint job. It has to be a paint I can apply, touch up, take off, do repairs, reapply and blend in myself with something readily available or better left alone. My Criteria: -A color supported by a manufacturer for a very long time -Supply available almost everywhere, or a close substitute can easily be obtained -No, I don't want black -Be confusingly similar to a brushed alu appearance from a distance So far, the thing I am looking for is a light gray primer that bonds to metal, preferably more removable than an etching primer, of which most Ive seen are green. Any suggestions? Sarcasm is always welcome!

-
If Bob has a CAD file, he might be able to make them again in a laser printer cheaper than old CNC, and sell for $80.
-
Yea new skin and inspection between the skin and all chassis tubes for corrosion is often a ten year requirement to keep these buggars running and pretty. must clean out the "grot trap", the space between the foot well and outter skin.
-
This is really cool. Don't get the meaning of the eye...it looks kinda Mason-ish
-
Thanks for making me buy another tool! lol
-
Hydraulic clutch set up for Crossflow w/ Type E or 9 transmission.
IamScotticus replied to Vinman1's topic in General Tech
Here? https://www.retroford.co.uk/product-category/drivetrain-and-clutch/hydraulic-clutch-components-and-release-bearings/ -
Very nice. Did you do the finishing work?
-
Delete
-
a pressure regulator as close to the carbs as possible is good insurance against whatever might cause a fluctuation. I got a thing from Pierce Manifold that is an inline regulator of sorts but not for pressure, for surges to create a smooth flow into the bowls. I show it off on my build thread.
-
AM= Arch Motors 98= year of manufacture J2= Jig number 4452= production number. I don't know if that is an annual production nbr or total count for the particular jig. 4k is big for a production within a year, Cat averages around 500 a year. I suspect its a running count for the jig. the cool thing about Arch is, with that Jig #, they can supply you perfectly fitting body panels and tube sections. Even the rivet holes will line up.
-
Hydraulic clutch set up for Crossflow w/ Type E or 9 transmission.
IamScotticus replied to Vinman1's topic in General Tech
have you looked at Tracsport for bells? might want to email steve there. his website is pretty but doesn't show half of what he has. or he doesn't sell all he used to. I suspect he has no personal webmaster involvement in his site. He supplied all the Escort and Ital remans for Caterham in the 90s, maybe earlier. -
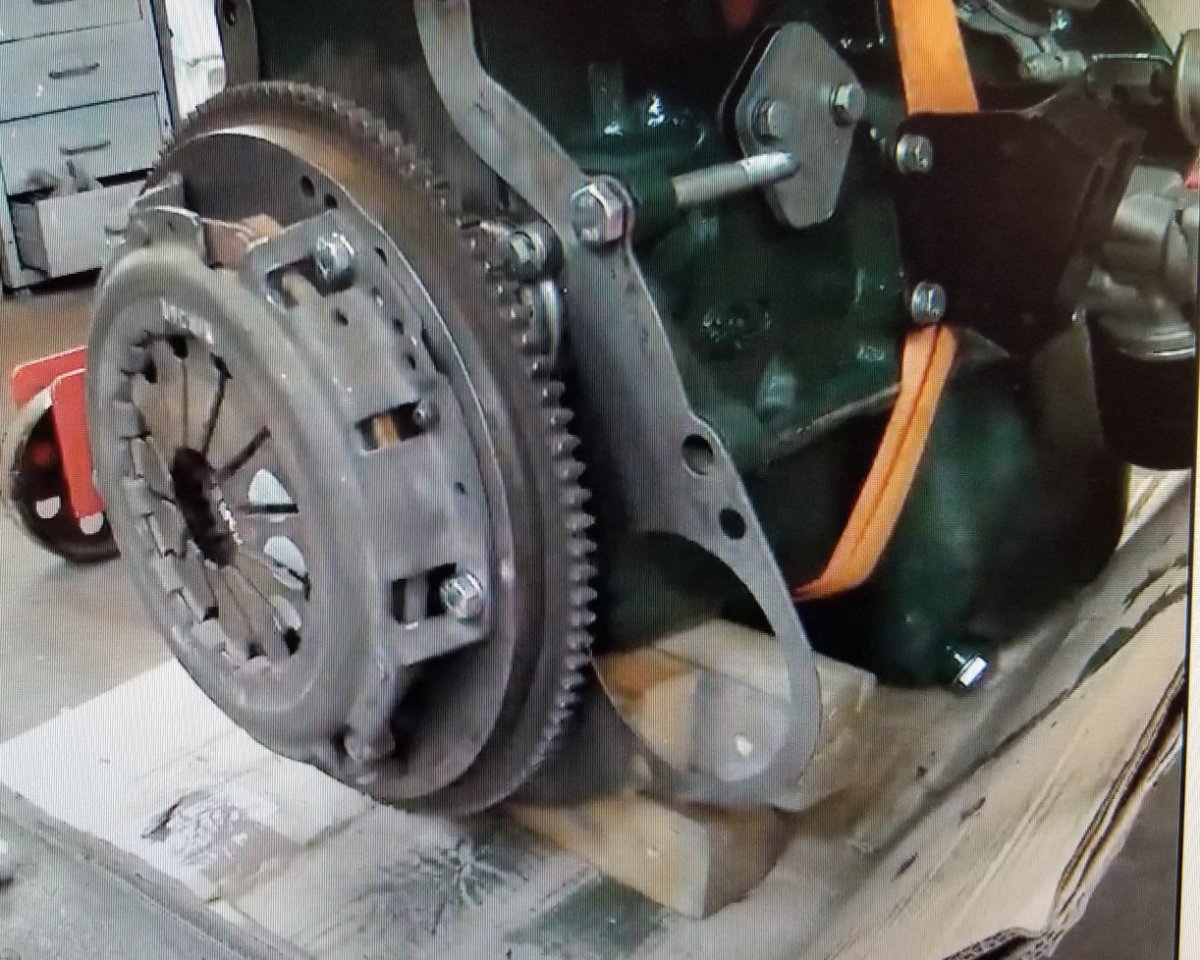
so... A T9 to 1600 adaptiopn uses: 1600 Kent: flywheel, pilot, clutch cover, release bearing & arm 2000 Pinto: 190/7.5" 1x23 clutch disc (reduced diamter from 8.5") bellhousing (some grinding to cleaar the starter may be necessary) T9 box with (a)reduced diamter shaft cover for release bearing)(Burton), (b) if box is the longer shaft V6, a 1" spacer between the box and bell. Remember (1) the engine threads are Imperial and the bellhousing are metric and you do use both. (2) use special tacky clutch disc grease on the splines. PM me i have a few packs. (3) have the flywheel surfaced, balanced and checked for runout Notice I don't use car model names...it just adds to the confusion.
-
Starter ring gear!
-
Ive been putting together the parts for an evetual T-9 conversion to my Xflow. This is the list of stuff I know so far. Not sure I agree with Burton on the "standard Escort clutch". On parts, standard 1600 Kent clutch disc is 190mm 7/8" x 20. A T9 was never fitted to Kent 1600 in a Ford road car, but on 2ltr and larger engines using larger clutches. To adapt the T9 to work with the Kent it only requires two or three things: (1) A 1" spacer between the case and the bell IF the T9 uses the longer input shaft (1x23), and a small bit of the shaft length may need removal. (2) A reduced diamter input shaft sleeve the release bearing slides on so std Escort bearings can be used (with a std Kent pressure plate). (3) A special 190mm 1x23 PPlate, which is an oddity because the 1"x23 discs were larger in diameter for the 2ltr Pintos. Im not sure what vehicles used a 190mm 1x23 but I've only heard of one. Thank Burton for keeping them in stock. Input shaft tips are same dia so pilot/spigot bearing is common to both. I believe I have seen a CRB spacer on Burton for the takeup issues. Here is a more typical CC Vibration causes, im only sugessing here... Trans & engine mounts loose, warped flywheel, chatter/ slipping from contaminated flywheel surface, uneven bellhousing bolt torque, prop shaft U joints bad. I hope Im helpful here.
-
Front hub - like new + greased bearings
IamScotticus replied to slowdude's topic in Parts For Sale / Wanted
Just out of curiosity, so I can get schooled on it.. The front bearing change Cat did, replacing the Spitfire parts, 3 burning questions: 1, are those sealed bearings and what cars are they used on? 2, can the upgrade bearings be pressed into Spitfire hubs? 3, Is the felt dust seal used? -
I've been wondering about that pump. Spewing fuel all in the boot? Thats just a good cleaning 😝
-
an excellent guide on the kents is Jake Lamonts book available at Pegasus https://www.pegasusautoracing.com/productdetails.asp?RecID=1639 anyone with a Xflow should have it.
-
ethanol, wouldn't an additive like stabil or enzyte take care of that and be better for the carbs? yes, the Facet box pumps are noisy and mounted to the back seat panel you feel it in your back. nut they can be drawn through in line with another pump.
-
Thanks Vin Heres mine I don't have an adjuster on the cylinder, its up top and manually adjusted with a square key. I also confirmed this to be A Marina, not an Ital, although Cat says its an Ital. The hub locating key is 3/16", not 1/4"square. Where some have gotten into trouble on these is fitting Ital hubs on Marina shafts giving the Ital hub 1/16" of space to move in. Fortunate to not have this issue. If buying shafts from MOSS or Rimmer Bros one must check this.
-
Good stuff