
IamScotticus
-
Posts
2,203 -
Joined
-
Last visited
Content Type
Profiles
Forums
Store
Articles
Gallery
Events
Library
Everything posted by IamScotticus
-
These are umbrella seals and are intended to ride the stem up and down so the necessary amount of oil lubricates the stem. This is a good time to check lateral valve stem movement. If it wiggles, you may need valve guides. More than helpful...
-

Hopefully we will have our car back soon.
IamScotticus replied to theDreamer's topic in Member Rides
I would have lost myfckingshit. -
red threadlock: how much heat do you need? Birkin mirror adventure.
IamScotticus replied to pethier's topic in General Tech
I was going to suggest a large gage soldering iron on the stud and clamped on so the heat is applied to that core. Heat until you see smoke. -
Saw on FB 7spot the recent Westy revival isn't gonna make it. This interview video will post on the 17th. They had a good engine.

-
@Xhilr8n re: grammar, Thanks for the clarification. There is official guidance. Because we want information.
-
Caterham A Frames - check them as part of your annual maintenance
IamScotticus replied to Croc's topic in General Tech
I don't understand how, for the same reasons one would NOT use a Powerflex bush, that one would opt for a hard spherical or rose joint. To harden one point to the detriment of the next? Yes the A-frame to chassis mounts have bushes, but rather thin ones. Do these suffer too much by the use of a spherical at the center? -
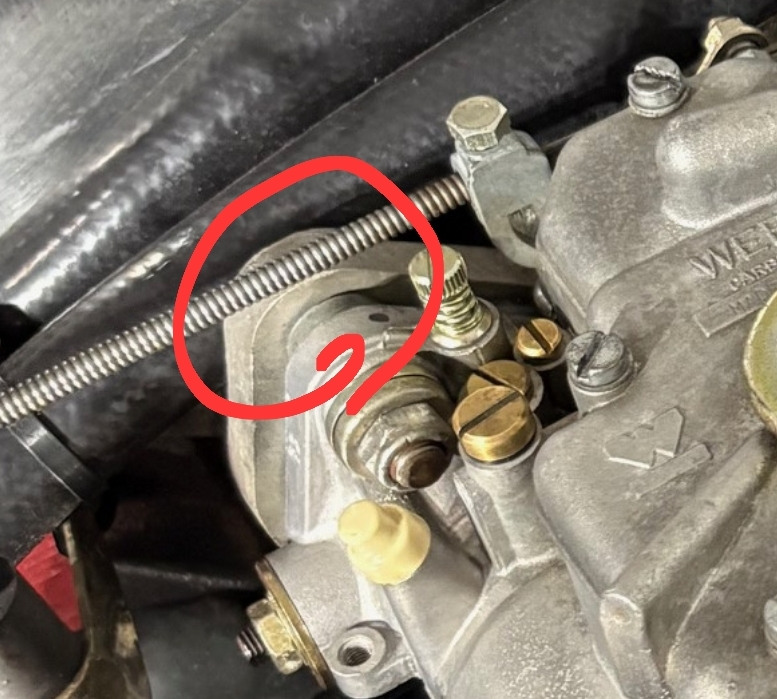
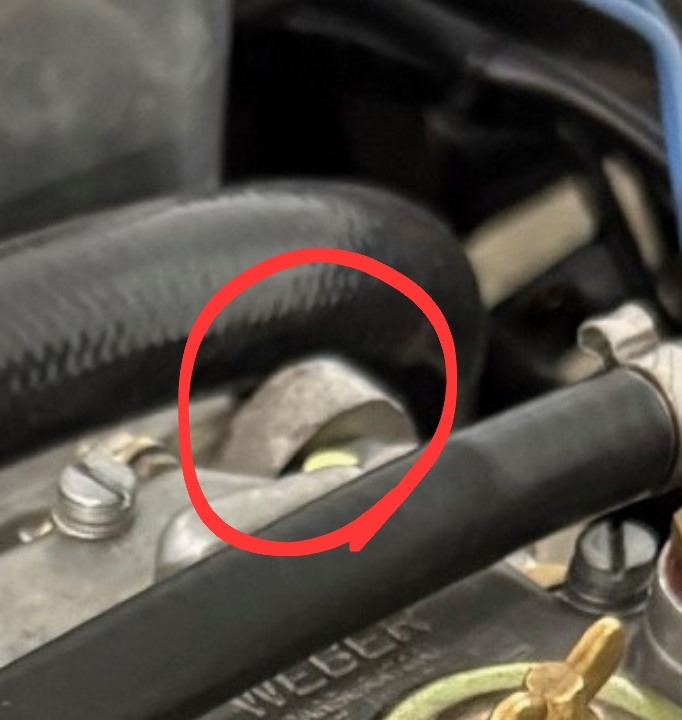
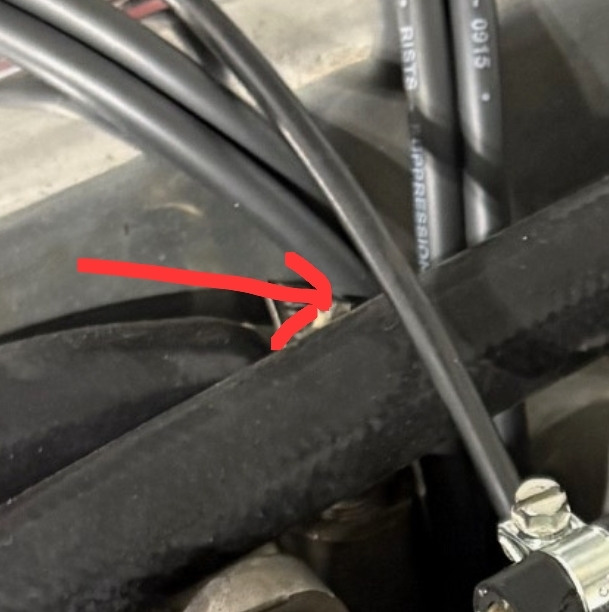
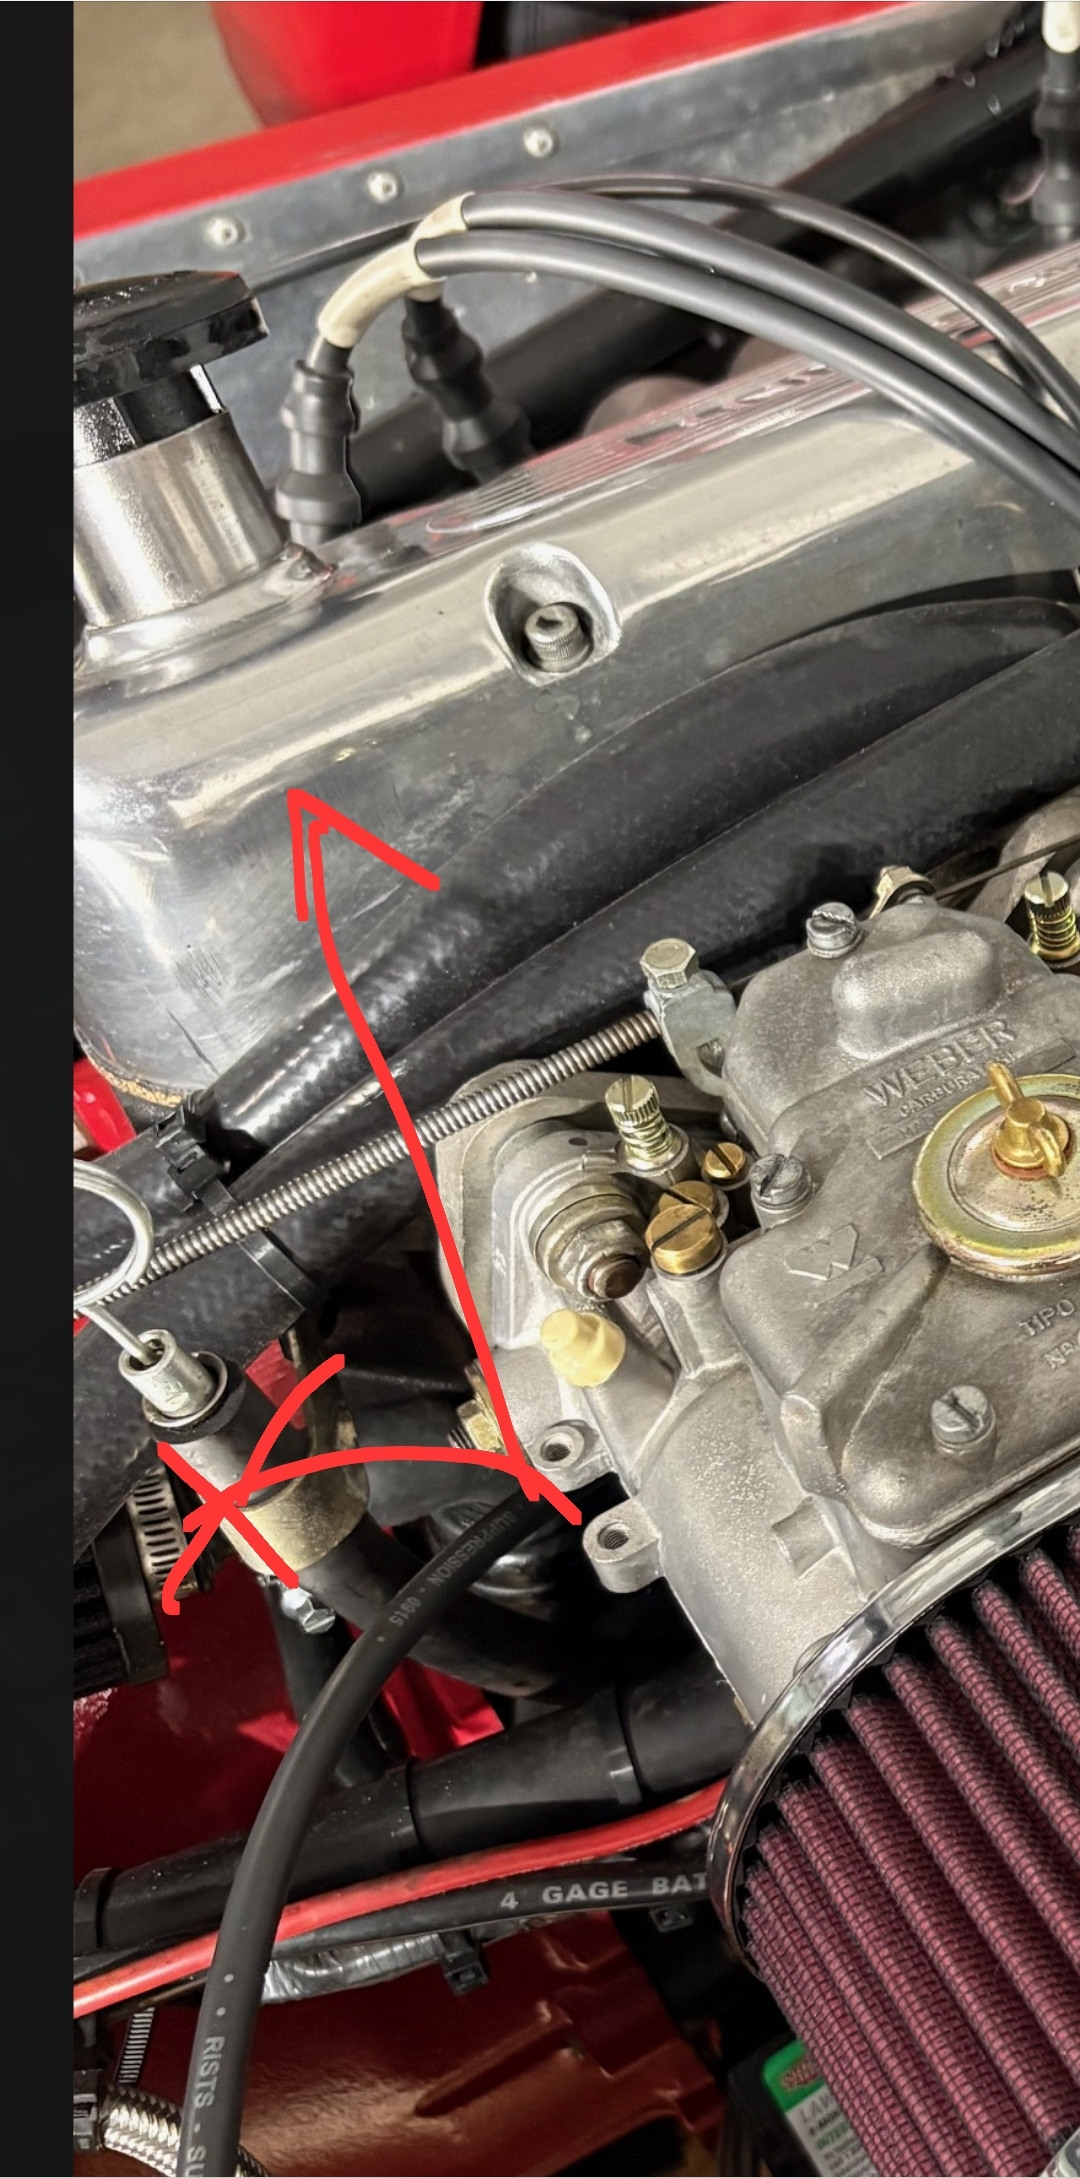
Working out idle is a very hands on process done by feel and giving the engine what it likes. I would stick to the good books and Tuning guides you get from Pierce Manifold and others and avoid rabbit holes. This is a light car so you aren't rolling through the dead spots like a 4K pound car you will feel everything. If you're going to err, err on the side of rich. At least you won't melt anything. There are other things here I would like to critique, however. This car shakes and vibrates; everything moves. This is why Caterham used steel brake lines. I have identified points where your heater hoses may be in danger of abrasion. Also, I think the crankcase vent breather filter is likely going to become an oil collector/dripper in that position. I recommend a longer vertical position or routing it to a mounted catch can/breather, even if you do have the OEM oil separater in place. The upper rocker cover vent can also benefit from routing to a collector. Both of these can be routed into a single catch can/breather. It will keep the engine bay cleaner. I also see a spark plug lead very close to a hose clamp that will get cut into. The rule is, if you can wiggle it, the car is wiggling it. Wiggle and see what rubs, comes lose and how now before it breaks on the road.
-
Members can go to Will's profile and search for all his contributions. He gas a website with much of his research posted there. https://www.anglocanadianlotus7.ca/
-
You have a fantastic skill set to to make this much progress in 26 months! And very well done I think. An interesting thing about your body is the front wings are missing the frogeye indicator pods. Did you have them cut off and patched over?
-
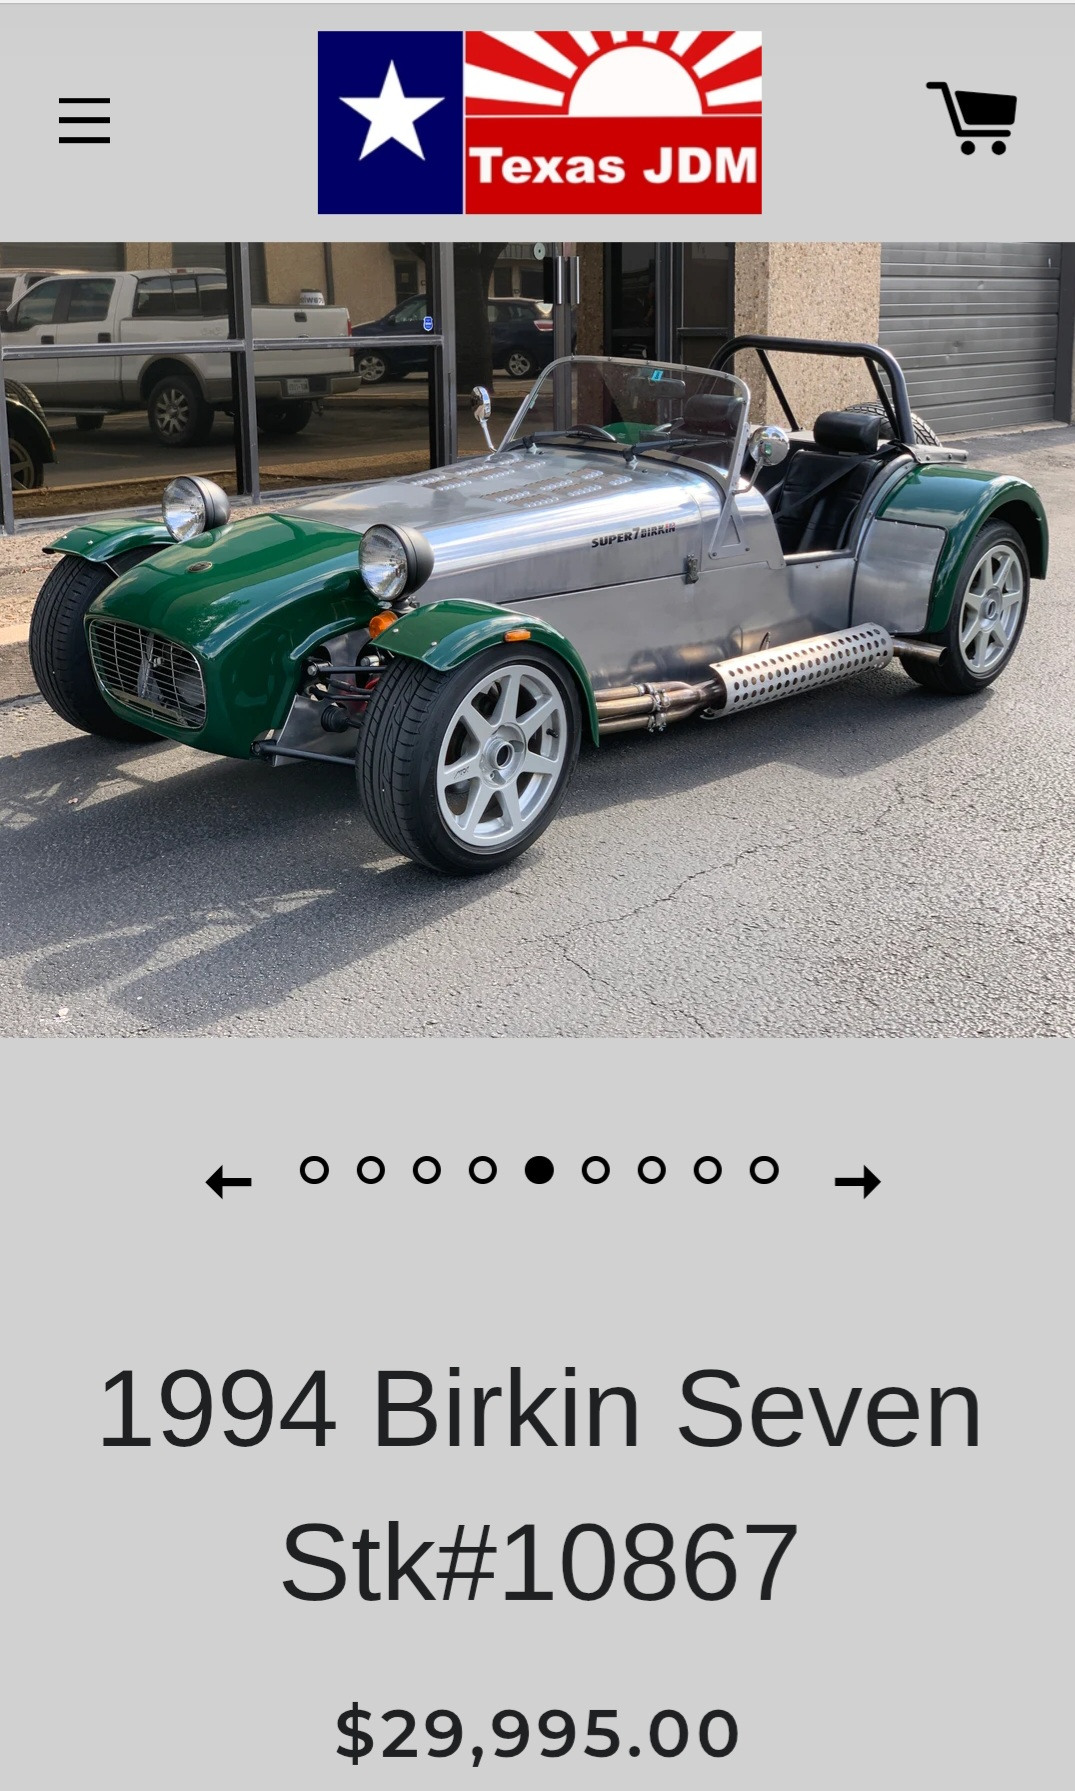
Saw this here, no affiliation. https://texasjdm.com/collections/enthusiast-vehicles/products/1994-birkin-seven
-
That would be very helpful. Josh beat me to these by a few hours. But I'm glad he has them as he's putting together a Seven museum. They will be very nice displayed somewhere. Im thinking of sending him the S4 model I got from you.
-
How is this going? Did you create a proper build thread for this project?
-
I wonder where we go when the answers found using AI are taken as absolute and infallible truth, regardless. Also, AI does not have tact (neither do I). The truth can hurt a lot of feelings. The truth can make people snap. Useing AI as the weapon of proof that someone is inferior or a belief is deleterious to a peaceful society thus deserving of disparate treatment, the civil wars will ignite.
-
PM sent
-
Noooo! You don't have to remove those. The scuttle isn't attached to the dash hoop. The scuttle is hard attachto the frame on these three places. The firewall is not fastento the chassis, it sits in a groove. Drilling out the front rivets isn't necessary, it just makes it easier depending on how much stuff you would have to take off the firewall. Leave those dash rivets in place. Sending a PM.
-
Please excuse my numbers, I shouldn't drink and forum. You are correct.
-
Likely a silicone sealer to prevent water ingress. Most likely will have to cut through it with a wire or metal blade. Possibly a length of string will work. Remove and reapply if desired. This may be a good time to do the easy scuttle removal mod. Drill out all 14 or so rivets along the front firewall edge and insert 5/32 (or close to the original rivet size) rivet nuts. The holes in the firewall will need drilling larger for the rivnuts. There are button head screws that look like rivet heads to replace with. My 2 cents.
-
1990 Super Seven roll bar bolt question
IamScotticus replied to greasymonkey's topic in General Tech
On harness mounts there are center standoffs to keep the buckles off the frame and swiveling. Also eye bolt and gate latch types. If you can, I would follow the bottom of the bolt with a nylock nut and washer as a safety against shear and walk out. Not tight. 20 lbs ft is 6" wrench snug.
-
1990 Super Seven roll bar bolt question
IamScotticus replied to greasymonkey's topic in General Tech
If it helps, my 95 chassis was built as a racing Live Axle (makes a difference) chassis so i have 4 point bungs installed which are directly behind the headrest. If I didn't have these, or didn't use them, the roll bar mount bung (pointing) would be used with the top seat belt strap attached to the top of the roll bar mount. My chassis was built for an FIA roll bar so the bung is 7/16-20 tpi. If it was intended for a "standard" road bar, it would have a 5/16 bung. I wouldn't let the build manuaI throw you on the threading. These cars can have a variety of variations. Your friend is a set of thread sizers like the one in the bung. https://a.co/d/09u6gMPR Check everything to know what sizes and thread pitches you have. Use a set of thread chasers to clean and deburr threads. The bolts you buy to use should be high quality and never plated steel. Never stainless steel for safety applications like this. Know that most threads come in at least two different pitches
-
Do you see a part # on it anywhere?
-
I can't disagree there will be some senseless policy. The whole business is very complex. I don't disagree there will be some unintended consequences. Fortunately, tariffs can be changed rapidly without a long drawn out contested and litigated process.
-
Tariffs allow USA manufacturers to compete in the market against imported competition. Just try to manufacture something and sell it in this country. In short order, some foreigner will make a counterfeit in another country at a fraction of your costs and sell it in the USA, undercutting your lowest price by 50%. Then you try to offset your losses by selling your product in that aforementioned foreign land and you will be hit by a 35-50% tariff to defend the local sales of your counterfeited product, of which the manufacturer made with government subsidies and grants. The United States, historically, has had the lowest tariffs of any nation, and especially, benefitting the #1 counterfeiter. We also allow the import of resources tariff-free under a quota program. The problem with tariffs now, is the instability. They change too rapidly. I believe this is a temporary condition. I'm not an import broker, but I work close to it. Tariffs have a purpose. Used correctly, they are beneficial.
-
This little car, made in England, by typically tall English blokes. And that was the short cockpit. I suspect the car was designed around a 6 foot person. Anyone north of that will have foot problems, anyone south will have reach problems. For the latter, the sliding seats help, but just put you closer to the wheel, which is another annoyance.
-
-
Birkin engine mounts, Kent engine.
IamScotticus replied to 3Ducs's topic in General Sevens Discussion
Unless your intake manifold is the exact same item used by Birkin to use with Birkin mounts, you may find the angles to not place the air filters in the bonnet hole squarely. So, you may get Birkin mouts, but the intake angle is wrong. Therefore I think fabbing mounts with the engine in situ is your best option. Remember to allow height for setting. If you are using a Birkin intake, or know that the intake is the same angle, or Birkin intakes are a common angle, you might get lucky there. All a welder has to do is cut the parts, tack them together on the car then do the full beads on a work table. Prime and paint. Overbuild it a little for peace of mind. One more thing, pay attention to pinion angle, try to get it close.