MV8
-
Posts
2,303 -
Joined
Content Type
Profiles
Forums
Store
Articles
Gallery
Events
Library
Everything posted by MV8
-
Ditto on "safety" glass which is two layers of standard residential glass bonded with a sheet of vinyl. You must request the glass be cut with the marking (in what will be a lower corner) or risk having no marking. They may fit it to the frame for you. I suggest bicycle inner tube as a gasket for the channel, then trim the excess with a razor blade after assembly. They should sand the corners but it can still cut you. "Plexi" is acrylic; cheaper and more scratch resistant than "lexan" (polycarbonate) but can also shatter. Motorcycle windscreens and helmet face shields are acrylic.
-

The Regular Summary of Classified Ads of Se7ens Found For Sale
MV8 replied to Croc's topic in Cars For Sale
Not much to see. Only two bids in the last few days that raised it a couple hundred. The last bid was about 31 seconds from the end but the bid was not enough for the automatic bidder from a week prior. Looking at the bids, it looks like nobody had thought through how to get it for the least amount but not everybody cares about that. -
Look for a capri or euro granada shifter, 2000E, or Type 5 (v6 version of 2000E, not our domestic T5).
-
An Annoying 'Feature' On My Seven's Zetec SVT Engine
MV8 replied to rcollum's topic in General Sevens Discussion
That'd be helpful to Lonnie. He is at the exhaust stage of his builds. -
The Regular Summary of Classified Ads of Se7ens Found For Sale
MV8 replied to Croc's topic in Cars For Sale
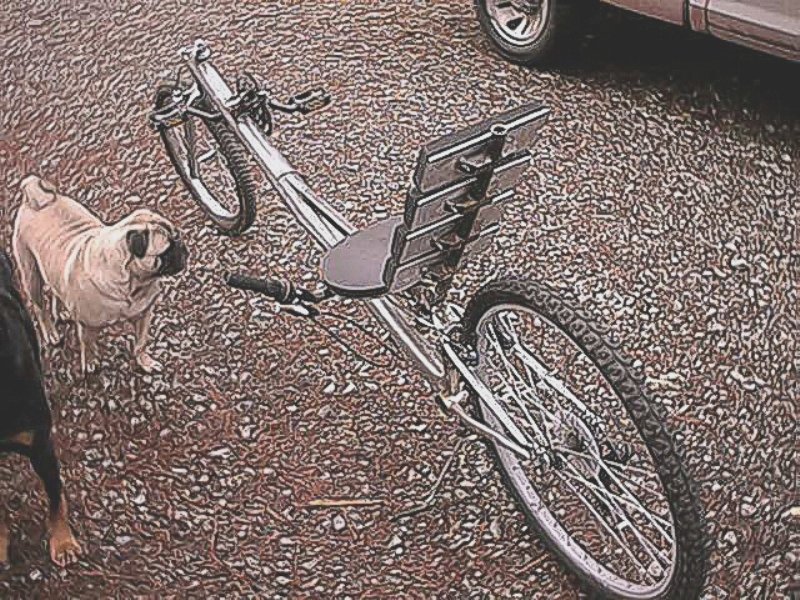
We have converted rail trails too; the Chief Ladiga Trail in Alabama and the Comet Trail in Georgia. I built a long wheelbase low recumbent bike years ago. Seven feet long, under seat steering (hands rest on top of the handle bar), so low I could touch the ground easily with my hand and eye height about the same as most car bumpers. Mostly a men's bike with the front fork and wheel from a kids bmx connected by an exhaust tubing boom, three chains and a ball bearing idler sprocket as a chain guide. Very fast and stable if you go off but not good exercise if you have companions on traditional bikes trying to keep pace. Awkward at intersections and scary low/invisible in the parking lot.
-
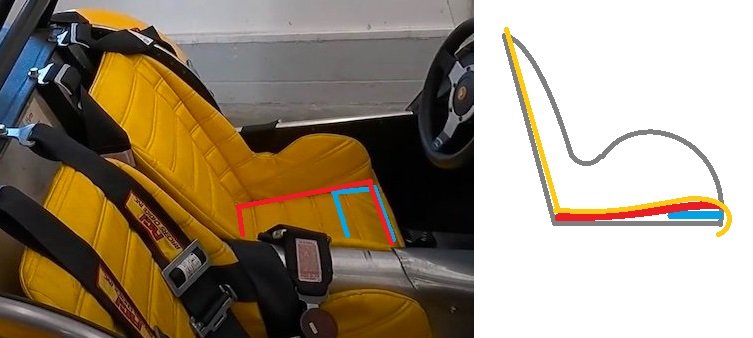
A section of material cut from a yoga mat that is trimmed to cover the full seat "pan" (red in pic). The smaller strip (blue) goes under the red. The idea is to provide some thigh and bottom support beyond what you get with the slip on yellow cover.
-
Imho, I prefer autometer mechanical oil pressure gauges when a standard, six foot plastic capillary tube will reach (mid-engine not so much unless mounting in the center console like a pantera). I heat some water in a large pot then hold the tubing off the bottom while it uncoils to the pot id, then take it out and hold it straight while it cools. Routed with small zips and in small split loom or vac hose for more protection if needed. Definitely route through a grommet in the firewall. Very little nut torque is needed to seal. Generally, the smaller a tube, the greater the burst strength and the more rapid the response to pressure changes.
-
The Regular Summary of Classified Ads of Se7ens Found For Sale
MV8 replied to Croc's topic in Cars For Sale
Imho, there is enough metal in the chassis to make about 4 caterhams but not as rigid. Interesting though. That is close to the same weight as an early miata. -
For now, you might try a cheap, foam rubber yoga mat. Cut one piece to cover the inside of the lower pan and another about three inches wide for the front edge. Depending on the mat you buy, the pieces may grip each other to keep position. Just slip the foam under the upholstery. Layer and shape to suit with no permanent modification. Must be an optical illusion but it looks like the roll bar would hit me in my big fat head. If it's close, a light tap in the rear could be real bad for the noggin. Also, the 3 inch strip of mat goes under the full pan mat.
-
I expect the throttle shafts individual linkage or combined linkage is hanging a little, keeping the butterfly cracked open. You can disconnect to isolate. Return spring tight/tensioned with the throttle closed? Check the fast idle screw tip is in the notch of the choke cable cam to allow the throttle to close to engage the idle speed screw. Is the thermostat opening? During warm up, the upper hose will suddenly get much warmer when it does. Thermostats are often not very reliable. You could remove it and test, then reinstall if it's closed when cold. It can be tested on the stove in a pot of water. Radiators collect debris and eventually clog. You can determine this by placing your hand around the core during warm up from overnight cold, a laser temp reader, or an IR camera to see the temp difference across the core. Warm coolant flows in from the upper hose. I'd push water through the lower hose and out the upper port to attempt to flush. You could also try a safe for your radiator cleaner like CLR. Remove radiator, fittings up, mix cleaner in bucket, fill and let it sit a day or so, then flush from the lower again. If your coolant was muddy, I'd use a cup of "metal prep" concentrate (phosphorous) added to water, run the engine to circulate, then drain and flush after a few days.
-
Who doesn't love gocarts? I always "reserve" the smallest rental cars available. Then when gas became expensive, I was always stuck with an "upgrade" to an suv or truck. I drove versas, Pt Cruisers, Aveos, and Yaris. Always automatics but still fun. Work cars are always bigger. Amateur! No Vovchandr, your versa is not the cheapest car. My "daily driver" (I've not driven daily in years) is a Ford Aspire two door, 5spd, mazda B3 sohc (non-interference) 1.3L, 63 hp. Some comments I receive are "It feels like we are flying!" or "How many clowns does it hold?". My tires used to be about $7-10 each but you don't want to hear about my problems. Best mpg I ever accomplished when the moons aligned was 55. My fueling range is designed to be similar to most vehicles so the tank is very small. From below E to topped off is about 7 gallons. When gas is $3/gal, its $21. If it's $5/gal, it's still only $35. Blue book value is probably about $100. My favorite is the yaris but there are so many cool small cars these days.
-
Maybe not all the way in one lift plus it would be better to lift the front and rear incrementally. I have the same type jack. It is a special low profile, high lift, long jack from Harbor Freight Tools. I spy a 4x4 post block. With the multi-pin stands, you can lift as far as it will go, lock the stand wheels and engage the stand pins, lower it to be supported by the pins, then add a post block to the jack pad to lift higher.
-
Imperial vs. Metric rear anti roll bar for an S3.
MV8 replied to RedbeardRacing's topic in General Tech
You could make the bar from rod stock, fab the arms around two inch long dom tube reamed to a press fit over the bar, then braze the ends or pin. I don't know how well 4140 from mcmaster will work without additional heat treat, but I've been told 1020 is often used by oems (not heat treatable-low carbon common steel). There are also torsion bar kits with splined ends and different lengths available but the spline fit must be tight as the load reverses on an anti-roll bar. -
Imperial vs. Metric rear anti roll bar for an S3.
MV8 replied to RedbeardRacing's topic in General Tech
https://www.pistonheads.com/gassing/topic.asp?t=1073731 Does this help? I don't know. One may be 1/2 inch where the other is only 13mm!?! Sounds like either is workable but not a direct swap without some work. You could resell the one that will be more difficult to install. -
I wonder why, for LHD, they didn't just add one more joint to the steering shaft and a support bearing versus a custom timing cover/pump housing.
-
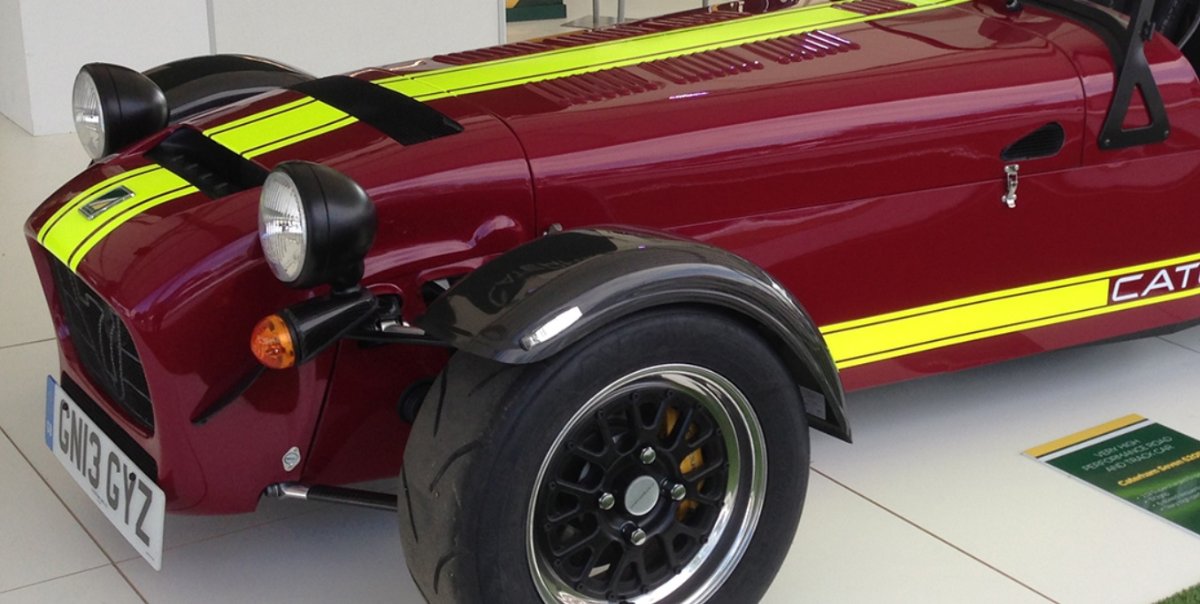
I assume you do not have these wheels to check the marking. I think it is 23-24mm offset (23 or 24ET marking on the wheels) for a back space measure of approx 4.5f/5.5r. Lightest in CONUS? Probably aftermarket 3-piece with magnesium centers designed for no lug cover at around $3500/set. Cast or forged 1-piece with minimal center mass (spokes), 13x6 all around with less rear offset (near zero?) on the rear (bringing the tire outside edge to the same position as the 8 inch rim) would be much more practical and probably cost about $1000/set.
-
In the words of Gretta Thunberg with a 'Jersey accent, "HoouudaaaUUU"! Oh, the humanity! All I see is high maintenance, like a abnormally pretty girl. Gimmie a fatty. They are grateful and can protect me from antifa. Plus, I can do whatever I want as long as it's ok with them.
-
Good luck! Crazy expensive new. You might consider original CAT style squabs from earlier models until you run across a set for your restoration/build or recover what you have?
-
Caterham IRS – Conversion for S3 and SV
MV8 replied to Vovchandr's topic in General Sevens Discussion
Imho, the conversion design, upright fab, and component choices look very good. I would have used two plates instead of all those ribs around the hub to weld but I like it otherwise. One could probably buy an irs repair section of frame and associated parts from CAT to convert for less $. -
In general, zip ties directly on hose are not a problem. Also, there is a version of Scott's mesh cover that is split down one side so it doesn't require disconnecting one end of a hose to install/remove.
-
The Regular Summary of Classified Ads of Se7ens Found For Sale
MV8 replied to Croc's topic in Cars For Sale
I'd add tabs/flanges at the rails for a bolt-on wrap-around guard for the transmission. Four attachment points to the chassis and a hoop behind the shift turret. Not sure why that aluminum plate is so big. Think I made it too small for a car plate but you get the idea. Probably one inch dom and 1/8 strip for flanges and mounting. Upper tubes obscured by the body.
-
Looks great! Nice stands. I'm surprised the ifs doesn't droop further. Short travel dampers I guess or the camera angle.
-
I typically use 4 inch and 6 inch black zips too under the bonnet and never had one let go. I also have some that have an eyelet on the end for riveting or screwing to a panel. For rubber and plastic in close proximity to the exhaust, if I cannot reroute, I use silicone fire sleeve (coated woven fiberglass tubing) and silicone addel clamps for soft parts. The fire sleeve is sized for the od of the smallest end of a cable sheath or for a hose, slightly bigger than the hose od or bigger than the clamp od if it will cover the hose end also. It should not be split to install and doesn't usually need clamping. I don't use the stainless zips but have used short pieces of 12-14ga fence wire to make ties by hooking the ends together. You can make adel clamp mounting tabs from 1-3/8 x 1 x .080-1.25" steel strip. Drill to size but locate the holes with a washer. The edge of the washer should align with the end of the strip. Outline with a black marker inside and out, drill, then use a bench grinder to radius and deburr. The tab thickness is unlikely to require longer bolts. You could make a similar brkt for the "submarine" manifold. Also easy to make brkts that are triangular that overlap a rail with 3-4 rivets spread over three inches of rail to attach and an eye for a clamp in the overhang. With two pipes/hoses that cross or are parallel, two clamps can be bolted to each other with one bolt so the pipes/hoses stabilize each other. Split corrugated vinyl is good for chaffing areas. Short pieces can be used with zip ties to hold it. Order based on hose od.
-
Look for a 5-3/4, bottom mount bucket. These have two flanges on the bottom to swivel on. The mounting block that goes between the flanges and the car mount brkt is available with the bucket or separately. If it doesn't hold the vertical aiming adjustment, consider replacing the plastic washers with rubber and add a lock washer under the nut. If the bucket comes painted, plan to paint or clear coat before installation. If the car is out of the weather, chrome versions will probably last a while. The EPA has made high quality chrome plating very expensive. Chrome-like powdercoat is another option. Hella DOT projector assemblies with servo beam control for hi-lo are a bit smaller. I think those are on the Atom.
-
Here is a way to add adjustable side mounts without welding. Also, Skybolt makes very nice dzus type fasteners.