JohnCh
-
Posts
3,444 -
Joined
-
Last visited
Content Type
Profiles
Forums
Store
Articles
Gallery
Events
Library
Everything posted by JohnCh
-
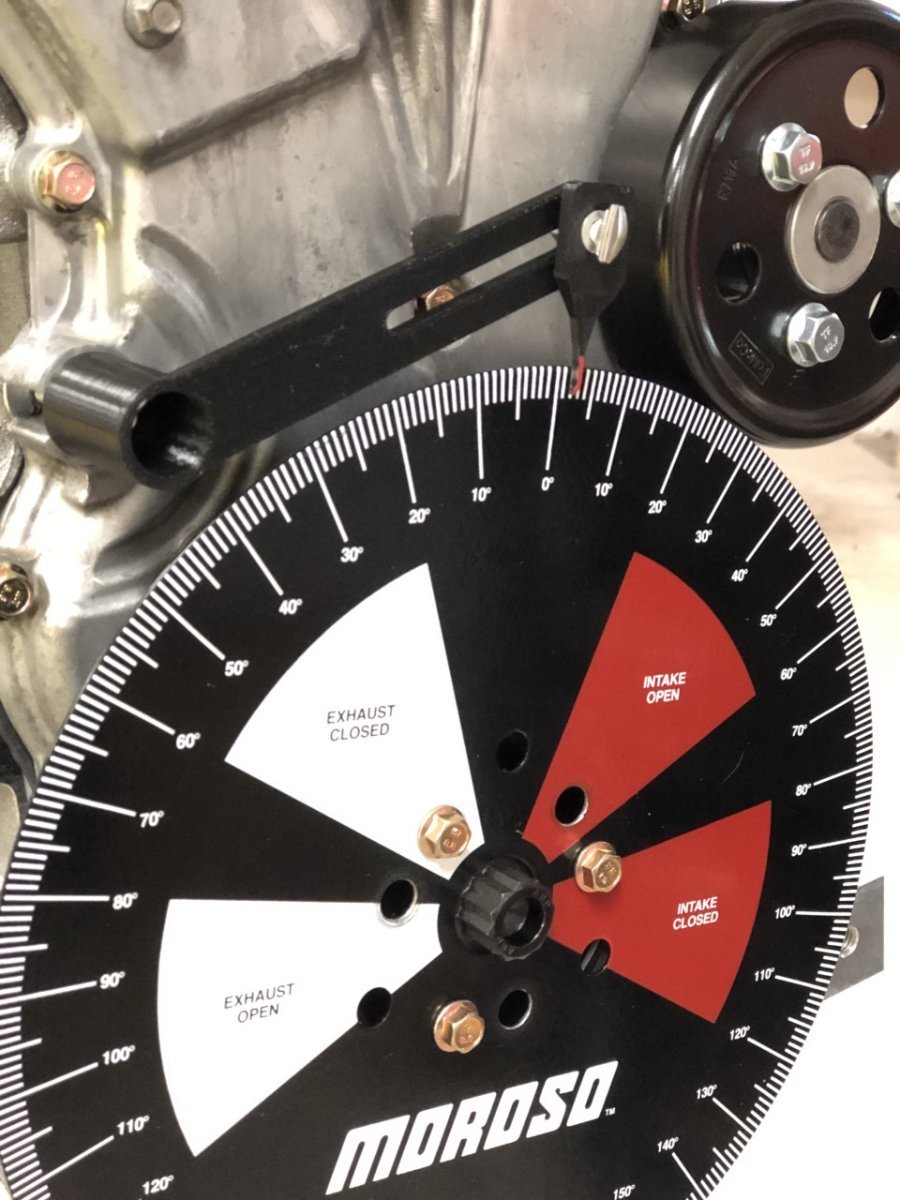
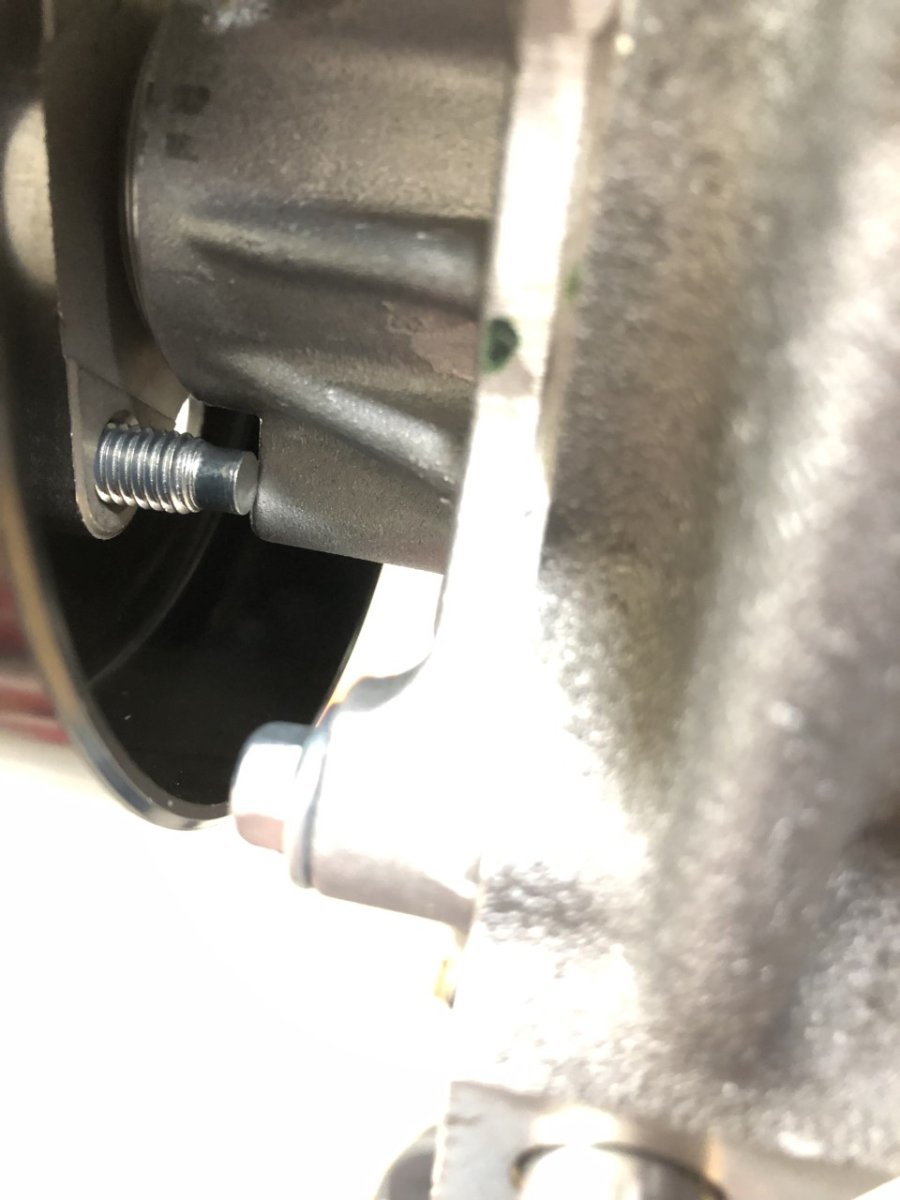
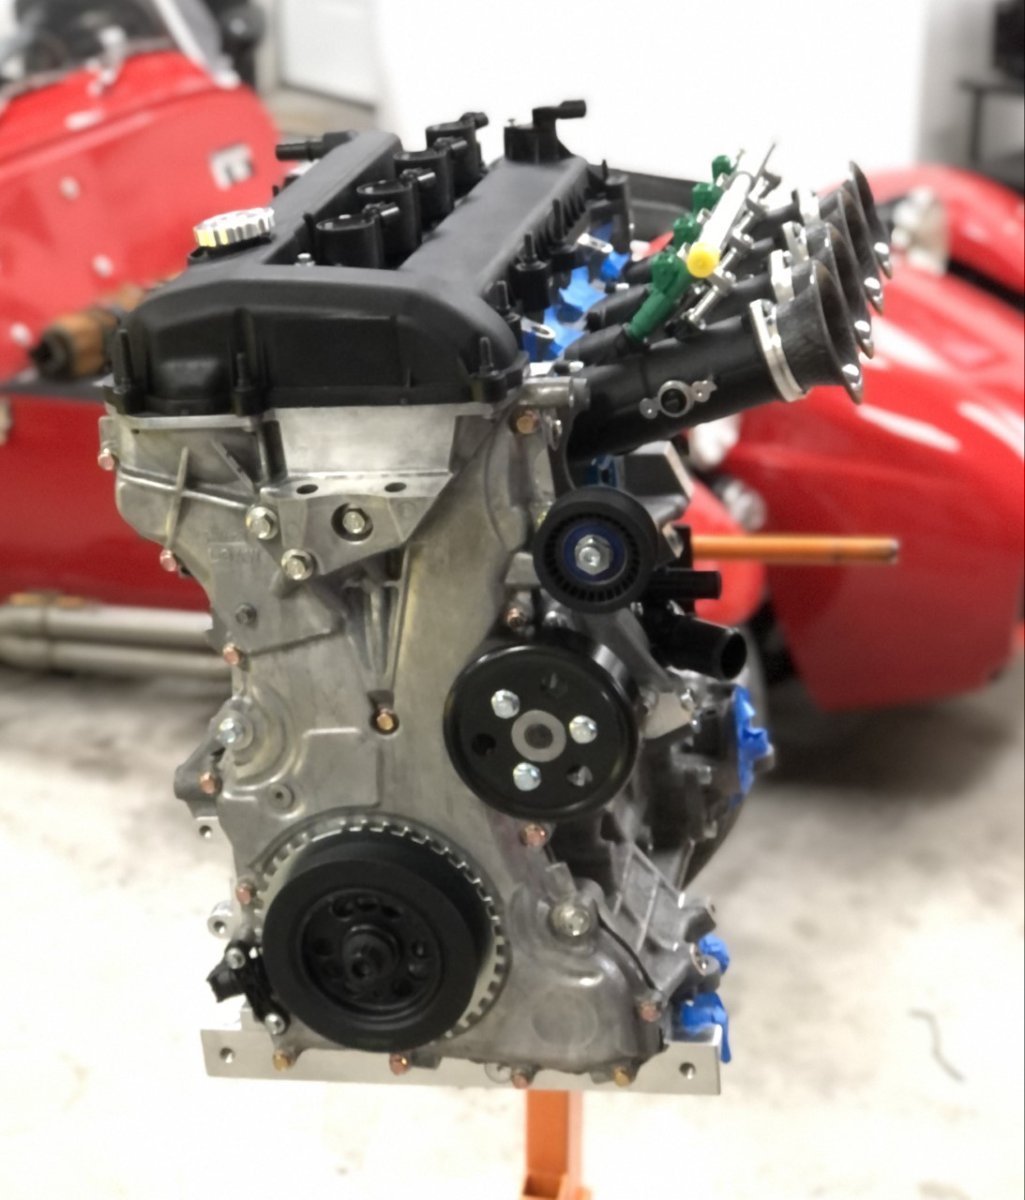
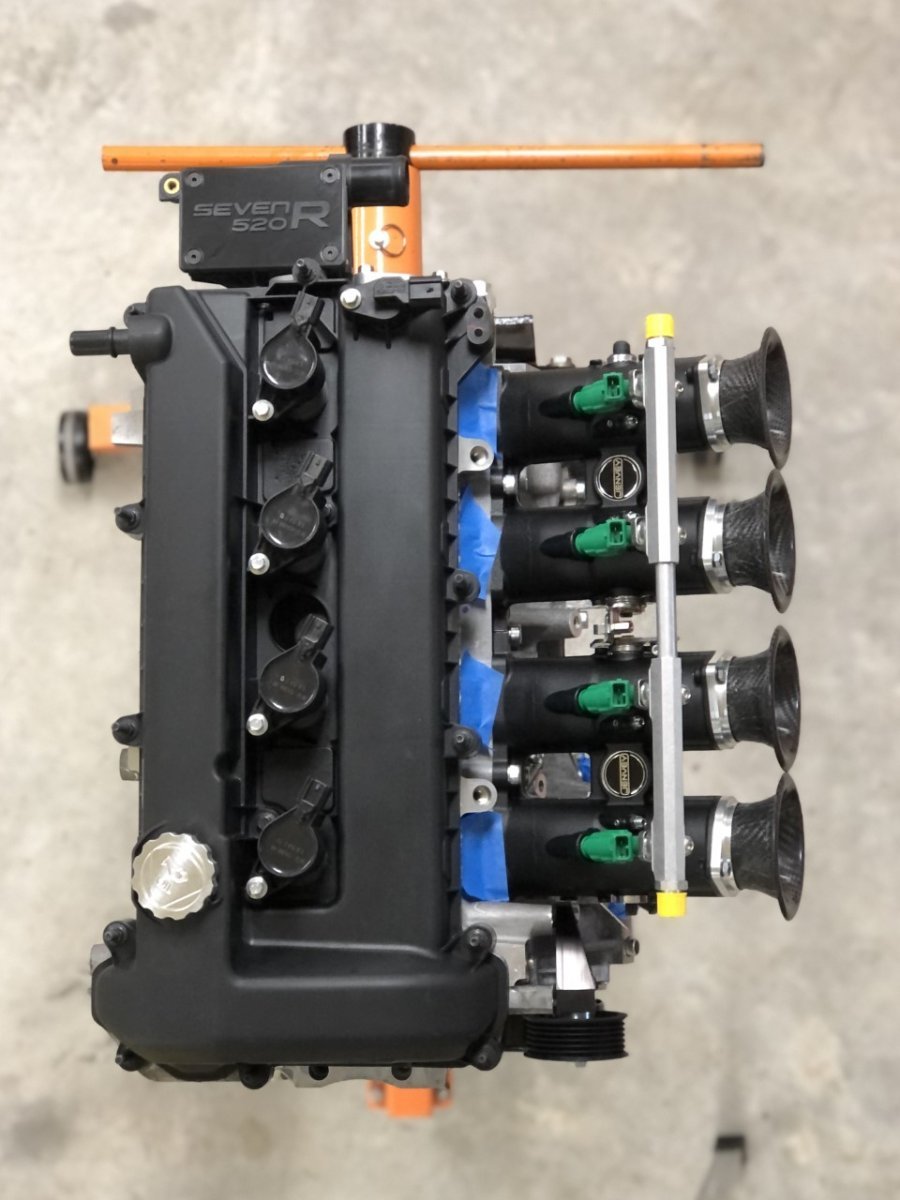
I realized I never updated this thread. Although life got in the way a bit, the engine is effectively done and ready for installation. The cam timing setup worked well after a slight redesign to how the wheel attached to the crank pulley. The initial design used a bushing that allowed a tiny amount of slip when the crank bolt was rotated. The new design rigidly attaches the wheel to the pulley with bolts that fit through new holes drilled in the face of the wheel which align with existing holes in the pulley. I also made a slightly different version that allows me to use the setup with the front cover in place as shown below. If you haven’t already joined the 3D printing movement, it’s worth exploring. Lots of things you can design and make that help out in the garage. Initial cam timing was set to Esslinger’s specs, but we’ll use the adjustable cam gear verniers to play with that on the dyno. I’ll reiterate something from my 2.0L build thread; buy a good quality dial indicator and adjustable holder. They make the job a lot easier and infinitely repeatable. Also, a bigger degree wheel helps. In my case, the new degree wheel's spacing between degree markers is over 60% wider than my old wheel from Kent Cams, making it easier to get a precise measurement. I tapped out after getting the cam timing less than 0.25 degrees from target, although TDC was dead on. There were only a couple of minor issues with the remainder of the assembly, with the two big ones related to the multiple versions of the Duratec that exist. First was bolt length for the front timing cover. Since I am using the front cover from a Mazda based on the recommendation from Esslinger, I also ordered the bolts from the dealer at the same time. When torquing them in place, it was clear there was a slight issue with one that screwed into the Raceline dry sump pan. After disassembling everything, it became clear that the Mazda bolts were a few mm longer than the Ford version (28mm vs. 25mm.) Although this didn’t matter when screwed into the mating holes in the block and head, or into two of the bolt holes in the Raceline plate, it was about 1mm too long for that remaining hole. Next was the bolt length for the water pump pulley fastener. I purchased the water pump, pulley, and bolts from the same Ford dealer; however, the bolts were too long and fouled on the water pump. Both issues were easily addressed with new, shorter bolts. I still need to decide on injector location. I’m leaning heavily towards mounting them in the Jenvey’s this time around and have temporarily installed them in that location. Until I am certain though, I’ll hold off on installing the aluminum plugs that seal the unused ports. For now, I’m sticking with the 40mm velocity stacks with the plan of a cold air induction system with no hole in the bonnet, but I will probably print up a set of 93mm stacks (the other size available for the 50mm Jenveys) to test on the dyno. If that makes a big difference in an area I wish to improve, then I’ll buy the longer stacks and cut the bonnet. E.g. if it produces a big torque bump at 4000rpm, but I’m finding that torque in that area is already as much/more than I want, then no point in making the change, but if I want more in that area, then longer stacks go in. -John

-
Raising this for awareness since I don't think it's well known, and also to thank the people who helped me dodge a bullet with my order. It turns out that although Caterham supplies the Tillett B6 when someone orders the Carbon seats with padding for their S3, they fit the larger B6 XL when the chassis is the SV. Surprisingly, this isn't documented on Caterham's website or the configurator. Given my back issues, before placing my order I sat in what I thought were all the seat options, finally settling on the Carbon seats I tried in a 620R S3. They were a lot closer in comfort to my Westfield's MOGs than either the composite or Kevlar race seats and ordering them would save me the hassle and expense of securing another pair of MOGs from Germany. Big thanks to @Pokeyfor sending me a video Friday where this size difference is mentioned and to @mdorkwho let me try the Carbon seats in his SV on short notice yesterday. That test fit confirmed the extra width takes the comfort level down a few notches and means they won't work as-is for me. Lastly, a big thanks to Bruce Beachman. @BruceBetook time from his vacation this morning to convince Caterham to swap in the S3 Carbon seats in my completed car that is getting ready to ship. Great community, great dealer! -John
- 1 reply
-
- 1
-

-
This article addresses why some photos appear upside down on the forum yet right-side up in other applications on your device, and the steps to fix this when it occurs. This same information applies to other forums you may visit and is not unique to USA7s.net or our particular forum software. Why it happens Short answer is because your phone was upside down when you took the picture. Your phone logs meta data in the photo indicating which direction you intended as up. Unfortunately, this information isn't always transferred correctly when a photo is uploaded or emailed, and further, some source systems simply don't know how to read the orientation data. How to fix a photo after uploading to the forum Open your photo in your editing software of choice and rotate the photo at least one full revolution, stopping when the orientation appears correctly, then save and upload it to the forum. (e.g. if it looks right-side up on your device, rotate at least 1 full revolution before resaving. if it's upside down rotate it 1.5 times, so it is correctly oriented.) This works most of the time. If, however, your photo is an exception, first try a different a different editing program if you have it (for Windows users, Paint seems to work best). If you don't have another option or that still doesn't work, then a quick hack is to use the Snipping tool in Windows to take a capture of the photo while it is right side up or take a screenshot in Android or iOS and crop down to the image, then save and upload this new image to the forum. How do I avoid this from happening? Take your photos with the phone in it’s right-side up position. In portrait mode, the lens should be at the top of the phone. In landscape mode, the lens should be at the upper left corner.
-
We had two threads on this topic, so merged them under the initial post to avoid confusion and a split conversation. -John
-
Pegasus also has some that work well for silicone hoses: https://www.pegasusautoracing.com//productselection.asp?Product=3613 I've also had good experiences with the Summit style that @toldfield shared above. -John
-
My Westfield has the hard lines running through the transmission tunnel. Much older car, but it is odd they moved them to that position. I wonder if that is a result of the Miata transmission which is wider than the Type-9? -John
-

Version 1.0.0
13 downloads
Parts diagram for Titan Dry Sump as used in the CSR260. -

1980 Caterham Seven Twin-Cam wiring diagram
JohnCh replied to Larry Sanata's topic in General Sevens Discussion
Thanks for sharing it. I've added it to the downloads section to ease future discoverability. -John -

Version 1.0.0
21 downloads
Wiring diagram for the 1985 Caterham Seven Twin Cam -
1980 Caterham Seven Twin-Cam wiring diagram
JohnCh replied to Larry Sanata's topic in General Sevens Discussion
Here is the file (I hope) that @MoBoost referred to above. -John
-
1980 Caterham Seven Twin-Cam wiring diagram
JohnCh replied to Larry Sanata's topic in General Sevens Discussion
@MoBoost I just checked and the file is really small (17kb). Do you want to send it to me via PM and see if I can figure out the issue? Thanks, John -
1980 Caterham Seven Twin-Cam wiring diagram
JohnCh replied to Larry Sanata's topic in General Sevens Discussion
If no one has that specific wiring diagram, this one might be close: -John -
By unsupported, I mean that it will not embed the photo in the post as it will with jpeg, jpg, gif, etc. It’s just a downloadable file. If your OS or the apps loaded on your device support that file type, then yes, you can open it.
-
Yep, those work. Now hopefully someone can actually help you with your question -John
-
Hi James, you attached an .HEIC file which is an unsupported file type (most backend systems used by various brands of forum software don't yet support it.) My guess is you took the photo with your iPhone, then uploaded it to the forum from a Mac device. If so, it stays in that format. Try emailing the photos to yourself, which generally does the conversion to jpeg, or take a screenshot of the photo and save it as a jpeg, then attach it. -John
-
The next delay was down to forgetfulness. I had planned to order a new degree wheel for this project; something I failed to do. The Kent Cams wheel I've used in the past is small (<6-3/4") which means the difference of 1/2 degree on the wheel is really tiny and requires a lot of care to ensure timing is just right. A larger wheel has greater spacing between the degree marks and is therefore a little less frustrating to get correct. As long as I was waiting for the new wheel to arrive, I thought I'd mock up and 3D print a better degree wheel pointer option than using an old piece of solid strand wire wrapped around a bolt. The plan is to use the factory TDC bolt to put #1 at TDC, center the degree wheel so the pointer is on 0, then remove the bolt and confirm TDC with the dial indicator. If it's off by a small amount, simply loosen the thumbscrew and slide the pointer to the correct position on the wheel. It seems this will be less frustrating and more precise than re-bending the wire or repositioning the wheel. I hope to finish the engine work this weekend. -John
-
I've had a few self-inflicted delays to finishing up the engine. First was indecision over a mechanical timing chain tensioner vs. the factory hydraulic version, then was a realization that I forgot to order a replacement degree wheel. I'll go into some detail on the timing chain tensioner in this post since it might be of interest to anyone contemplating building a Duratec. Most of the UK Duratec tuners recommend a mechanical version of the tensioner as the plastic teeth on the hydraulic version's ratcheting mechanism can supposedly break when the throttle is abruptly lifted at high rpm. The mechanical versions swap out the ratcheting mechanism for a bolt and lock nut setup as illustrated in the images shamelessly stolen from the internet. On the left is the stock hydraulic tensioner with the ratcheting mechanism extended. On the right is a mechanical tensioner that replaces the ratcheting component with a bolt. My 2.0L uses a mechanical tensioner I purchased from Raceco many years ago. I had one on order from Raceline for this engine, but after 7 months of waiting for production, I decided it was time for a rethink. Speaking with Esslinger, they felt the factory unit is fine provided it's the older style cast iron version rather than the new aluminum item Ford currently supplies. Given they have extensive experience building and refreshing race Duratecs, I decided to follow their recommendation and a cast iron item was ordered (Melling still manufactures this as part #BT5514.) I then made the mistake of cruising Caterham's parts site one evening. It seems they also used a mechanical tensioner for the R500 (the one pictured above) and had some in stock. Hmm… Deciding to err on the side of caution, I placed the order and triggered my first delay After the new tensioner arrived from Caterham sans instructions, I dug up the old email from Raceco that explained how to set the tension. It contained a line that didn't apply to my 2.0L installation so never stuck in my memory: "I prefer to use a good used chain. If you use a new one it will initially wear quite quickly and the chain will need to be re-tensioned which involves a timing cover removal. " I have no desire to go through the hassle of pulling and resealing the front cover shortly after getting the car on the road, so I've decided to stick with the hydraulic version for now, then swap to the mechanical tensioner the next time I pull the engine. In the meantime, I'll see if I can take some chain deflection measurements to monitor over time as an indicator of broken teeth. -John
-
New member, preparing to take the plunge, VW engine?
JohnCh replied to GTIspirit's topic in General Sevens Discussion
I suspect fitting the engine under the bonnet with the stock intake will be tough. I have a 2.5L Duratec on an engine stand right now and could provide a measurement for comparison. Those engines "just" fit. Are you considering new or used? If used, you could be looking at either a Zetec or Duratec, if new, then Duratec is now the standard configuration. How much of the desire to keep the VW engine is driven by emotional attachment vs. the fact you like the characteristics of that engine? When it's emotional attachment, logic tends to go out the window, which is understandable and often all that's needed to justify a decision. However, if it's the nature of the engine, I wouldn't sell a modified Zetec or Duratec short. Given the money and headaches you would save doing the conversion, you could upgrade the Zetec/Duratec and have something with a lot more power that you may like nearly as much. -John -
And now for something completely different... -John
-
Here's a picture of my current setup. For scale, the wheel is 270mm, but it appears my spokes are thinner than yours. -John
-
I've been enjoying following this journey and agree with Kitcat that all the new build threads have been great. We need more! -John
-
Have you considered mounting the turn signal switches in the spokes? It looks like you might have space for that. Mine are mounted this way and it works well. I can post a picture if it helps. -John
-
It looks like there is a sporadic issue with .MOV files. After recreating this issue in 4 out of 5 attempts in our test environment, I've piled onto an existing thread in the Invision support forum in hopes of getting this sorted. -John
-
Are you trying to get away from the overstuffed look? The later S-type seats are visually flatter but still have small side supports. I'm not sure what Birkin is using these days, but that could be another option. Intatrim, whom I believe may have made seats for Birkin in the past, does a range of seats that are fairly narrow and might be worth a look. As for regular production cars, that might be tough given the width restriction. -John
-
I believe that TPS is from Ford Duratec installations from the early 2000's. If that's the case, it should be easy to source in the US based on the part number. I don't have any experience with that specific TPS, but the Colvern units frequently used on Jenvey's do fail and exhibit similar, random behavior when that occurs. Rule out the easy fixes first. -John