JohnCh
-
Posts
3,406 -
Joined
-
Last visited
Content Type
Profiles
Forums
Store
Articles
Gallery
Events
Library
Everything posted by JohnCh
-
I'm planning to make my scuttle removable by replacing the 24 rivets with M4 dome head fasteners and rivnuts. For those who have already done this, how did you remove the old rivets? I'm used to drilling out the center then letting the remaining rivet head "ring" fall off. However, Caterham paints over the rivets meaning those rings stay in place. As someone accident prone by nature, I'd prefer not to use an oversized drill bit and carefully wear down the rivet heads. Even if I make a jig to limit drill depth, with 24 chances to make a mistake, I probably will. Is there any reason not to simply drill out the center with a drill bit also the correct size to create the through hole for the M4 fastener and leave the rivet head ring in place under the paint? The only one I can see -- and it is a concern if realistic -- is some ring could rotate when tightening the fastener and crack or tear the surrounding paint. Thanks, John
-
Sounds like a nice spec! The number of Seattle area owners is certainly growing. Counting you, I am aware of 4 new builds starting in October/November. In addition to @Pokey's great build thread, I've found the following build blogs helpful: https://caterham420detailedbuildblog.co.uk/ https://www.caterham7diaries.com/420r https://purplemeanie.co.uk/index.php/build-blog-index/ As for nightmares, there is no point. Just assume you will be missing parts, some of the parts you do have won't fit without fettling, and you will frequently ask yourself the rhetorical question "what the hell were they thinking?" It's all part of the experience Cheers, John
-
Welcome to madness! You should start an introductory thread and tell us about your spec and plans for the car. Cheers, John
-
I made some minor progress this week; front suspension is completed, and headlight assemblies are installed. Reading various build blogs, many identify the headlight assembly as the worst job in the build. Not sure if they've written that after completing the car, or if that's simply their opinion immediately after finishing that assembly. I will admit it was fiddly. In part because all these builders opt to redo the wiring assembly from stock. They eschew the factory PVC tube that covers the headlight wires and instead use heat shrink or a combination of heat shrink and braided wire covering to protect the wires. The reasoning is the factory apparently suggests -- and I say apparently because none of this is covered in the Build Manual -- cutting a slit in the PVC tube which runs from inside the headlight bowl, through the headlight bracket, and into the engine bay, then inserting the wires from the indicator with the negative running up into the bowl and the positive joining the other wires going down to the engine bay. This slit is then sealed with electrical tape. Some people think that approach is a little hokey. I was sucked into that vortex and wasted a bunch of time trying to figure out which of the various approaches I preferred. I went with heat shrink for better sealing and cleaning properties. However, in hindsight, I wish I had attempted a modified version of the PVC tube as I think that is the most aesthetically pleasing. It might have proven too difficult to get right or even fit -- it's a much larger diameter than the heat shrink wire bundle -- but without trying, I don't know if that's true. The other part of the job that annoys many, including me, is the poor fit of the headlight bracket to the chassis. It slides over the upper front suspension arm bracket and has a locating tab that fits under that bracket. The suspension bolt then goes through both brackets and the A-arm bushing to hold everything together. Problem is when pushed over the chassis bracket, the headlight bracket's bolt holes are severely misaligned with the chassis bracket's bolt holes. Some people bend the tab down to alter the fit and achieve bolt hole alignment, others enlarge the bolt holes on the headlight bracket. I had to do both. But it's done. Time for a Guinness. -John

-
As some of you may have noticed, the forum was down for about 90 minutes this morning. Unfortunately, the auto-renew Mazda has setup for the domain failed. Again. We are implementing some changes to ensure there are no further repeats. Specifically, moving to a more reliable domain register and having two backup people in place who can address any issues quickly in case the primary individual is unavailable. -John
-
Both Beachman Racing and Rocky Mountain Caterham carry a decent selection of Caterham parts. -John
-
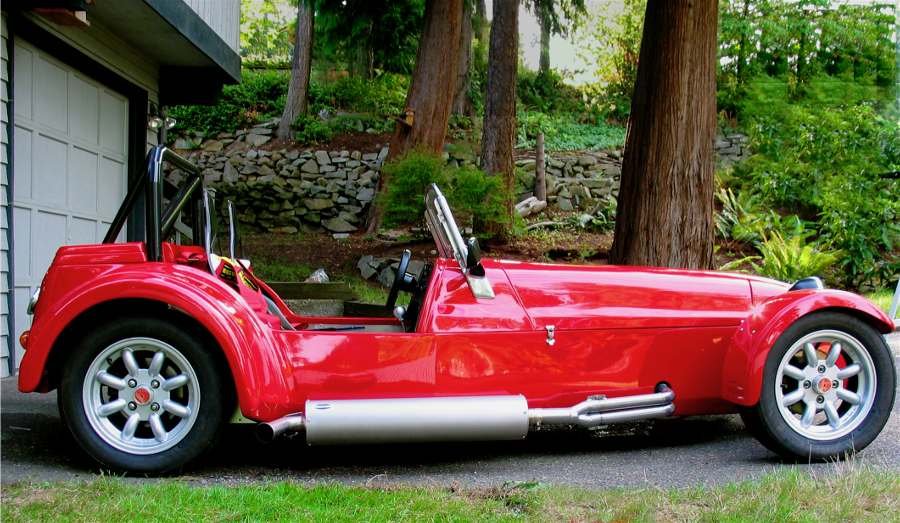
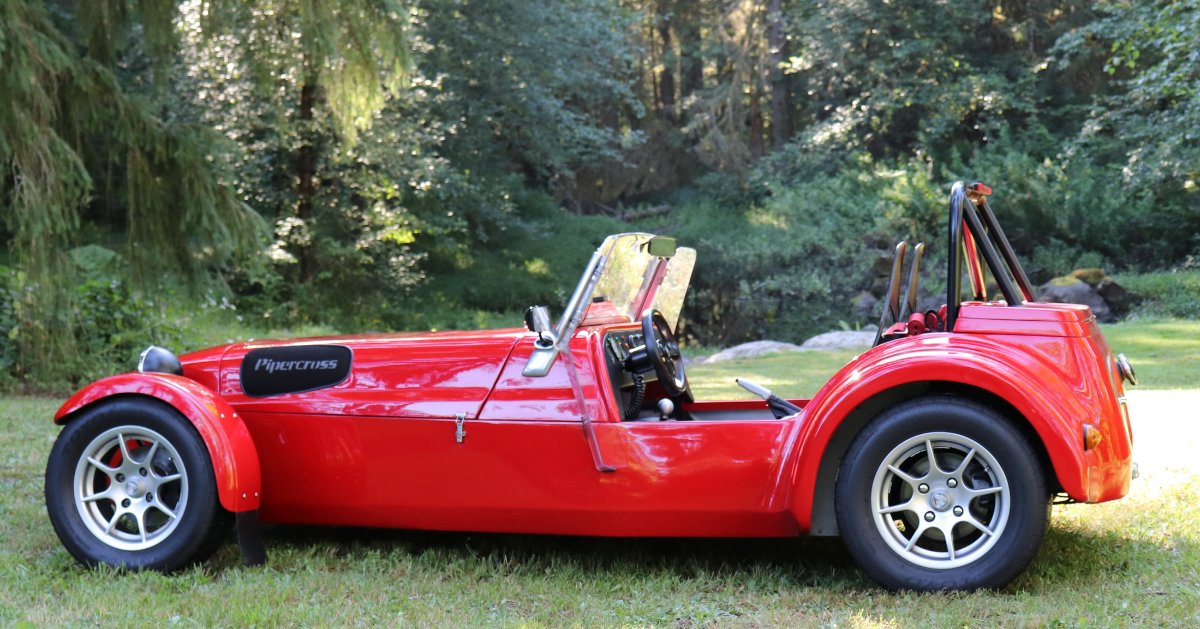
@ProfGriff's thread on his incoming Revolution wheels got me thinking it might be helpful to have a thread showing pictures of the various wheels people are running on their cars to give others upgrade ideas. Photos that show the wheel on the car are preferred. Repeats are fine as long as it's not an exact duplicate. i..e either the wheel diameter, wheel color, se7en brand/model or car color should be different to ensure some level of variety. The first photo shows 14" Two Gates wheels, the second are silver 13" Caterham wheels from 2009. I'm sure someone here can add more details on this wheel, either the model name or the years they were offered by the factory. -John
-
Very cool! What's the engine from? Thanks, John
-
No, it's not normal. Without getting into the actual content, it's difficult to say what was intended. The Internet makes it all too easy for people to read something differently than the writer planned. Hopefully that's the case here, and you two can work it out in PM. Personally, I've been looking forward to how this thread progresses. Buying an assembled car on Bring a Trailer is certainly easier, but where's the challenge in that? -John
-

The Regular Summary of Classified Ads of Se7ens Found For Sale
JohnCh replied to Croc's topic in Cars For Sale
Bruce, you should have received an automated email before your membership expired on July 11th notifying you of that fact. It's possible it went to your spam folder or there was a glitch. Regardless, the easiest way to tell if your membership is expired is that it no longer reads Club Member in red font under your avatar, and instead reads Registered User in black font. If you have questions about this, please contact me offline so we can get this thread back to the intended topic. -
It happens. But fair warning I am still watching FP3, so no spoilers on that one!
-
DOH!!! Some of us weren't able to watch it live. Best not to post sports results to a thread with a title that gives the reader no indication a spoiler is ahead. -John
-
Thanks @KnifeySpoony, mine now looks like that too. Ran into a minor snag doing something simple: removing the headlight bowl trim ring so I could access the innards. All the online build blogs referenced removing the allen screw on the top of the trim ring, however, I only had two screws on the bottom. I figured this was a running change and the trim ring would still pop off with a little pressure. Except it wouldn't. Now wouldn't in this case is code for me being afraid to force it beyond what I considered to be normal pressure for this job. I opted for the painted headlamp bowls and had visions of the trim ring flying off from me ham-fisting it and damaging the finish, so I was proceeding very cautiously. After taping it up with painter's tape, I pulled out a plastic trim removal tool, sanded down the edge until it was very thin and burr free, then proceeded to wedge it between the trim ring and bowl and carefully work my way from bottom to top. It took a fair amount of force for it to finally release. The reason was pretty clear after it was off: thick paint on the tabs creating very tight tolerances for the friction fit. You can see where the paint came off one tab revealing the standard black finish beneath. The other tab was about the same. Fortunately, no scratches. Of course, I still have that opportunity with the second headlight. -John
-
Someone sent me a photo of his 420R lower wishbone. His lower nut fitment is the same as mine which tells me this isn't an assembly issue. The nut is 0.606" thick and the shorter nut for the wingstays is 0.469". This morning I found an extra pair of the shorter nuts in a random, unmarked bag that appears to have front anti-roll bar fittings and a couple of other random suspension parts. I suspect these are the correct nuts to use and it's simply skipped in the Build manual. I'll use these for now. Thanks, John
-
I made some progress today, and as expected, ran into some minor issues. Most of them are known and well documented in other build threads and blogs. So instead, I'll focus on things I haven't seen elsewhere and will simply confirm that, yes, getting the washers to fit the lower front control arms is frustrating, and it's annoying that bolt placement for both the upper front shock mount and upper forward front control arm try to occupy the same space as the painted side skin. Unfortunately, in my initial inventory I missed the fact that the fastener pack for the steering rack and column assembly is still at the factory. This required a trip to the hardware store. They didn't have exactly what I needed, so temporary fasteners are holding the steering rack in place for now. As noted earlier, I'm using CORE dampers from Meteor Motorsport in lieu of the factory Bilsteins. The CORE's bolt spacers are 0.6 mm narrower than the Bilsteins. When coupled with factory tolerances for the mounting brackets, this resulted in gaps ranging from about 0.8mm to 1.2mm. That meant another trip to the hardware store to buy washers, then some time with a file turning them into proper width spacers. This would have been a far more tolerable tasks with a Guinness, but alas it wasn't 5pm anywhere, let alone Seattle. Next, the nut that holds the bottom of the upright to the lower wishbone, doesn't fit as expected. I'm not sure if I screwed up somewhere, if the nut is wrong and too thick, or some bigger issue is afoot. The instructions state that for the R-pack cars, you need to bookend the lower wishbone's spherical bearing with two different spacers. Those are both fully seated, but with the nut torqued, the threads of the stud aren't protruding from the bottom of the nut. Pics below show the spacers, the correctly(?) seated spacers, and the bottom of the nut. A thinner nut, as provided for the wing stays (same thread size) would resolve the issue. I'm hoping that's the answer rather than something more annoying. Anyone know? Before calling it a day, I attempted to install the driver's side wing stay only to discover, there isn't sufficient room to install it with the CORE dampers in place. Unlike the Bilsteins, there are fitted upside down and have larger diameter coils, which conspire to leave insufficient space to slide the wing stay onto the upright. It's a simply fix -- remove the lower damper mounting bolt and rotate the damper inward -- but by this time I had already exceeded time allotted for the build today and will need to pick it up in the morning. -John
-
Caterham is not the only company that has morphed away from their original model designation convention. The last two digits in a BMW model used to indicate the engine capacity in liters: 320i was a 2.0L, 325i was a 2.5L, but then things changed and sometimes a 328i was a 2.8L and sometimes it was a 2.0L turbo. Then there is Porsche. The turbo designation meant it was, well the version with a turbo. But now it just means it's the highest performing model. The base 911 has two turbos as does the 911 Turbo, then there is the Taycan Turbo that doesn't even use an ICE. Marketers never let the truth get in the way of a good name... -John
-
Thanks John. Guinness is always a good call BTW the naming convention you mention was correct in the past, but Caterham changed that when they went with the 360 and 420. Caterham lists the starting weights for the 360 and 420 at 560kg, and the 620 at 610kg. Their respective horsepower ratings are 180hp, 210hp, and 310hp (half the model name). For the names to follow the HP/Tonne formula, they would each need to weigh 500kg. Using the old formula names and the published weight and power on their website, the model names would be 321, 375, and 508 -- although I'm sure the marketing people would round up the first and last models to 325 and 510 Cheers, John
-
Thanks, that's the only car I've ever purchased which has appreciated. Typically, the market for a car plummets as soon as I buy one. Yesterday after work, I attempted to do a preliminary inventory. Based on things I have read elsewhere, I figured a Guinness would help the process. Surprisingly I haven't yet found any obviously missing parts, but Caterham hasn't made it particularly easy. There is a half-hearted attempt to group things in sealed bags or labeled boxes, but unfortunately it doesn't appear the people doing the packing are very good at the childhood game "which of these things is not like the others?" For example, one wing stay was in the front suspension parts box, while the other was in the box with the half shafts and exhaust manifold. There was sufficient room for both stays to have been in either box. The sealed bag that contained the tie rod ends and steering rack brackets also had one additional item: the dry sump dipstick/cap. Interestingly, a second dry sump dipstick was screwed into the dry sump tank. If you're kit was missing one of these, it appears I have it. Hopefully I'll have time later this week to make actual build progress. -John
-
The TC has 4 user-definable settings, one of which will be fully off. With the amount of torque this engine will produce, I want to ensure I can put it down on a narrow bumpy road when passing someone without going sideways in a straight line. This "should" give me options. We'll see how well it works. -John
-
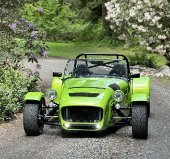
The color is Roulette Green which was a factory color several years ago. As a pearl paint, the color morphs a bit under different lighting conditions, which makes it difficult to accurately capture in photos -- particularly when I'm taking them. In person, there is a hint of gold that isn't visible above. -John
-
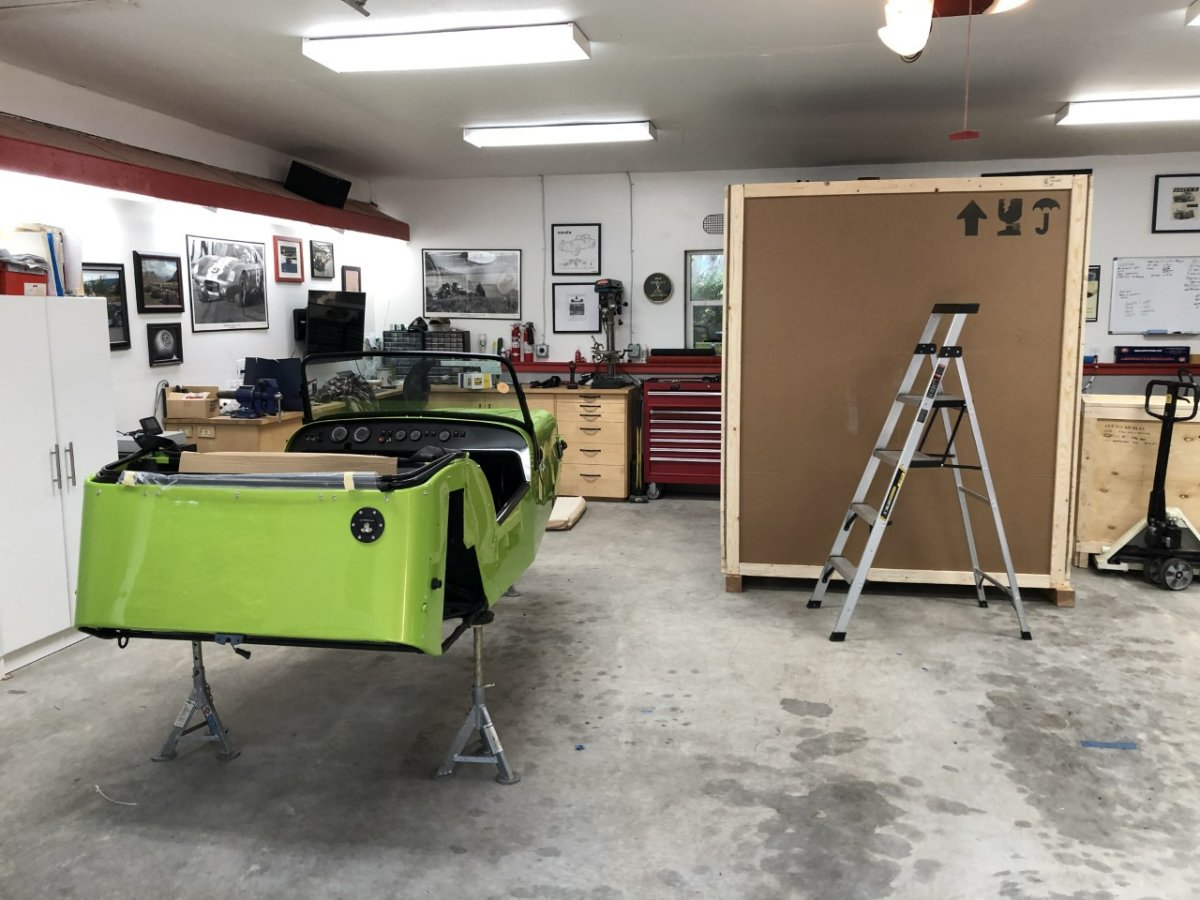
One year, five months, 6 days and 14 hours after placing my order, the crates have arrived. Not that I've been counting... Despite the order sheet identifying the car as a 420R SV, it won't reach the road in that state of tune. The engine, built around an Esslinger 2.4L short block (thread here), should be good for around 260hp -- probably a little under while still using the 420 exhaust and little over when replaced with something larger. Given the engine is so different, calling the car a 420R doesn't make much sense to me, so I've applied Caterham's naming convention which doubles the stated horsepower to arrive at the model name and dubbed this the 520R. For the purists among you who don't like my rename, you'll like my planned modifications even less 🙂 Those deviations from stock are listed below. Some are pretty straightforward, but others will add to the timetable as I attempt to figure out the best approach and likely ponder why I didn't take the simpler, factory route. i.e. this is gonna take a while. 2.4L Duratec Emerald K6+ ECU External fuel pump with return-style plumbing and Holley Hydramat Traction control Cold air intake (likely via the intercooler duct in the 620R nosecone) Blank carbon fiber dash (from Westermann) Aim MXS 1.2 Strada display Freewheel programmable steering wheel mounted controls for horn, turn signals/hazards, high/low beam, and possibly single wipe function 620R toggles for the remaining switching needs CORE single adjustable dampers (Front: digressive valving w/linear springs; Rear: normal valving in rear w/ progressive springs) Removable scuttle Relocated WB O2 bung Assorted other customizations I'm still pondering Next step is to go through the parts to see if anything obvious is missing -John
-
Not to depress anyone whose been thinking about ordering a new Caterham, but they just updated their configurator with new prices as per the table below. I'm not sure if there are changes to the 360 and 420 that warrant the much larger increase for the 360 or if that's simply an intentional adjustment to alter the sales mix between the two models. I suspect the £2,300 upcharge for more power and a dry sump will be a lot easier for many people to justify than the old £4,000 upcharge. Old New Increase 360 £31,990 £35,990 £4,000 420 £35,990 £38,290 £2,300 620 £51,990 £54,990 £3,000 -John
-
The 420 cams' lift is at the clearance limit for the stock pistons. Although you could theoretically remove and pocket the pistons, the more common approach when installing more aggressive cams is to upgrade rods and pistons, refresh the bearings, balance the bottom end, install ARP fasteners, etc. Been there, done that with cams that are not quite as aggressive as the R500 cams and love the results, but yes, it was major work. -John
-
@BlakeJ did you get the 420 upgrade parts through Caterham? If so, were the valve springs part of the package? How about ARP rod bolts? I've read that the R400D (precursor to 420R) initially used those, but at some point, Caterham stopped that particular upgrade. Not sure if that's true or just speculation. Thanks, John
-
No, just sharing information to consider. It's not just a cost decision. The 4 pots with their much heavier discs add a lot of unsprung weight which is not a good thing, particularly in such a light car. Over the years I've seen a number of people report the 2 pots with good pads work fine for them on track. I've also seen some people complain of fade. It comes down to a combination of the car's power, the tracks driven, and the driver's speed. Engine wise it's the cams, ECU tune, and dry sump. The cam manufacturer recommends HD valve springs, which I'm assuming Caterham include, but I've never read confirmation of that addition. I'm not aware of other differences between the two models, but others here may know if they exist. -John