MV8
-
Posts
2,303 -
Joined
Content Type
Profiles
Forums
Store
Articles
Gallery
Events
Library
Everything posted by MV8
-
https://www.teikokukikaku.com/en
-
Articles on the birkin mention a toyota axle and maybe they switched to that at some point. If you go to quaifes site, they list a diff under the caterham as a BW68 plus the ridges on top of the housing make it unique. Are you looking for a more highway friendly, numerically lower ratio?
-
Nice score Tom! We've been talking about that one on Locostusa. Did the seller have any other parts for sale off this car like the hard top and doors? Buy back whatever you can. I see you bought the trailer too. I'll see what I can find.
-
Lonnie posted to locostusa. Nice video.
-
I was thinking crack since you were talking about vibration, but you said pin hole. It sounds like the leak is between a tube and the end plate and a mfg defect versus a vibration issue.
-
Has it always read low? Calibration speed for most is 1000 rpm at the cable for a 60 mph indication. The plastic driven gear on the transmission end of the speedometer cable is usually where calibration to a good instrument is made. Each tooth is typically a 5 mph change. When gears to change the ratio are not available, a ratio changing box is used. The boxes and gears are universal and assembled to order. The box goes between two cables or direct attach to the transmission the same way the cable does. The sometimes include a 90 degree drive for clearance and better cable routing. Costs run $75-150. If it is a speedo issue, it sounds like the magnet has lost strength or there is too much friction. The adjustment you are referring to sounds like the end of the clock spring.
-
That axle is a Borg Warner 68 used on Aussie Datsun B210s. http://datsun1200.com/modules/mediawiki/index.php?title=Borg_Warner_Differential
-
Beautiful, pricey rad. I would measure the upper hose outside diameter for the clamp size to use, then add a cushion/adel/MS21919DG or WDG clamp to the upper hose at the greatest bend and another to the chassis X brace tube below it to act as an attachment point without drilling or welding the chassis. This will help to counter the hose pushing the rad forward and leverage on the hose fitting from 14psi or higher in the cooling system and softening from heat. I'd probably install a lower than is modern practice 12 psi cap as well but the clamps should be enough. Another alternative is to replace the upper hose with rigid tubing, reusing 3 inches from each end of the hose and four clamps. https://www.aircraftspruce.com/catalog/appages/ms21919clamps.php
-
Since these carports are going on slabs and I'm grading my driveway, I checked the local concrete suppliers for the going rate though I won't pour until after Easter/last freeze of the season. The last time I ordered concrete was probably about 15 years ago. It was $90/cuyd for 3000 psi/5 bag with no additives. This time, I going with 5.5bag/3500psi and enough water reducer added for a seven slump (well worth the small increase per cuyd for easier work without loss of strength from excess water). 10 yards is considered a truck load. They can hold more but it is a weight thing. Each cuyd is about 3500 lbs. The place I used last time gets $212/cuyd plus $65 for various fees and delivery (probably not including tax), plus an extra $200 if less than 6cuyds are ordered (good to know for planning). $2185 per load plus tax. The other supplier gets $176, $50, and $100 for under 5 cuyds, so $1810/load. I'm making a 12 foot chute to add to the roughly 16 feet between the rear tires and the end of the trucks chute. This will keep the truck out of my forms and help me place it as close as possible. The chute will be a metal roofing panel with 2x4 sides and blocking to keep the U shape with a few feet of chain to wrap the end around the trucks chute. Pumping would be ideal, but I don't like trusting a third party pump trailer and operator where many things (show up/setup/operation) can go wrong and you've got tons of concrete coming that will have to go somewhere within 30 minutes of delivery, plus the mix costs more spec'd for smaller gravel/more sand to ensure it doesn't stick in the hose. I think a small pumper adds about $500 for a half day. I also found the local supplier of the materials used to assemble the carports/garages. I should be able to purchase directly instead of through a third party for everything.
-
It's a small world in that field. My work is related. I recently found some old pics from around 2007 or so that were posted on locostusa of a sevenesqe middy based on a vw rabbit and it was pulled off fairly well. Some parts needed massaging and moving around to look right imho.

-
I think your right. That's a dude.
-
Hi David, That's Kurt. We've been on the locostusa for well over a decade now. I'm sure my input is in the book here and there from our conversations. He sent me a copy of the mini build book but I don't have the midlana book. I've had a few fieros (still have one with a 4.3l v6-90 and a chevy cobalt 5spd) that fulfills my needs though much heavier of course at about 2500lbs and cg like a 911. None ever exploded or caught fire but were cheap because of the reputation. I used to get yelled at regularly be people who felt I was an idiot for driving one (at least that is what they'd shout driving by). I'm an old mechanic, so I fix/reengineer things so they don't go boom. Never been a honda guy though. I bought Ant Anstead's book too, along with pod published morgan build and other small car builds. I buy the books for entertainment. If you are interested in books on designing chassis and suspension, Carroll Smith and Allan Staniforth are the primaries imho.
-
Just providing some info on how it can be done but don't get bogged down on the build for this. If the end result is a hole bigger than you'd like or you don't care to be so precise with the hole placement (which is fine too), a 3x3" filler patch of 3003 sheet can be riveted or screwed on to the firewall with #6x1/2 sheetmetal screws. I'd use .050" for the patch or bend flanges in the edges for more rigidity. If concerned about water entering when washing the engine bay, the top edge of the patch can be bent over to form a hoodie similar to what comes on other 70's british cars
-
Lateral is easy using a stick or wire gauge from the center of the column forward end to the chassis rail. For accurate vertical placement of the steering shaft hole in the firewall, you can run a string down the outside of the car between the center of these two joints. You can use a long wood dowel (to cut, square is better than round for this), some more blue masking tape, twine (found with concrete tools), and two string levels. The levels are about three inches long and hang from the twine. 1) Cut the dowel into three pieces that are at least long enough to vertically cover the side of your chassis upper and lower rails. 2) Fit the upper joint to the column end. 3) Tie the twine around the center of this joint. Run the string horizontally through the side of the frame. 4) Tape a vertical dowel on to the side of the car so the twine, when wrapping around the dowel, does not slope forward or backward in the overhead view. It should he both horizontal and perpendicular to the chassis. If there happens to be a chassis tube in the way, go around the aft side of the tube and don't add a dowel. Use a string level between the chassis and the joint to bring the string level then tape the string to the dowel/tube to hold it level. 5) Repeat the process for the other joint of the steering shaft you want to make a hole to clear except that if a tube is in the way, go around the forward side. 6) Now place a dowel, ruler, or anything you can place across the firewall where you can ensure it is level and the end can reach the string outside the chassis and mark a line on the firewall. This will give you the height of the hole. If one or the other end had a tube in the way, the hole will be a little higher or lower than the line depending on which end of the string is offset in the overhead view. 7) When cutting the string, tie a knot near the end and melt the cut ends so they do not unravel.
-
You may want to dimple where the grub screws touch the DD shaft and use loctite as well as the jamb nuts to ensure they don't come loose. The joints are bare steel so wipe them down with acetone and let it sit a while before rattle can clear or black. I guess you are having a 2.25" driveshaft made. The shaft is sized to be appropriate to the maximum rpm it will turn to prevent flexing/whipping but since you are probably going to be shorter than a miata shaft, it will probably be ok. The weld yokes are sized for a specific tube size and wall thickness (typically .065 or .095"). I built a replacement for my wife's na using all new parts since the originals are throw away with staked bearing caps, thin edges and no grooves for retaining clips. They eventually offered joints to the the original yokes but I wouldn't trust it. I used 7260 joints (same as dodge dakota) and 2.5 x .065 tube. I bought the parts and had a heavy truck driveshaft shop put it together and spin balance it.
-
"All hat, no cattle". I see it everywhere. She's probably working her way through college.
-

Replacing entire front end of Caterham and need some guidance
MV8 replied to Jonathan Cort's topic in Build Threads
Curious as to what you mean by this. You bought the cmc turn-key. -
Replacing entire front end of Caterham and need some guidance
MV8 replied to Jonathan Cort's topic in Build Threads
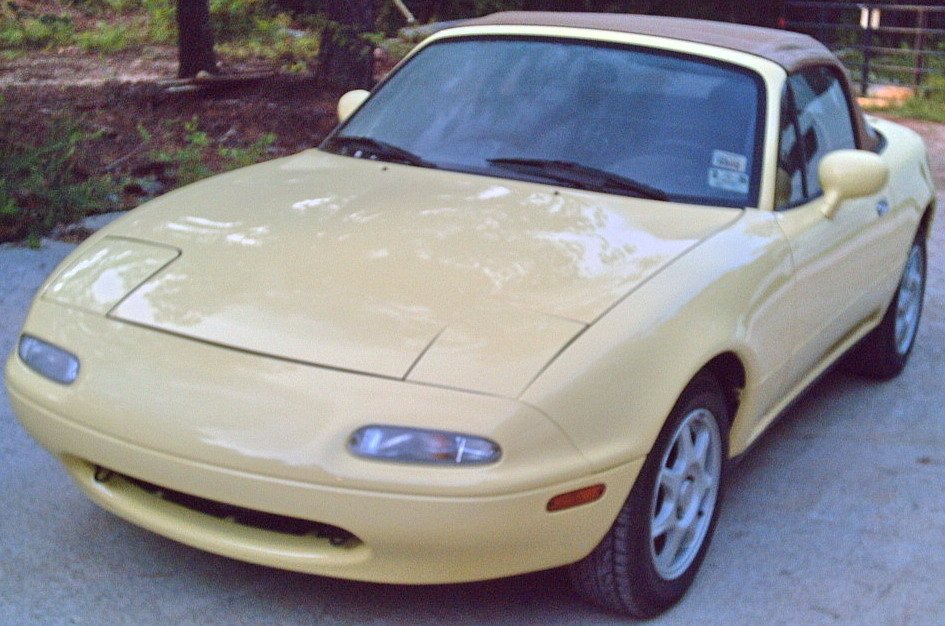
Lovely Seven. It would be better to reskin the whole side and weld at the original narrow section near the rear wheel arch since the welded area may be different from the rest of the panel as far as polishing is concerned. Maybe you have a Wicks or Aircraft Spruce nearby to pick up the 3003. Proper welds do not need extra reinforcement. If the welds will be mid-span on a tube, it would be better to fill a narrow gap if the tube will be ground level after welding, removing part of the weld bead. Align tube sections with strips of angle iron the same size or a little smaller than the tube and that are as long as the available space along the tubes. Use four vice grips clamping lightly and spaced as far apart as practical. Tack it all, remeasure, and recheck body panel fit before fully welding anything. Go back and forth (like when torqueing lug nuts or head gaskets) and don't weld more than a half inch at one time. I see it came in three sections. I would not install everything they sent if it isn't needed. It depends on the actual damage. I expect there is no repair data made available with chassis dims from each point in three dimensions. Measuring another car might help but is no guarantee it will be right for your panel fitment. Can't assume the chassis dims on the opposite side are correct either. You could compare the published wheelbase then adjust the caster to the typical spec to measure on the "good" side and use a straight edge carpenter square or level to see if the tubes are straight in two dimensions. If that's good enough and the bonnet edge to the scuttle and nose fit well, you could use the good side to base the new front end off of. You can also see how bad the bent side is. Care to share a pic of the damage? It could be a minor pull to correct without all this work. Are you doing the repair work yourself or just want to strip the car as much as possible before it goes to an frame shop? -
Getting closer to a purchase. More questions.
MV8 replied to Saudio's topic in General Sevens Discussion
I don't have a cat so feel free to ignore my input. I think wind noise at speed would be louder than the standard side exhaust. I don't think vented are necessary for a non-race cat and they should be lighter with lighter calipers for a better ride. The cut off is driven by racing requirements. Shift indicator, no. "Less is more". 13s for more sidewall cushion for a better ride and less weight. -
Idler Pulley for 2.3L Duratec w/ exhaust side alternator mounting
MV8 replied to ashyers's topic in Parts For Sale / Wanted
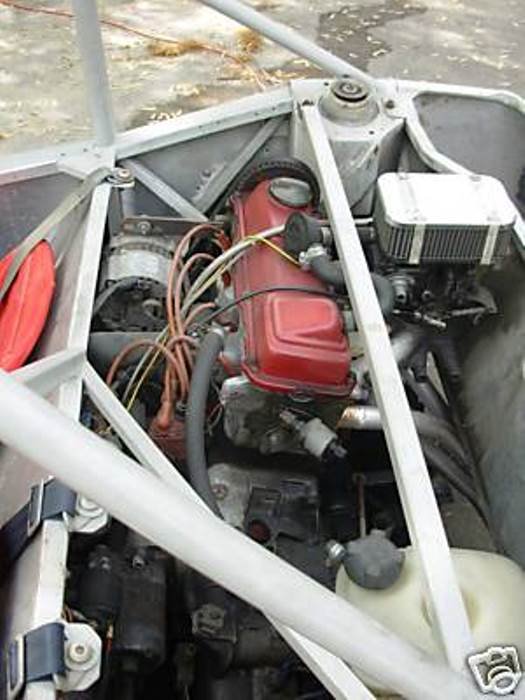
Pic for the words.
-
Wagons make sense. I remember riding in the backwards facing seat that folded into a truck bed and the power tailgate window. So heavy though. As I recall, gov regs back then drove us into the suvs since trucks had lower safety and emission requirements plus the incentives for businesses to buy trucks even if they didn't need one.
-
Idler Pulley for 2.3L Duratec w/ exhaust side alternator mounting
MV8 replied to ashyers's topic in Parts For Sale / Wanted
If anyone is curious, the pic is of a fwd cover with a dry sump showing aftermarket drive components. No experience with the duratec but I've made a few belt drive adaptations and brkts for vee and serpentine belts. I'd remove the fan drive from the cover, check fan drive boss clearance with a ruler or straight edge between the alt and upper right idler. If there isn't a 1/2 inch or so of clearance for dynamic belt flop, I'd mill the boss and/or raise the idler and/or raise the alt. Should be able to use an oem tensioner to the left of the crank if you can get the belt length right. This would be just long enough to allow installation with the tensioner pulled back yet still have enough tension when released. For coolant pump wrap, it would be better to fit an idler between the crank and oil pump behind the gilmer belt but you'd need some creativity with the ranger cover, since it has no provisions. If not fitting a dry sump, I'd probably put the fwd alt where the oil pump is and eliminate the need for the idler. -
Size refers to shoe size (versus drum od). Pinto/M 2 8 inch brake shoes are 9" x 1.75. A drum weighs 10.85 lbs. https://www.hemmings.com/stories/article/ford-8-in-differential-carriers https://www.motortrend.com/how-to/rebuilding-8-inch-ford-rear/
-
With a 3.5 width, look for a 145 and leave out the side wall percentage back when everything on the street was an 80 (145R13 = 145-80-13 and R for radial): https://www.cokertire.com/tires/145r13-firestone-f560.html
-
I only looked for a '76 pinto axle near Cape Cod.