-
Posts
3,266 -
Joined
-
Last visited
Content Type
Profiles
Forums
Store
Articles
Gallery
Events
Library
Everything posted by JohnCh
-
Thanks Bob, if I wasn't able to get Caterham to agree to the seat switch, I would have needed to do something like that. However, although the seats are a little looser than I'd prefer, it's not to the degree that a correction is required.
-
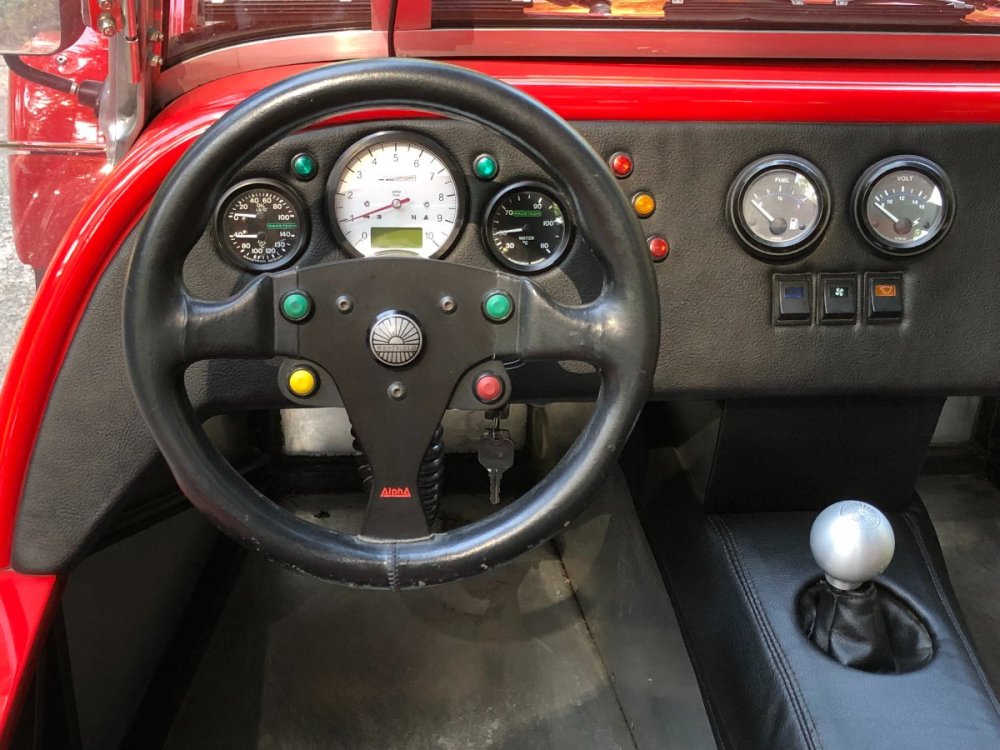
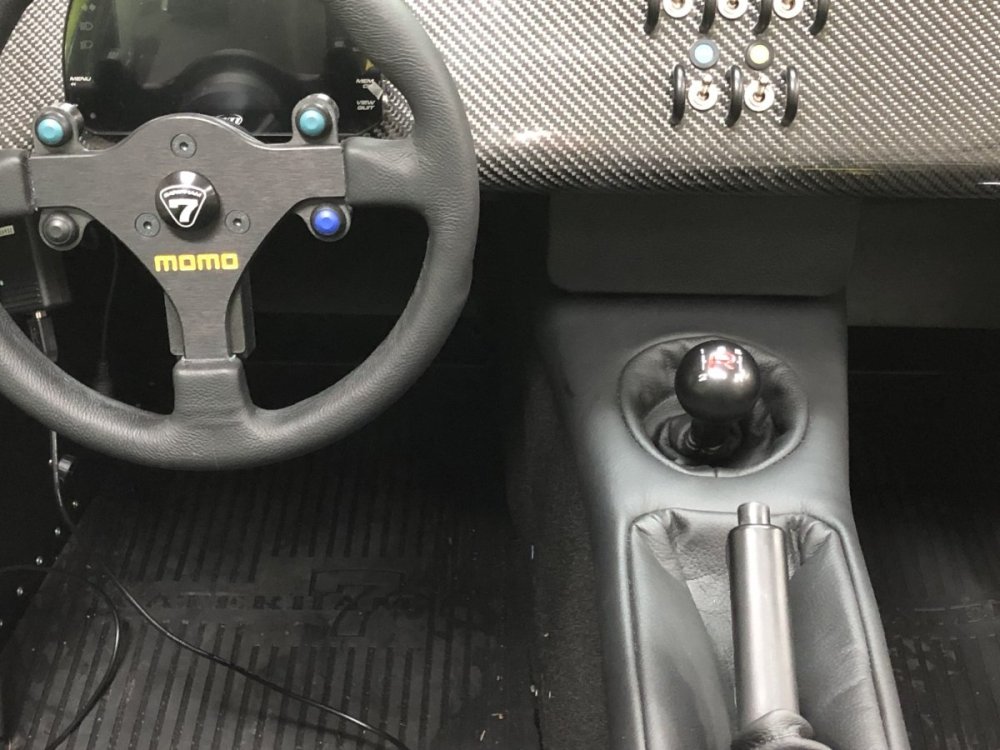
I decided to attempt seating the rings today. The plan was to vigilantly watch the Lambda reading while doing reasonably heavy throttle from 2000-5000rpm, then snap off the throttle to push the rings into the cylinder walls. Provided there was nothing concerning in the readings, repeat a few more times. A camera was pointed at the exhaust to record any signs of smoke. It went okay. Lambda was safe, the car sounded fine, there was zero smoke visible in the video, but… After my last run, I noticed the oil pressure was down to 5 psi. Oh crap. Then suddenly it was up to about 70 psi then immediately fell to -3 psi, then up to 50psi, then… Clearly a sensor issue, but I decided to stop the fun and carefully drive the mile and a half to my house while keeping an eye glued on the oil pressure reading. It did the weird stuff a couple of more times, then went to a steady reading and was fine idling and after subsequent restarting when I played with revs. Interestingly the oil pressure alarm programmed into the AiM never came on, so it might be an issue inside that device rather than the sensor itself. Regardless, I want to sort this before going on the dyno or have a manual gauge back up installed. First step will be the old wire jiggle routine to make sure it's not a connection issue. Although it's early days and I haven't yet had an opportunity to drive the car even reasonably hard, I do have some initial observations. Some good, some not. The car is big. Shoulder room in the S3 has always been tight for me with a passenger. I don’t like that and have been spoiled by the Westfield's additional 2" of cabin width, hence the reason I opted for the SV. However, the cabin feels immense. Yes, I'm aware I'm probably the first person to ever publicly describe any Caterham this way, but in fairness, all my tin tops have narrow cabins. My references are a bit skewed. The seats seem comfortable enough but are unnecessarily wider than the Mogs. This despite special ordering the narrower S3 version of the carbon fiber seats. For me, the Westfield is the Goldilocks for seat and cabin size. The turning radius is big. The Westfield's is significantly tighter. The steering is also a little slow for my taste. Not as slow as the original rack on the Westfield, but much slower than the version I've run for the past 18+ years. The quicker Caterham rack is likely in my upgrade future. Steering is very nice. Really linear and smooth on turn in. I've only driven 2 other cars that had that same sensation: another Caterham and a modified late 80s 911 with a lot of front suspension updates and an absence of rubber bushings. The CORE dampers are really good on abrupt bumps. The sharp input on that initial transition is really smooth and takes the edge off the hit. So far, glare has not been an issue with the AiM display. The custom mount appears to be doing its job. The steering wheel buttons are similar to the Westfield's and perfectly positioned. The wheel though is slightly bigger at 280mm vs. 270mm. That 10mm difference is noticeable. I prefer the smaller wheel, but it's a minor nit. -John
-
I have the Caterham (Raceline) dry sump system and the engine is effectively the same from an oiling standpoint. I wish there was a definitive view on optimal capacity but it's all over the map. I've seen references anywhere from 6-8 quarts. Of course, what really matters is how much of the missing oil is down to combustion events vs. user error/inconsistency in filling each time. I really hope this is simply a case that I'm an idiot. In my favor is a long history of being an idiot. So I'm hopeful...
-
@Anaximander, I saw your other post and glad to see it's sorted, and you did so well at the recent autocross. If this turns out to be a non-issue, then I am close to tying things up. Pop the scuttle to finish up a couple of wiring items and install the knee panels, get on the dyno, then sort registration. How hard can that be?
-
Thanks, I added nearly 6-3/4 quarts to get it just below the top of the baffle, but I can't guarantee I filled it to exactly that same spot before. The fact that you add a little over 6 quarts makes me feel much better. Now who is going to come along and make me feel much worse?
-
Thanks Simon. My lean spikes are at tip in at low load sites. I haven't yet tried heavier application like you would have on track. That said, when I drove the car yesterday and tried to ignore the Lambda readings when tipping in the throttle to avoid a bias, it seemed to run better. It might be good enough for the 35 mile trip to the dyno. Well, there is an asterisk to that comment which reads "if the engine isn't bad." <cue foreboding music> I'd covered over 60 miles and it was time for its first oil change. My recollection is that I initially put in 8 quarts. However, after sucking out the oil from the tank, removing the finger and oil filters, I had a shade over 5-1/4 quarts in the Pella. The plugs were sooty but dry, yet when looking into the bores, a coat of oil on the top of every piston stared back at me. After refilling with fresh break-in oil, I confirmed there is no visible oil smoke from the exhaust. There was a brief puff of very black smoke but it coincided with a stumble when blipping the throttle and was consistent with earlier Lambda readings. A compression test showed 240psi across the board. That seems high, but it could be my gauge. It has historically shown 200-210 psi with the original iteration of the Westfield's Duratec which had 10.75:1 pistons vs. 12:1 in the 2.4L. Leak down showed 2% in each cylinder and a borescope revealed nothing out of the ordinary beyond the thin film of oil. Esslinger responded to my email Sunday evening (nice customer service). His initial reaction was bad and led to much swearing and invoking the names of various deities on my part. However, after seeing the leak down numbers and my confirmation I've never seen visible smoke from the exhaust, he thinks it might have been oil from initial startup before the rings had begun to seat. That would also mean my estimation of how much oil is missing is, well…wrong. At this point I'm not sure what to think. Other than the issues related to the fuel assembly and the map not being ideal -- yet according to the logs, nothing unsafe -- there are no other signs of issues. No odd noises, starts and runs fine, no smoke from the exhaust that I've seen or smelled, and it doesn’t run hot. If the rain holds out, I'll try to put another 10 miles on it today to see if there is measurable oil decrease in the tank and also keep an eye open for smoke. There is still the possibility that I missed it or that running it for several minutes wasn't sufficient. When I started this thread many, many months ago, I recall writing this was going to take a while. This, however, is not quite what I had in mind. -John
-
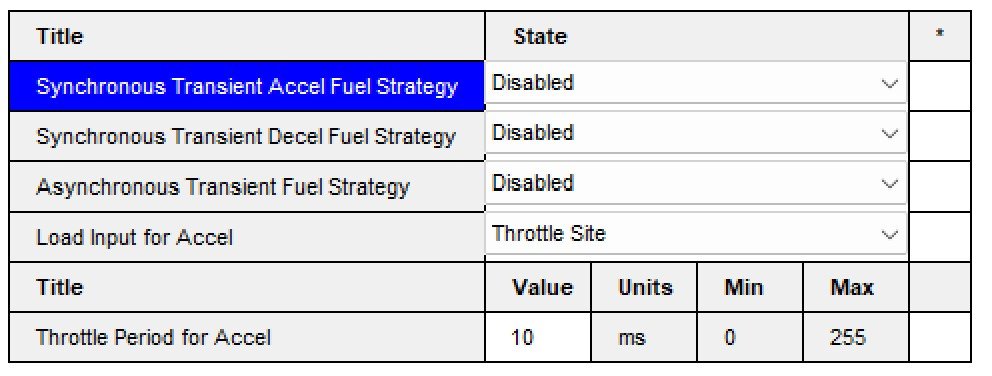
Thanks Andy, Simon was kind enough to share his map from SBD for comparison. It also has the acceleration fueling disabled, so this seems intentional. In contrast, Emerald does enable it on the map I'm using in the Westfield and it didn't show those lean spikes when logging after the engine was completed. Perhaps part of the issue is that I'm seeing the lean spikes as they occur because the Lambda is shown in my AiM display? I see it, so I'm aware. I'll see what happens if I intentionally ignore the display under normal driving. If I feel the issue, then I'll know it's not simply my reaction to a reading.
-
Thanks MV8. As per the screenshot below from the software, there are a number of individual pages associated with this function and it appears they all have data. However, it's unclear if that data is for whatever he normally uses as a base map -- which could be old and for a very different engine -- or if these are the values used in his maps for his similarly tuned Duratecs. I'm hoping I can get a hold of an MBE map for a Duratec so I can compare. If I don't get a hold of one in a bit, I may just click the enable button for Synchronous Transient fueling and see what happens.
-
I put 22 miles on the car today. No issues, and looking at the logs, the random lean spike seems to have disappeared. However, it still goes lean (about 1.10 Lambda, 16 AFR) when adding throttle. Looking at the map, it appears SBD didn't enable either of the acceleration fueling options. Does anyone know if that's expected with the MBE? If it's not, does anyone have settings from another Caterham I could try as a baseline? Thanks, John
-
Thanks MV8, I'll keep that in mind if for a winter project. The interesting thing for me, assuming my hypothesis is correct, is that my mods didn't create a problem, but rather exposed a shortcoming of the stock tank. If I treat empty as the same fuel level where the stock pickup can no longer access fuel, then the issue will remain masked. I should be able to program the AiM to reflect this virtual empty point. Looking back at when the engine first died, I was driving in a straight line, and the prior turn was a gentle sweep to the right. This tells me that yesterday's experimentation was either fraught with false positives, or there were actually two issues at play: in-tank fuel plumbing issues (now addressed and possibly causing the random lean spikes) and fuel surge as fuel was consumed. I'll report back later with today's results. Thanks, John
-
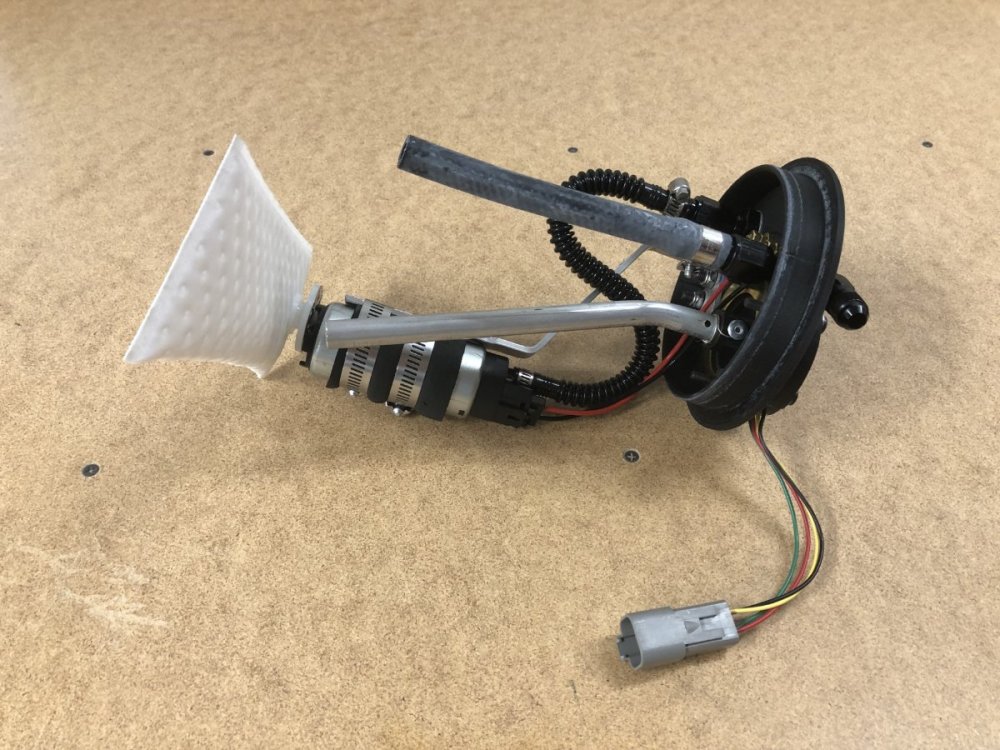
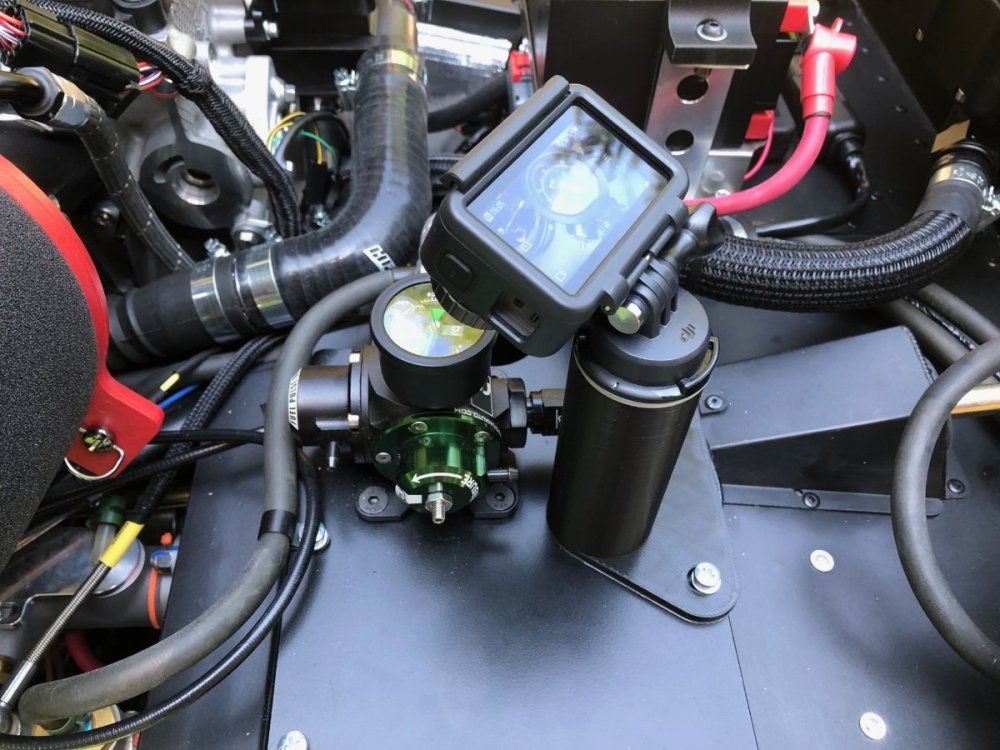
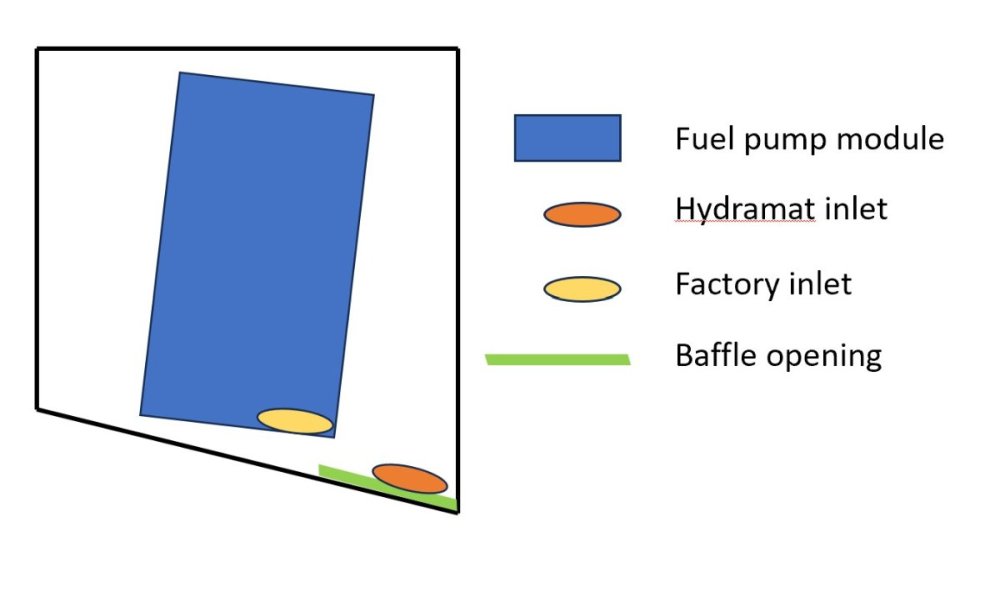
I finally received the various parts required to assemble the redesigned fuel pump module. The big change is a new, smaller Hydramat that attaches directly to the bottom of the pump, eliminating the restrictions from the earlier design and freeing up a lot of space. That in turn required a new pump bracket and convoluted PTFE tube on the pump outlet to accommodate the big S bend. Unfortunately, a quick 200' drive on my property resulted in the same behavior as seen before: full lean, stalls, easily restarts, then repeats about every 200'. Argh.... With an action camera livestreaming video of the gauge to my phone and extension cables allowing me to hold the multimeter next to it, I confirmed fuel pressure drops to zero before power is cut. No doubt. this is not an ECU issue. Thinking through the possible causes given this didn't start happening until after I had covered about 12 miles, and then suddenly started doing it repeatedly with shrinking intervals, I began suspecting fuel level. It was one thing I was certain had changed over that span. Initially though, this seemed a red herring. Based on measurements and subsequent calculations performed while fabricating the new pump bracket, I had about 0.9 gallons of fuel in the tank, and the Hydramat was fully submerged. But what else could it be? The pump and fuel pump module were all new and the fuel filter and fuel lines showed no blockages. Opting to add just 1/ 2 gallon as a test, I drove it again on the same route: 200' up the driveway, left U-turn onto the lawn, then back down the driveway before turning left to face the garage. Things were better. The fuel pressure went to zero in the same spots – as I completed the U-turn and as I prepared to stop in front of the garage – but in 3 out of 4 instances, the fuel pressure recovered before the engine could die. Hmm.... Left turns. Granted these were made at idle speed in first gear, so not exactly a g-force inducing change of direction, but it was consistent. I then drove a full circle to the left at idle speed. Zero fuel pressure.. Repeated two more times with the same result. Then 3 circles to the right. Fuel pressure stayed steady at 44 psi. After adding another gallon to the tank, the issue went away when doing circles to the left. Woo hoo! My theory on what is happening and why is best explained with a cross section drawing of the tank: Note, the above is not to scale and is an approximation based on my memory. The factory fuel pump pick up is much higher than mine and misses about 1-1.5 gallons of available fuel in the tank. My setup, however, is at the bottom and in theory provides access to all fuel in the tank. The baffle separating the left and right sides of the tank that's intended to minimize fuel sloshing has its opening on the bottom front. This is below the factory pick up but at the same level as mine. This means that when turning to the left, the baffle keeps the fuel available for the factory inlet as it approaches its empty point. However, it allows the fuel to vacate to the right side of the tank under similar circumstances for my set up. Hopefully this is the issue. I'll find out tomorrow when I add more fuel and attempt road driving. Couple of other updates. I heard back from Caterham about the wires feeding the fuel pump. They are 2mm2 which is 14 AWG equivalent. That should be sufficient for the current pump, although I may still downsize it to avoid stressing the alternator during those rare times when all the big load items are on (headlights, fan, heated seats, and pump.) Lastly, after 4 long months, the no-logo ITG filter has arrived. -John
-
As MV8 suggests, definitely do a compression check. Easy way to rule out an injector issue is to swap # 3 or #4 with #1 or #2 and see if the low temp follows the injector. Do you have coil-on-plugs or the earlier coil pack? If the latter, I've had a couple of those act up over the years so that is a possibility. If you have the CoP, check the wiring at the connector to make sure things are seated properly. Probably a good idea to look over all the wiring for the injectors and ignition to make sure there is no visible damage. -John
-
Congratulations! What are your current thoughts about options and color? That info will make a great starting point for the conflicting advice that is sure to follow -John
-
Glad to hear it's sorted! That's a lot of work to perform on a new-to-you car, but hopefully it's downhill from here. What did you decide to do for the replacement clutch and flywheel? -John
-
Thanks, is that an SR20? Has it been on the dyno?
-

Caterham A Frames - check them as part of your annual maintenance
JohnCh replied to Croc's topic in General Tech
Caterham switched from imperial to metric chassis around 2006/2007. A lot of parts are not interchangeable between the two due to small dimensional changes. -John -
I see you practiced restraint when choosing the engine -- that turbo looks bigger than my steering wheel! What are the specs? Cheers, John
-

The Regular Summary of Classified Ads of Se7ens Found For Sale
JohnCh replied to Croc's topic in Cars For Sale
There are some interesting things on that car. It states it was a Zetec car that was swapped to a Duratec during the build. The valve cover supports that timing as the aluminum valve covers were used on the very early Duratecs people were swapping into se7ens back then. However, the seller makes no comments about how the exhaust holes were addressed and you can't see any indications on the driver's side through the wrap. Was there a reskin along the way or did Caterham supply kits back then without the cutouts? It has SBD throttle bodies, but I don't recognize the wet sump or oil filter take off. They don't look like Raceline parts. Titan may have been doing their own versions at that time. It might be a very nice car, but the steering wheel does not inspire confidence in the builder's attention to detail. Although to be fair, that looks much newer than the rest of the car so might have been added by the current owner. I wonder if there is any in-period information on this car in the California Caterham Club forum archives? -John -
This! Unless your goal is pure originality, or you plan to sell off the car fairly quickly, satisfy your aesthetic. -John
-
It's a last resort situation since it would require bringing the steering wheel closer to my body to gain sufficient finger clearance. I'm hoping the mount that angles the display towards the driver's face will eliminate glare issues in most situations. The Westfield has a Motogadget tach/speedo unit with an LCD display for speed and various other functions. The angle is similar to the AiM, but It doesn't have anywhere near the brightness or contrast, yet glare is rarely an issue. That gives me hope, but the only one way to find out is to drive it in various conditions. -John
-
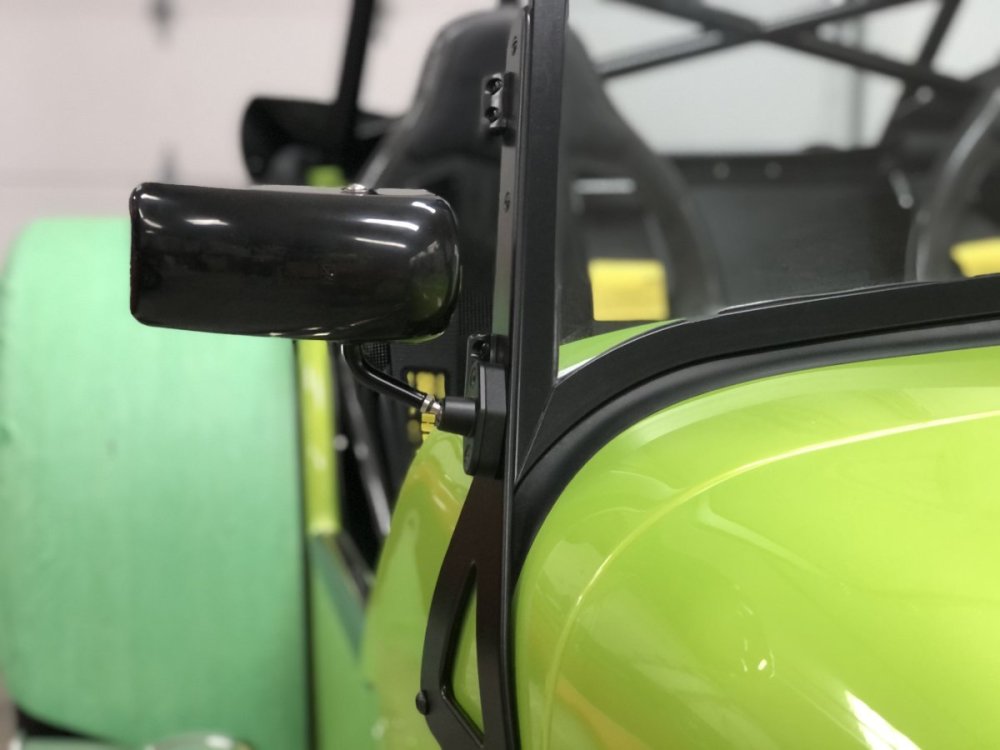
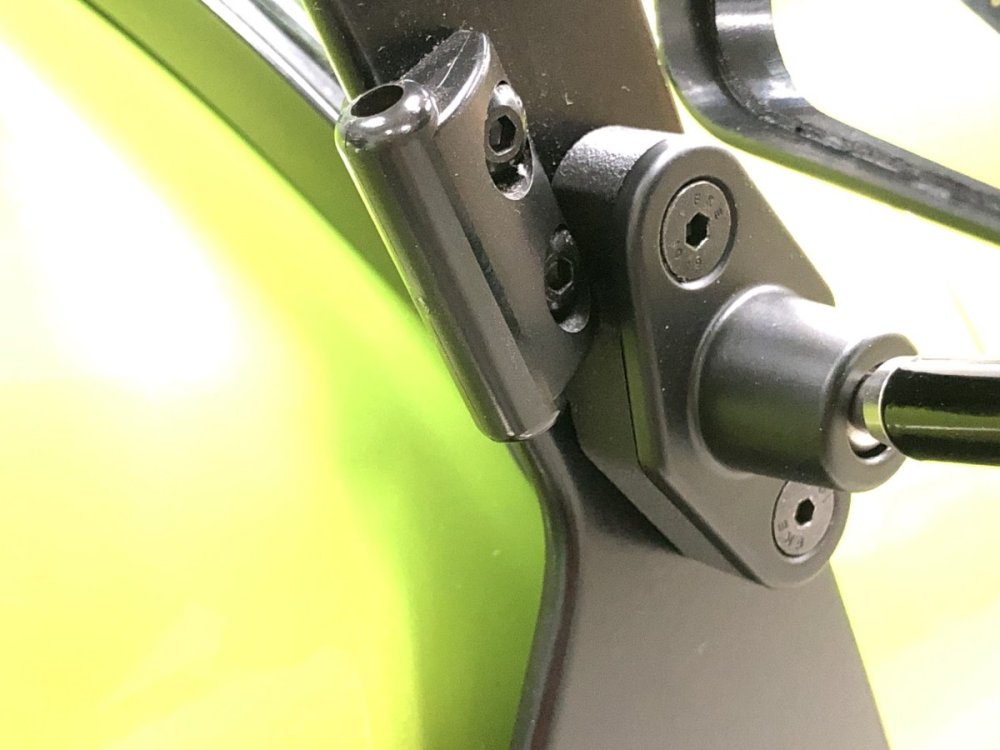
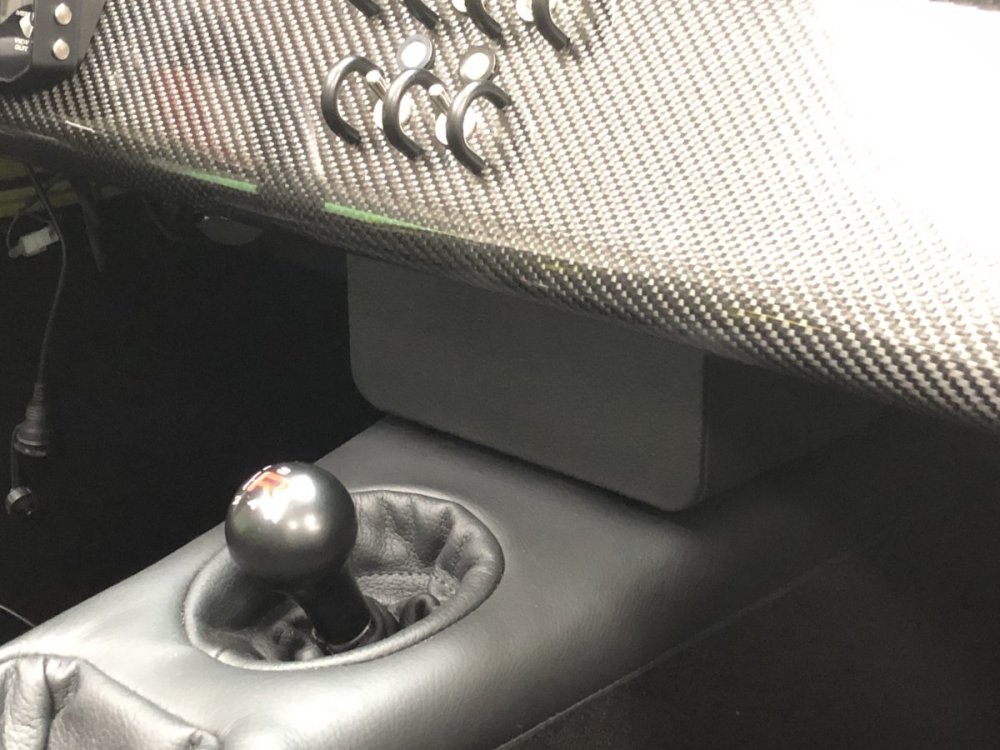
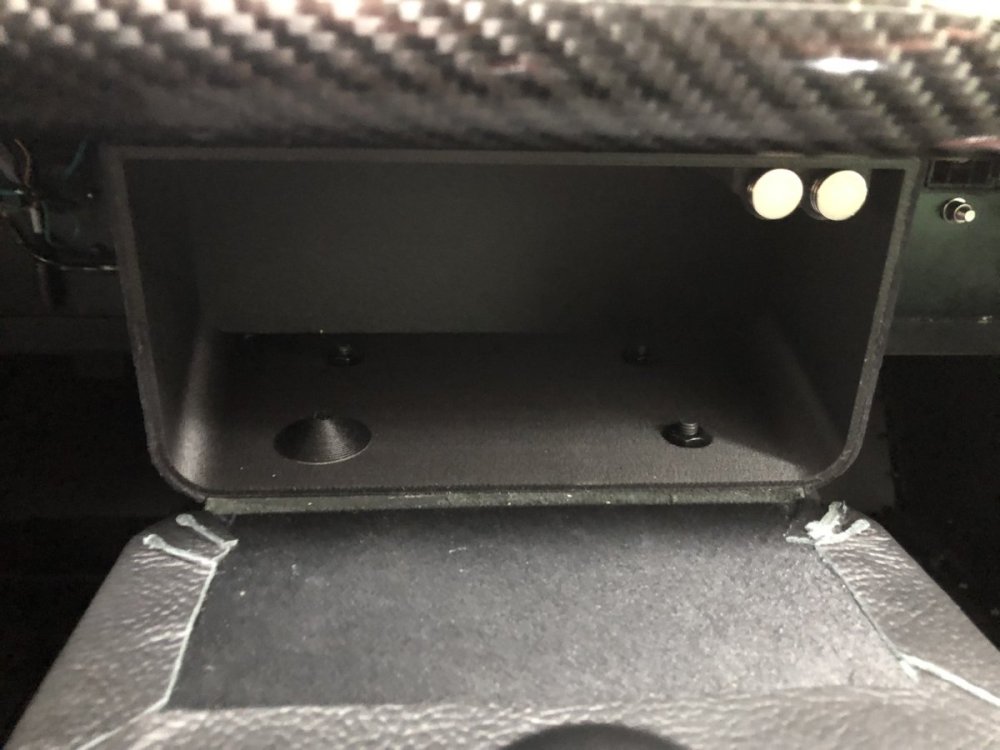
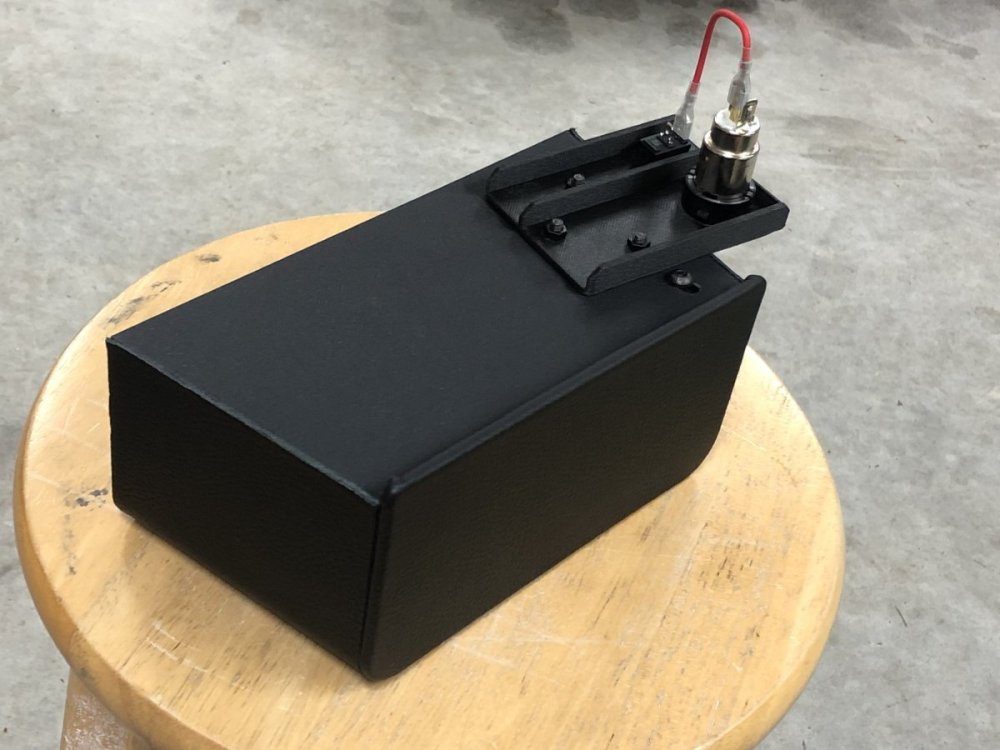
Given I'm in a holding pattern waiting on parts to arrive before I can attempt driving the car again, I decided to finish up two projects: mirror mounts and glove box. The mirrors mount fairly high on the Caterham. Coupled with the lowered floors, the mirrors are in my line of sight when going around corners; a pet peeve of mine (PM me for the full list). Using the lower threaded mounts rather than the ones in the middle, and printing spacers that work around the lower sidescreen hinges, results in mirrors about 3.75" lower than stock. Still a little higher than the Westfield, but close and it's enough to move the mirror out of the way. Next was the 3D printed glove box. Thundersport, who makes the tunnel covers for Caterham, provided a matching piece of leather with my half hood order. That covers the outside of the glove box and doubles as the hinge. Magnets glued into the lid and into an adjustable fixture that bolts to the top of the glove box keep it closed. I also added a mount for the 12v+ outlet and inserted a USB adapter which is easy to reach from the driver's seat yet not visible from the cabin. Given the parasitic drain from the USB adapters, a simple on/off switch was added to avoid battery issues. It turned out ok, but mounting was compromised. My original plan was to use countersunk screws through the bottom of the glove box, with nuts on the underside of the tunnel top. Unfortunately, the chassis has a steel plate in that location and clearance between it and the tunnel cover is really tight. The fix was switching to dome head screws that go up through the bottom of the tunnel cover with the nuts inside the glovebox. Not optimal, but good enough. A few printed caps to cover the nuts and screw ends should protect objects from scratches. V1 of the cap design is shown below. I might tweak it before printing the final set of four. -John
-
Are those the DPR mirror mounts?
-
Congratulations! Looking forward to hearing your thoughts after you've spent some time on proper roads. -John
-
Thanks @sf4018, do you happen to know the amperage draw or can you share the make and model so I can look it up? At this stage I have three options: (1) leave as-is, (2) replace the wire, or (3) replace the pump with the version rated at 165 LPH. That's still more than enough and draws half the amps (<5) but likely won't lift the fuel as strongly. I'd love to go with option 1.
-
Fair point and something to consider. I've asked Caterham to confirm the wire is 1.5 mm2 (assuming it's metric) which is a touch larger than 16 AWG. First priority now though is getting the engine running well enough that I can journey to the dyno and have the tune sorted.


